Welcome to the creepy-cute world of amigurumi! 🧟✨ Today, I’m excited to share my free crochet pattern for a Zombie—a quirky and spooky creation perfect for Halloween, horror-themed collections, or adding a touch of eerie charm to your handmade lineup! 🎃 Whether you love crafting playful monster figures, enjoy working with textured stitches for a tattered effect, or simply want to stitch up a delightfully creepy companion, this pattern will guide you through creating a beautifully detailed zombie with expressive features and a stitched-up look! 💚
This design embraces worn textures, mismatched details, and an eerie-yet-endearing aesthetic to bring your undead friend to life—perfect for display, gifting to fellow horror fans, or adding some handcrafted spookiness to your crochet collection! 🧶🦇 I’ve carefully outlined each step to ensure your amigurumi zombie turns out just right—ready to stumble into your display or become a treasured handmade piece! ✨ So grab your hooks, pick out eerie greens, purples, or faded hues, and let’s stitch up a wonderfully spooky companion! 🕸️
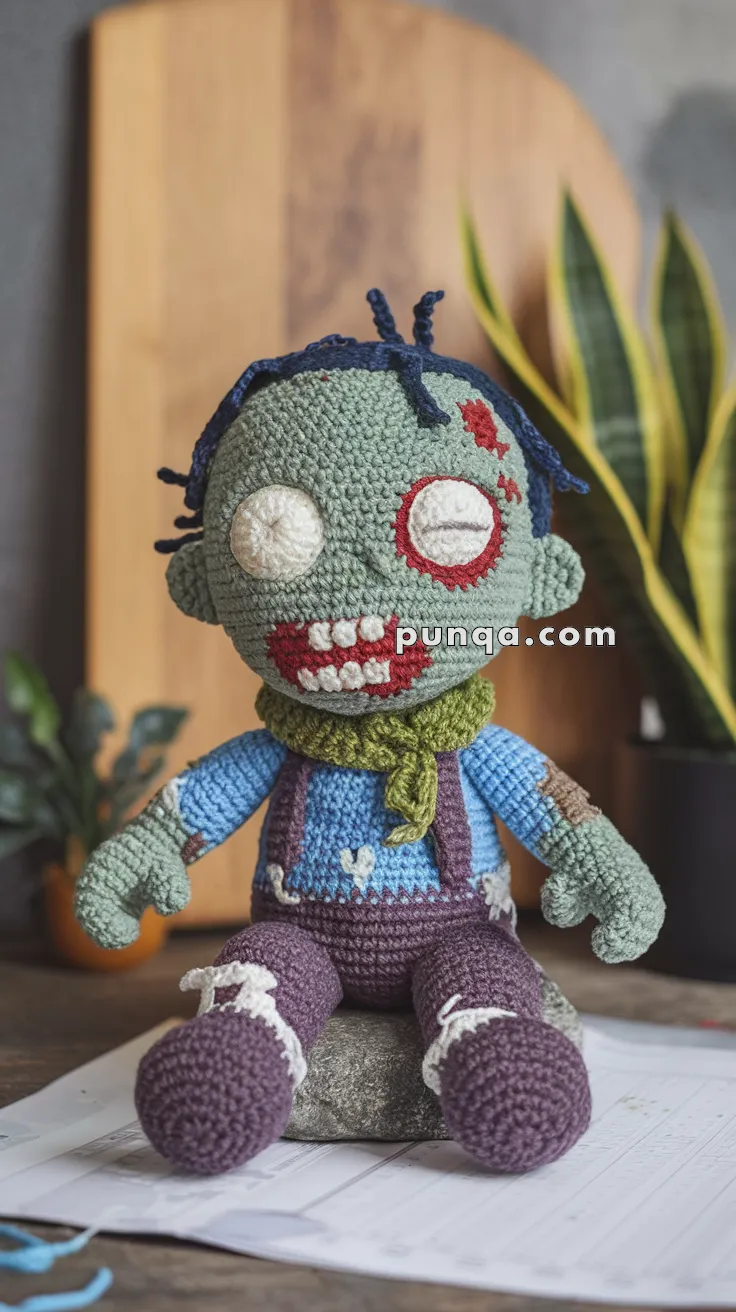
Bring this spooky-cute zombie to life with yarn and a hook! With pale green skin, stitched-up white eyes, a toothy red grin, wild navy hair tufts, tattered clothes, and a little scarf, this handmade zombie is perfect for Halloween or as a quirky gift.
✨ Skill Level
Intermediate – requires shaping, embroidery, color changes, and clothing details.
📏 Finished Size
Approx. 28–30 cm (11–12 inches) tall using worsted weight yarn and a 3.5 mm hook.
🧶 Materials
Worsted weight yarn in:
Pale green (skin)
Dark purple (pants, shoes, suspenders)
Blue (shirt)
Olive green (scarf)
Red (wounds, mouth, around eye)
White (eyes, teeth, shirt patches, bandages)
Navy (hair tufts)
3.5 mm crochet hook
Tapestry needle
Stitch marker
Scissors
Polyester fiberfill stuffing
🪡 Abbreviations (US Terms)
MR – Magic Ring
sc – Single Crochet
inc – Increase (2 sc in same stitch)
dec – Decrease (sc 2 together)
sl st – Slip Stitch
ch – Chain
FO – Fasten Off
🧠 Head (Pale Green)
MR, 6 sc (6)
inc x6 (12)
(1 sc, inc) x6 (18)
(2 sc, inc) x6 (24)
(3 sc, inc) x6 (30)
(4 sc, inc) x6 (36) 7–14. sc around (36)
Embroider large white stitched eyes with white yarn circles, slightly uneven.
Around right eye, embroider a red jagged wound ring.
Add small embroidered red scars on forehead/cheek.
Mouth: embroider large red smile with uneven white teeth stitched inside.
(4 sc, dec) x6 (30)
(3 sc, dec) x6 (24)
(2 sc, dec) x6 (18) – Stuff firmly.
(1 sc, dec) x6 (12)
dec x6 (6), FO and close.
👨🎤 Hair (Navy)
Cut strands 10–12 cm.
Use latch-hook method to attach on crown.
Style into wild tufts sticking out randomly.
👕 Body (Blue Shirt + Purple Overalls)
With blue, MR, 6 sc (6)
inc x6 (12)
(1 sc, inc) x6 (18)
(2 sc, inc) x6 (24)
(3 sc, inc) x6 (30) 6–10. sc around (30)
Switch to purple (pants), sc around (30) 12–16. sc around (30)
(3 sc, dec) x6 (24)
(2 sc, dec) x6 (18) Stuff well. FO, leave tail to sew to head.
Details:
Embroider white patches/holes randomly on shirt.
Make 2 purple suspenders: ch 25, sc back, FO. Attach from front pants over shoulders to back.
👖 Legs (Make 2 – Purple Shoes + White Bandages)
With purple, MR, 6 sc (6)
inc x6 (12) 3–9. sc around (12) Stuff firmly. FO.
Bandages: With white yarn, surface crochet or embroider torn wraps across ankles/feet.
Sew legs to base of body.
💪 Arms (Make 2 – Green Hands, Blue Shirt)
With green, MR, 6 sc (6)
(1 sc, inc) x3 (9) 3–4. sc around (9)
Switch to blue, sc around (9) 6–10. sc around (9) – Add a brown torn patch with embroidery on one arm. Stuff lightly. FO and sew to shoulders.
🧣 Scarf (Olive Green)
Ch 35, sc across. FO. Wrap loosely around neck, tie to one side.