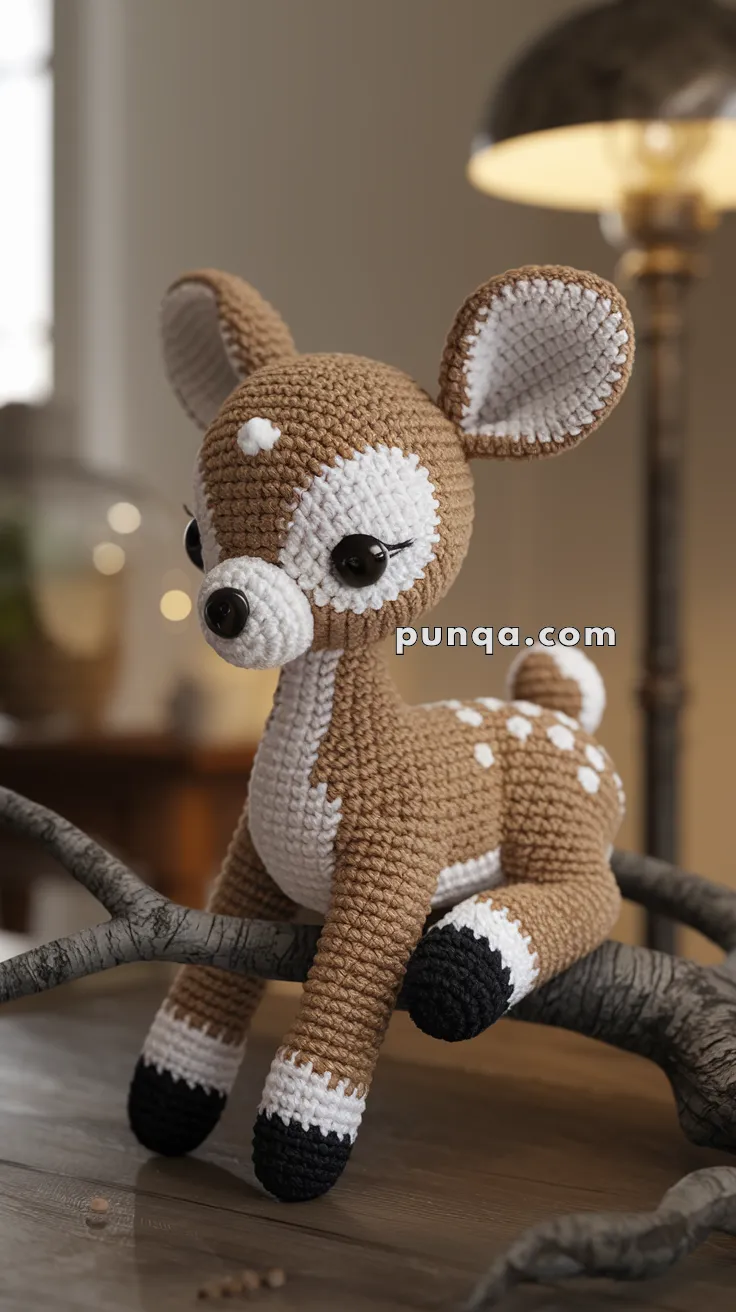
Bring a touch of woodland wonder to your holiday season with the Amigurumi Christmas Deer Fawn, a heartwarming crochet project that’s as sweet as freshly fallen snow! 🦌🎄 With big, gentle eyes, delicate white spots, and a cuddly sitting pose, this little fawn radiates charm and coziness. Its expressive face and realistic shaping make it a standout piece for festive décor, gift-giving, or simply adding a soft, handmade touch to your winter display.
Perfect for crocheters who love nature-inspired designs and thoughtful details, this pattern invites you to play with soft yarns, subtle colorwork, and sculpted features. Whether nestled under the tree, perched on a mantel, or tucked into a stocking, the Amigurumi Christmas Deer Fawn is a magical way to stitch up holiday joy—one loop at a time! 🧵✨
🦌 Amigurumi Christmas Deer Fawn Crochet Pattern
This adorable Christmas fawn is a woodland cutie with big eyes, delicate white spots, and a cuddly sitting pose. With its expressive face and realistic shaping, it makes a perfect festive decoration or a thoughtful handmade gift.
✨ Skill Level
Intermediate – Includes shaping, color changes, and seamless head-to-body attachment.
📏 Finished Size
Approx. 10–12 in (25–30 cm) tall when made with worsted yarn and a 3.0–3.5 mm hook.
🧶 Materials
-
Worsted weight yarn:
-
Color A: Soft brown (body, head, outer ears)
-
Color B: White (muzzle, belly, ear insides, tail, spots, leg accents)
-
Color C: Black (hooves, nose)
-
-
3.0–3.5 mm crochet hook
-
10–12 mm safety eyes
-
Tapestry needle & stitch markers
-
Polyfill stuffing
-
Optional: Eyelash thread or embroidery floss for lashes
🧵 Abbreviations (US Terms)
MR – Magic Ring
sc – Single Crochet
inc – Increase
dec – Decrease
ch – Chain
sl st – Slip Stitch
FO – Fasten Off
🔽 Pattern Instructions
🐾 Front Legs (Make 2)
With Color C (black):
-
MR, 6 sc
-
inc x6 (12)
-
(1 sc, inc) x6 (18)
4–5. sc around (18)
Switch to Color B (white):
6–7. sc around (18)
Switch to Color A (brown):
8–20. sc around (18) – longer legs for accuracy
Lightly stuff, mostly at the bottom. FO, leave long tail.
🦌 Body (continuous, worked from front legs upward)
Join both front legs with 3 ch between.
-
sc around leg 1 (18), sc in 3 ch (3), sc around leg 2 (18), sc in 3 ch (3) = 42 sts
2–12. sc around (42) – extra rounds for longer torso
Add white belly patch via intarsia or surface stitch.
13. (5 sc, dec) x6 (36)
14. (4 sc, dec) x6 (30)
15. (3 sc, dec) x6 (24)
16. (2 sc, dec) x6 (18) – begin stuffing firmly
Do not FO – continue straight into the head for a seamless join.
🐶 Head (worked on top of body)
With Color A (brown):
17. (1 sc, inc) x9 (27)
18. (2 sc, inc) x9 (36)
19. (3 sc, inc) x9 (45)
20–28. sc around (45) – stuff as you go
Insert safety eyes between R20–21, ~8–9 sts apart.
Add white face patches and optional lashes.
-
(3 sc, dec) x9 (36)
-
(2 sc, dec) x9 (27)
-
(1 sc, dec) x9 (18)
-
dec x9 (9)
Stuff firmly, close.
🐽 Muzzle
With Color B (white):
-
MR, 6 sc
-
inc x6 (12)
3–4. sc around (12)
FO, stuff lightly, sew centered under eyes.
Attach black safety nose or embroider with Color C.
🐾 Back Legs (Make 2)
With Color C (black):
-
MR, 6 sc
-
inc x6 (12)
-
(1 sc, inc) x6 (18)
Switch to Color B (white):
4. sc around (18)
Switch to Color A (brown):
5–13. sc around (18) – extra rows for longer legs
Stuff lightly. Sew to body sides at sitting angle.
🐰 Ears (Make 2)
Outer Ear (Color A):
-
MR, 6 sc
-
(1 sc, inc) x3 (9)
3–9. sc around (9) – longer ears for accuracy
Flatten, FO.
Inner Ear Patch (Color B):
Ch 7, work oval with sc around, FO.
Sew inside each ear for white lining.
Attach ears slightly tilted outward on head.
🦌 Tail
With Color B (white):
-
MR, 6 sc
-
inc x6 (12)
3–4. sc around (12)
FO, stuff and sew to rear.
❄️ Spot Details
With Color B, embroider or surface stitch:
-
3–4 spots along each side of back
-
1 above each hind leg
-
1 forehead spot
✂️ Finishing Touches
-
Weave in all ends.
-
Shape face slightly by sewing through head to indent eye area.
-
Add optional Christmas bow or scarf.
💡 Customization
-
Make it into a reindeer with darker brown + red nose.
-
Add holly leaves or festive embroidery.
-
Use velvet yarn for a soft plush finish.
🎄 Your Christmas fawn is ready to bring woodland charm to your holidays! 🦌✨