Get ready to stitch up some serious girl power with the Amigurumi Buttercup, a bold and adorable crochet tribute to the toughest member of the Powerpuff trio! 💚🧶 With her iconic green dress, fierce little scowl, and signature black bob, this tiny hero is bursting with attitude and charm. Whether you’re crafting for a cartoon fan or building your own squad of superpowered cuties, Buttercup brings a punch of personality to your amigurumi lineup.
Perfect for crocheters who love character-inspired projects and expressive details, this pattern invites you to play with vibrant colors, add tiny accessories, or even pose her alongside Blossom and Bubbles for the full Powerpuff effect. She’s quick to make, fun to customize, and guaranteed to stand out wherever she goes. The Amigurumi Buttercup is a delightful way to stitch up strength, sass, and a whole lot of handmade heroism—one loop at a time! 💥🧵
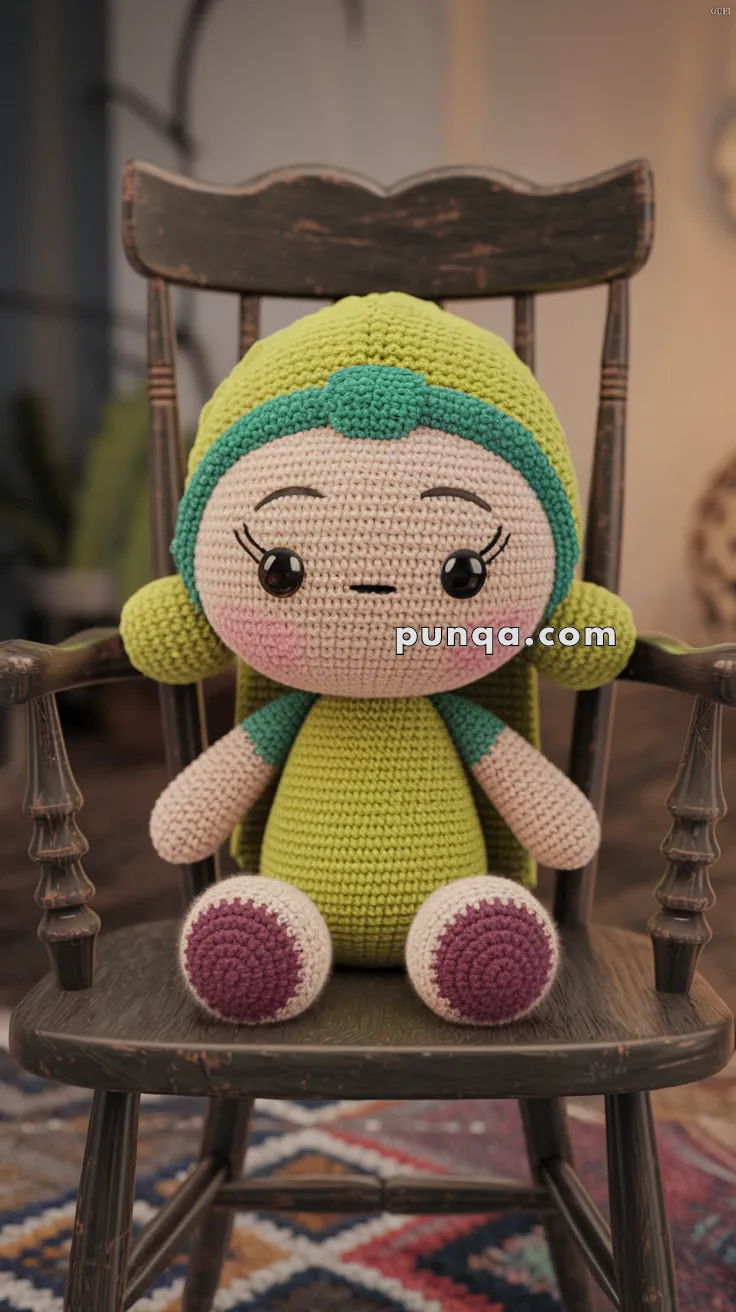
🧵 Amigurumi Buttercup Crochet Pattern
Bright, bold, and full of charm—this amigurumi Buttercup doll is inspired by the classic Powerpuff Girl with a handmade twist! Featuring her lime-green outfit, teal headband, blushing cheeks, and side buns, she’s a perfect addition to any fan collection.
✨ Skill Level
Beginner-friendly to Intermediate
📏 Finished Size
Approx. 25–28 cm (10–11 inches) tall
🧶 Materials
- Yarn:
- Light green (body, hair cap)
- Teal (front hair band)
- Cream (skin, arms, legs)
- Purple (shoes)
- Pink (blush embroidery)
- Black (lashes, eyebrows, mouth)
- Crochet hook: 2.5 mm
- Safety eyes (10 mm)
- Fiberfill stuffing
- Yarn needle, stitch marker, scissors
🔤 Abbreviations (US Terms)
- MR = Magic Ring
- ch = chain
- sc = single crochet
- inc = increase (2 sc in same stitch)
- dec = decrease (sc2tog)
- sl st = slip stitch
- FO = fasten off
👧 Head (Cream)
- MR, 6 sc (6)
- R2: inc x6 (12)
- R3: (sc, inc) x6 (18)
- R4: (2 sc, inc) x6 (24)
- R5: (3 sc, inc) x6 (30)
- R6: (4 sc, inc) x6 (36)
- R7–16: sc around (36)
- R17: (4 sc, dec) x6 (30)
- R18: (3 sc, dec) x6 (24)
- R19: (2 sc, dec) x6 (18)
- R20: (sc, dec) x6 (12)
- R21: dec x6 (6)
FO, stuff firmly.
👀 Eyes & Face
- Insert 10 mm safety eyes between R10–11, spaced ~7–8 sts apart.
- Embroider long lashes at outer corners and arched brows in black.
- Mouth: Small straight black line, 2–3 sts wide, centered below eyes.
- Blush: With pink yarn, embroider two large round cheek patches, ~4 sts wide, positioned 2 rounds below the eyes.
👱 Hair (Green Cap + Teal Band + Side Buns)
Green Hair Cap:
- MR, 6 sc (6)
- R2: inc x6 (12)
- R3: (sc, inc) x6 (18)
- R4: (2 sc, inc) x6 (24)
- R5: (3 sc, inc) x6 (30)
- R6: (4 sc, inc) x6 (36)
- R7–12: sc around (36)
FO, leave long tail. Sew onto head.
Teal Front Band:
- Ch 20–22 (to fit across forehead).
- R1: sc across. FO.
- Curve slightly across the forehead and sew in place.
Side Hair Buns (x2):
With green:
- MR, 6 sc (6)
- R2: inc x6 (12)
- R3: sc around (12)
- R4: (sc, dec) x4 (8)
Stuff lightly, FO. Sew one bun to each side of head.
🧍♀️ Body (Lime Green)
- MR, 6 sc (6)
- R2: inc x6 (12)
- R3: (sc, inc) x6 (18)
- R4: (2 sc, inc) x6 (24)
- R5–8: sc around (24)
- R9: (2 sc, dec) x6 (18)
- R10–18: sc around (18)
FO, stuff firmly.
💪 Arms (x2 – Cream + Green)
Start with cream:
- MR, 6 sc (6)
- R2–4: sc around (6)
Switch to green: - R5–10: sc around (6)
FO, stuff lightly. Sew to body sides.
🦵 Legs (x2 – Cream + Purple Shoes)
With cream:
- MR, 6 sc (6)
- R2: inc x6 (12)
- R3–4: sc around (12)
Switch to purple:
- R5–8: sc around (12) → 4 rounds of purple.
FO, stuff, and sew to bottom of body so the purple shoes face forward.
🧷 Assembly
- Sew head firmly to body.
- Attach arms to body sides.
- Sew legs to bottom.
- Attach hair cap, then sew teal band across forehead.
- Add side hair buns.
- Embroider lashes, brows, mouth, and blush.
🌟 Finishing Touches
- Keep stuffing firm for a rounded, plump look.
- Position blush slightly lower for the right expression.
- Pose seated, just like in the inspiration doll.
🎁 Your Buttercup is complete! With her green outfit, teal headband, rosy cheeks, and Powerpuff charm, she’s ready to join Blossom and Bubbles for a super-cute handmade trio. 💚💥