Step into the enchanting kingdom of Hyrule with this magical amigurumi! 🌸🗡️ Today, I’m thrilled to share my free crochet pattern for Amigurumi Zelda—bringing the wise and courageous princess of Hyrule to life in yarn form. Whether you’re a Legend of Zelda fan, love crafting video game characters, or simply want to add some royal charm to your crochet collection, this pattern will help you stitch your very own Hylian heroine.
This pattern blends elegance and charm, with carefully designed details that make it perfect for both display and play. The step-by-step instructions guide you through each element, ensuring your creation turns out beautifully. You’ll love how this character comes to life in yarn form, complete with iconic accessories that add that special finishing touch.
So gather your favorite yarns and let your creativity soar as you stitch this enchanting figure! ✨
🧝♀️ Amigurumi Zelda Crochet Pattern
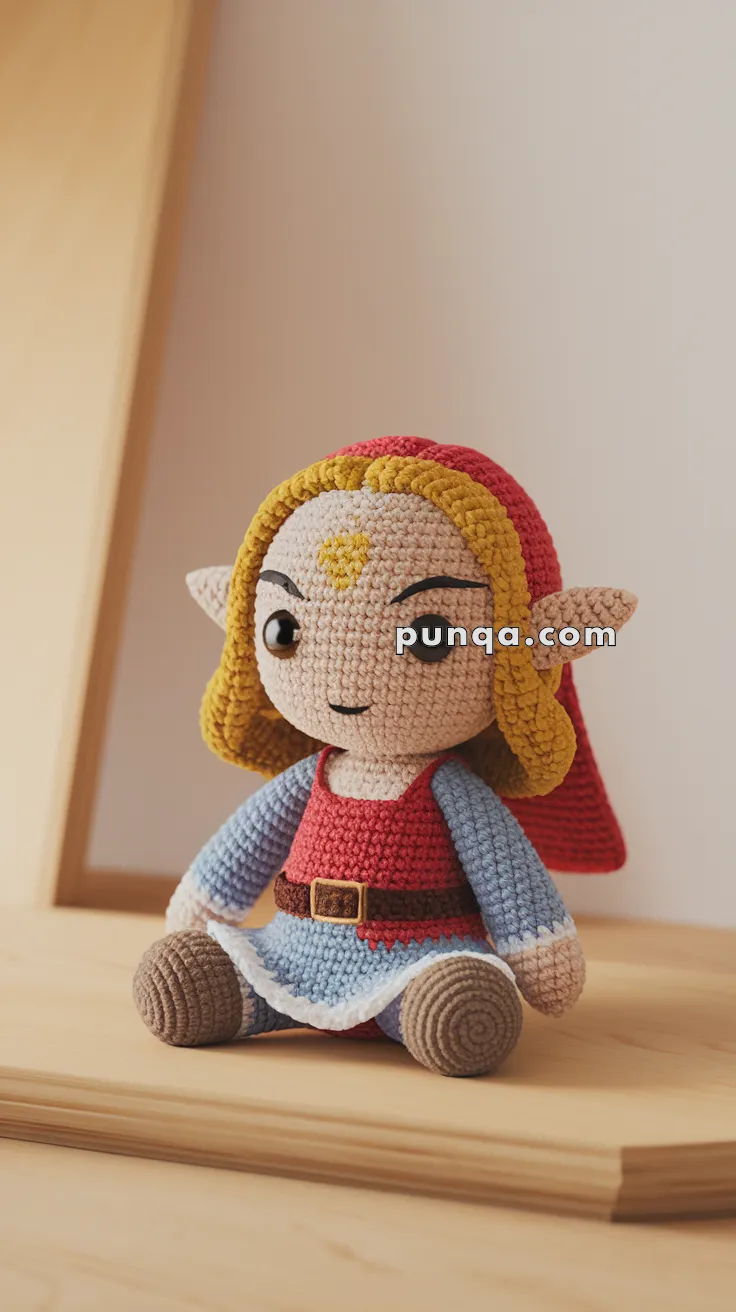
Bring Princess Zelda to life with this enchanting crochet doll! Featuring embroidered eyes, golden hair with side locks, a royal red cape, and her signature blue-and-red dress, this pattern is a perfect match to the photo.
✨ Skill Level
Intermediate – involves color changes, shaping, embroidery, and clothing details.
📏 Finished Size
Approximately 20–22 cm (8.5 inches) tall when using DK or worsted yarn with a 2.5–3.0 mm hook.
🧶 Materials
-
DK or worsted weight yarn:
-
Skin tone (face, hands)
-
Yellow (hair)
-
Red (dress top, cape)
-
Light blue (sleeves & skirt)
-
Brown (boots, belt)
-
White (skirt trim)
-
Black & yellow (embroidery)
-
-
Crochet hook: 2.5–3.0 mm
-
Tapestry needle
-
Stitch marker
-
Fiberfill stuffing
-
Embroidery thread (black, yellow)
-
Scissors
🔤 Abbreviations (US Terms)
-
MR = Magic ring
-
sc = Single crochet
-
inc = Increase (2 sc in same stitch)
-
dec = Decrease (sc2tog)
-
BLO = Back loop only
-
FLO = Front loop only
-
ch = Chain
-
sl st = Slip stitch
-
FO = Fasten off
👧 Head
With skin tone:
-
MR, 6 sc
-
R2: inc x6 (12)
-
R3: (sc, inc) x6 (18)
-
R4: (2 sc, inc) x6 (24)
-
R5: (3 sc, inc) x6 (30)
-
R6: (4 sc, inc) x6 (36)
-
R7–12: sc around (36)
-
R13: (4 sc, dec) x6 (30)
-
R14: (3 sc, dec) x6 (24)
-
R15: (2 sc, dec) x6 (18)
-
R16: (sc, dec) x6 (12)
-
R17: dec x6 (6)
FO and stuff firmly.
👱 Hair (Cap + Locks)
With yellow:
-
MR, 6 sc
-
R2: inc x6 (12)
-
R3: (sc, inc) x6 (18)
-
R4: (2 sc, inc) x6 (24)
-
R5: (3 sc, inc) x6 (30)
-
R6: (4 sc, inc) x6 (36)
-
R7–9: sc around (36)
FO. Sew cap onto head.
Side Locks (important for accuracy):
-
Ch 14, sc back (13), FO.
-
Make 2. Attach one on each side of head under hairline, framing face down to shoulders.
🎀 Red Cape (Flared)
With red:
-
Ch 24, turn.
-
R2: inc, sc across, inc. (26)
-
R3: sc across (26)
-
R4: inc, sc across, inc. (28)
-
R5: sc across (28)
-
R6: inc, sc across, inc. (30)
-
R7: sc across (30)
FO.
Attach at back of head under hairline. Secure lightly at shoulders so cape drapes behind.
🧍 Body
Start with red (dress top):
-
MR, 6 sc
-
R2: inc x6 (12)
-
R3: (sc, inc) x6 (18)
-
R4: (2 sc, inc) x6 (24)
-
R5–6: sc around (24)
Change to light blue (skirt): -
R7–11: sc around (24)
Change to skin tone (neck): -
R12: (2 sc, dec) x6 (18)
-
R13: (sc, dec) x6 (12)
-
R14: sc around (12)
Stuff firmly. FO.
💪 Arms (x2)
With skin tone:
-
MR, 6 sc
-
R2: inc x6 (12)
-
R3: sc around (12)
Change to light blue (sleeves): -
R4–9: sc around (12)
FO, stuff lightly. Sew to body.
🦵 Legs (x2)
With brown (boots):
-
MR, 6 sc
-
R2: inc x6 (12)
-
R3–4: sc around (12)
Change to light blue (skirt underlayer): -
R5–8: sc around (12)
Stuff and sew to base of body.
👗 Skirt Trim
Attach white yarn to bottom edge of skirt.
-
Sl st or sc evenly around to create trim.
🧵 Belt
With brown:
-
Ch 18–20 (fit waist), sl st back across. FO.
-
Sew around waistline.
-
Embroider yellow square buckle in center.
👀 Eyes & Face (Embroidered for Accuracy)
-
Left Eye (open): Satin stitch oval in black between R9–10, ~4–5 sts wide. Add tiny white highlight.
-
Right Eye (closed): Black curved line with upward arch, for winking effect.
-
Eyebrow: Embroider one black arched brow above open eye.
-
Mouth: Small black line, slight curve.
-
Forehead Symbol: Yellow embroidered inverted triangle/gem centered between R5–6.
🧷 Assembly
-
Sew head to body securely.
-
Attach arms and legs symmetrically.
-
Stitch belt in place.
-
Add cape under hair, draping behind shoulders.
-
Attach hair locks and tidy cap.
-
Embroider facial details carefully.
🌟 Finishing Touches
-
Add pink blush under eyes with embroidery or fabric paint (optional).
-
Adjust cape drape for balance.
-
Lightly brush hair strands to soften look.
🎁 Your Amigurumi Zelda is complete! With her embroidered eyes, golden locks, flared cape, and iconic dress, she’s a faithful and ready to guard Hyrule and charm your yarn shelf. 🧝♀️✨