Welcome to the adventurous and nostalgic world of amigurumi! 🎯✨ Today, I’m excited to share my free crochet pattern for an Amigurumi Kagome—a beautifully detailed creation perfect for anime fans, fantasy lovers, or anyone who enjoys crafting expressive and character-driven plush designs! 🧶 Whether you love stitching up iconic figures, creating textured and lifelike details, or simply want to add a courageous heroine to your handmade lineup, this pattern will guide you through crafting a beautifully sculpted plush with Kagome’s signature school uniform, flowing hair, and determined expression! 🏹
This design embraces soft textures, intricate shaping, and thoughtful details to bring a nostalgic and adventurous presence to your crochet projects! 🧶✨ I’ve carefully outlined each step to ensure your Amigurumi Kagome turns out just right—ready to brighten up your space or become a treasured handmade gift! 🎁 So grab your hooks, pick out deep greens, crisp whites, and warm browns, and let’s stitch up a fearless Kagome! 🎯
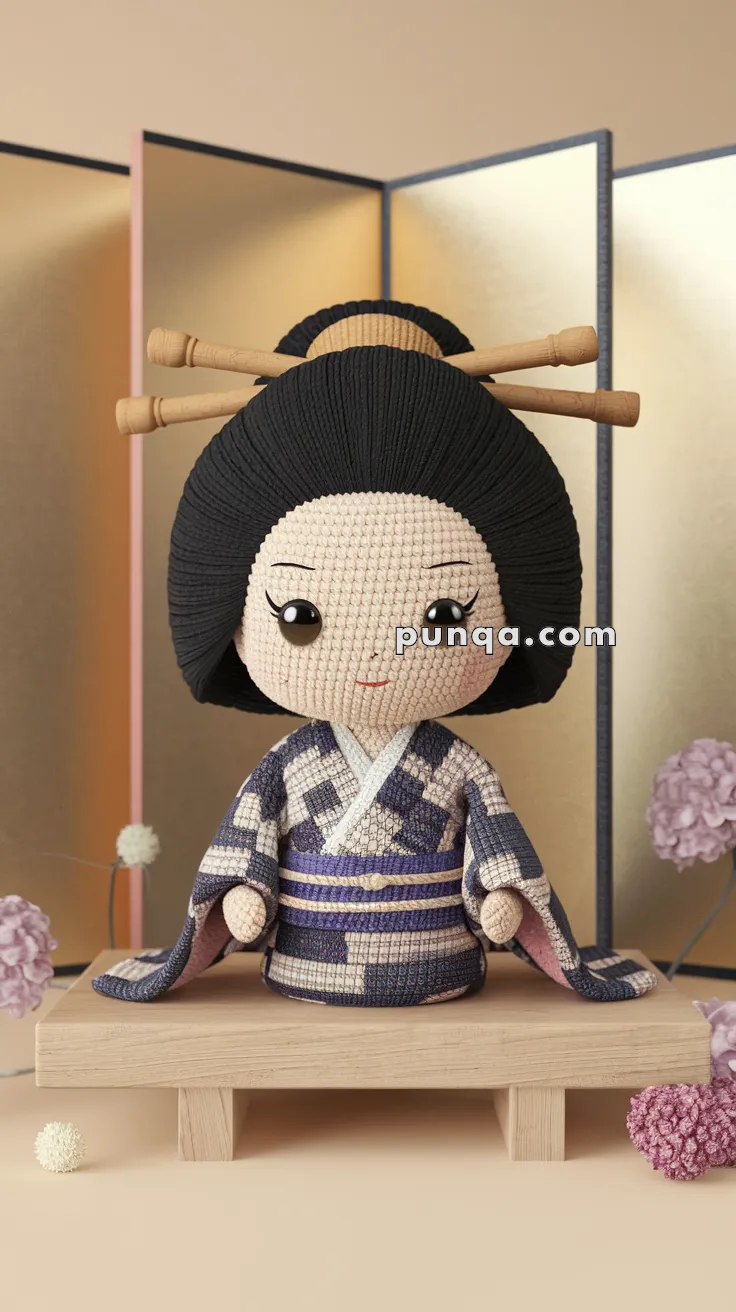
🎎 Amigurumi Kagome Doll Crochet Pattern
Create a graceful traditional Kagome doll inspired by classic Japanese geisha styling. This elegant amigurumi features a smooth rounded face, glossy black kimono wig, decorative hair sticks, layered kimono with crossed collar, flowing sleeves, and a wide obi belt. Her gentle expression and timeless outfit make her a beautiful display piece or meaningful handmade gift.
✨ Skill Level
Intermediate — includes wig construction, kimono layering, sleeve shaping, and detailed finishing.
📏 Finished Size
Approx. 22–25 cm (8.5–10 inches) tall using DK or sport yarn and a 2.5–3.0 mm hook.
🧶 Materials
Yarn (Sport or DK weight):
• Skin tone
• Black (hair)
• Navy blue
• Lavender
• Cream
• Soft pink (lining & lips)
Tools:
• 2.5–3.0 mm crochet hook
• 8–10 mm safety eyes
• Polyester stuffing
• Tapestry needle
• Stitch marker
• Two wooden hair sticks or chopsticks
• Optional blush powder
🧵 Abbreviations (US Terms)
MR – Magic Ring
sc – Single crochet
inc – Increase
dec – Decrease
ch – Chain
sl st – Slip stitch
FO – Fasten off
BLO – Back loop only
FLO – Front loop only
🧍 Head (Skin Tone)
MR, 6 sc (6)
inc x6 (12)
(1 sc, inc) x6 (18)
(2 sc, inc) x6 (24)
(3 sc, inc) x6 (30)
(4 sc, inc) x6 (36)
Rounds 7–14: sc around (36)
Insert safety eyes between rounds 10–11, 7 stitches apart.
(4 sc, dec) x6 (30)
(3 sc, dec) x6 (24)
(2 sc, dec) x6 (18)
(1 sc, dec) x6 (12)
Stuff firmly.
dec x6 (6)
FO and close.
Embroider fine brows, lashes, and a small curved mouth.
💇 Wig Cap (Smooth Geisha Hair)
With black yarn:
MR, 6 sc (6)
inc x6 (12)
(1 sc, inc) x6 (18)
(2 sc, inc) x6 (24)
(3 sc, inc) x6 (30)
(4 sc, inc) x6 (36)
Rounds 7–15: sc around (36)
FO and sew tightly onto head.
🎀 Hair Bun (Flat Oval)
MR, 6 sc (6)
inc x6 (12)
(1 sc, inc) x6 (18)
Rounds 4–7: sc around (18)
(1 sc, dec) x6 (12)
FO, lightly stuff and flatten.
Sew to back-top of wig.
Insert two wooden sticks horizontally through bun.
👘 Body Core (Hidden Under Kimono)
With lavender:
MR, 6 sc (6)
inc x6 (12)
(1 sc, inc) x6 (18)
(2 sc, inc) x6 (24)
(3 sc, inc) x6 (30)
Rounds 6–12: sc around (30)
Switch to skin tone for neck:
Rounds 13–15: sc around (30)
(3 sc, dec) x6 (24)
(2 sc, dec) x6 (18)
Stuff firmly.
(1 sc, dec) x6 (12)
dec x6 (6)
FO and close.
👗 Kimono Skirt (Floor Length)
Attach navy yarn to BLO of body base.
Round 1: BLO sc around (30)
Round 2: (4 sc, inc) x6 (36)
Rounds 3–9: sc around (36)
FO.
🧤 Arms (Make 2)
With skin tone:
MR, 6 sc (6)
inc x6 (12)
Rounds 3–6: sc around (12)
Switch to kimono fabric color:
Rounds 7–11: sc around (12)
Stuff lightly.
FO leaving long tail.
👘 Kimono Sleeves (Make 2)
With patterned kimono yarn:
Ch 18
Row 1: sc in 2nd ch and across (17)
Rows 2–7: ch 1, turn, sc across (17)
Fold in half and seam long edge to form wide draping sleeve.
Insert arms and stitch sleeve opening closed.
👗 Kimono Collar Panels (Make 2)
With cream yarn:
Ch 20
Row 1: sc in 2nd ch and across (19)
Rows 2–8: ch 1, turn, sc across
Cross panels over chest and stitch in place.
🎀 Obi Belt
With dark navy:
Ch 52
Row 1: sc across
Row 2: sc across
Wrap twice around waist and sew at back.
🧩 Assembly
• Attach head to body
• Sew arms into shoulders
• Attach kimono sleeves
• Stitch crossed collar panels
• Wrap and stitch obi belt
• Insert hair sticks
• Add soft blush to cheeks
🌸 Final Touch
Your Kagome doll is now complete — serene, graceful, and dressed in a traditional kimono with flowing sleeves and layered obi. Her smooth geisha wig, elegant bun, and decorative kanzashi bring timeless charm to this heirloom-style crochet piece.
A perfect display doll for collectors and lovers of cultural crochet. 🎎✨