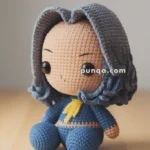
Add a touch of mythical mischief to your crochet collection with this Amigurumi Cyclops pattern! Inspired by legendary one-eyed creatures, this quirky design captures the cyclops’ bold expression, unique features, and playful personality in every stitch. Whether you’re crafting for fantasy lovers, adding a whimsical accent to your decor, or simply enjoy making monster-inspired amigurumi designs, this pattern lets you stitch up a miniature cyclops bursting with charm! Perfect for brightening up any space, this crochet creation brings a touch of handmade mythical magic to your collection. 👁✨
Designed for customization, this pattern allows you to experiment with different shades of green, gray, or even vibrant colors for a fun twist. Add embroidered details, tiny accessories like a miniature club or horns, or even create a full set of fantasy-inspired amigurumi for an enchanting display! Whether gifted as a quirky keepsake, displayed as a whimsical accent, or made simply for the joy of crafting, this Amigurumi Cyclops is a fun and creative project—perfect for bringing a touch of handmade monster magic to every stitch! 🧶💖✨
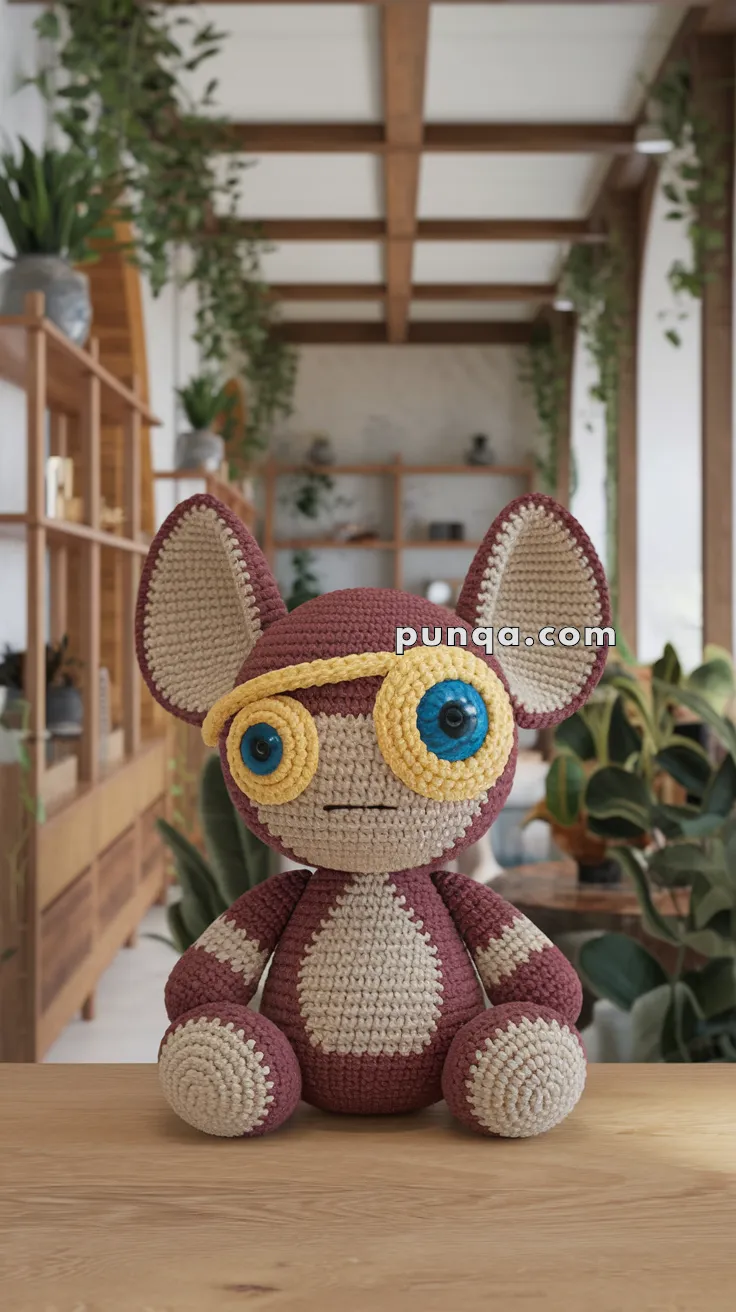
👁️🗨️ Amigurumi Cyclops Creature – Crochet Pattern
This charming and slightly mysterious Cyclops plushie features oversized ears, a centered eye with bold goggles, and a cuddly seated shape. Perfect for sci-fi fans, whimsical collections, or a handmade toy shelf hero!
✨ Skill Level
Intermediate – Includes color changes, facial shaping, and accessory attachments.
📏 Finished Size
Approx. 8–10 in (20–25 cm) seated
🧶 Materials
-
Worsted weight yarn in:
-
Main Color (MC) – Burgundy or deep red
-
Contrast Color (CC) – Light beige
-
Goggle Color – Yellow
-
Eye Detail – Black, Blue, White
-
-
Hook: 2.5–3.0 mm
-
Safety eyes or black buttons
-
Fiberfill stuffing
-
Stitch markers, tapestry needle, scissors
-
Optional: wire for poseable ears
🧵 Abbreviations (US Terms)
MR – Magic Ring
sc – Single Crochet
inc – Increase (2 sc in same stitch)
dec – Decrease (sc 2 together)
sl st – Slip Stitch
ch – Chain
FO – Fasten Off
BLO – Back Loop Only
🧠 Head (Work in continuous spiral)
Using MC (Burgundy)
-
MR, 6 sc (6)
-
inc x6 (12)
-
(1 sc, inc) x6 (18)
-
(2 sc, inc) x6 (24)
-
(3 sc, inc) x6 (30)
-
(4 sc, inc) x6 (36)
7–14. sc around (36) -
(4 sc, dec) x6 (30)
-
(3 sc, dec) x6 (24)
-
(2 sc, dec) x6 (18)
Stuff firmly -
(1 sc, dec) x6 (12)
-
dec x6 (6), FO
🧍 Body
Switch between MC and CC for chest patch:
You can either:
-
Use tapestry crochet to change colors mid-round, OR
-
Make body fully in MC and sew on a CC oval patch after (simpler).
-
MR, 6 sc
-
inc x6 (12)
-
(1 sc, inc) x6 (18)
-
(2 sc, inc) x6 (24)
-
(3 sc, inc) x6 (30)
-
(4 sc, inc) x6 (36)
7–14. sc around (36) -
(4 sc, dec) x6 (30)
-
(3 sc, dec) x6 (24)
-
(2 sc, dec) x6 (18)
Stuff firmly -
(1 sc, dec) x6 (12)
-
dec x6 (6), FO and sew to head
💪 Arms (Make 2)
Start with CC for hand, switch to MC for arm
-
MR, 6 sc (6)
-
inc x6 (12)
3–4. sc around (12) -
Switch to MC, sc 6–8 rounds
Stuff lightly
FO, sew to upper sides of body
🦶 Legs (Make 2, Seated Position)
Same color order: CC → MC
-
MR, 6 sc (6)
-
inc x6 (12)
-
(1 sc, inc) x6 (18)
4–5. sc around -
Switch to MC, sc 6 rounds
Stuff
Sew in front-bottom of body
🦻 Ears (Make 2)
Start with CC inner ear, then border with MC
-
CC – MR, 6 sc
-
inc x6 (12)
-
(1 sc, inc) x6 (18)
-
sc around
FO, switch to MC -
Work around edge of circle with sl st or sc to shape curve
Make slightly cupped before sewing to top sides of head
👁️ Cyclops Eye & Goggles
Eye Base (Yellow/Gold Goggle Color)
-
MR, 6 sc
-
inc x6 (12)
-
(1 sc, inc) x6 (18)
FO
Eye Pupil & Iris
-
White base: MR, 6 sc
-
Blue iris: MR, 6 sc
-
Black pupil: French knot or small black button
Sew or glue in layers (white → blue → black)
Eye Assembly
-
Sew eye parts centered onto goggle base
-
Attach finished piece to middle of face
-
Use yellow yarn to chain a strap across the head and attach to both sides of the eye
🧵 Color Change Tip (Chest Patch / Arms / Legs)
To cleanly change colors:
-
On the last yarn-over of the final stitch in the old color, pull through the new color to complete the stitch.
-
Continue crocheting with new color.
-
Use tight tension to avoid visible gaps; carry unused yarn inside if using tapestry method.
😐 Face Details
-
Embroider a short flat mouth using black thread or yarn
-
Optionally, add light pink/white blush for extra personality
✅ Final Assembly
-
Sew head to body securely
-
Attach arms and legs symmetrically
-
Position ears slightly curved upward
-
Stitch on goggles with strap
-
Double check seams and tension, hide all tails inside
This quirky amigurumi cyclops is an eye-catching companion full of personality. Customize colors, accessories, or even expressions to bring your own mythical friend to life! 👁️🧶