Step into the heart of the forest with the Amigurumi Deer with Antlers, a gentle crochet creation that’s full of woodland wonder! 🦌🧶 With its soft body, graceful antlers, and sweet little face, this deer brings a peaceful charm to any handmade collection. Whether you’re crafting for a nature-themed nursery, a seasonal display, or a gift that feels like a warm hug, this forest friend is sure to enchant.
Perfect for crocheters who love delicate shaping and cozy details, this pattern invites you to explore earthy tones, textured stitches, and a sprinkle of rustic magic. Add a tiny scarf, stitch on a flower crown, or pair it with other woodland creatures for a full enchanted scene. The Amigurumi Deer with Antlers is a heartwarming way to stitch up serenity, sweetness, and a touch of handmade wilderness—one loop at a time! 🧵🍂
🦌 Amigurumi Deer with Antlers Crochet Pattern
Bring the magic of the forest into your home with this charming crochet deer! With big eyes, gentle hooves, and tall branching antlers, this woodland friend makes the perfect nursery companion, seasonal decoration, or handmade gift. Intermediate crocheters will enjoy the shaping and assembly, while beginners looking for a fun challenge will love the step-by-step process.
✨ Skill Level
Intermediate – shaping, multiple limbs, facial appliqué, and optional wire-supported antlers.
📏 Finished Size
Approx. 24–26 cm (9.5–10.5 in) tall when seated, using DK yarn and a 2.5–3.0 mm hook.
🧶 Materials & Yarn Amounts
DK weight yarn:
-
Light brown / fawn – approx. 60 g (head, body, legs, ears, tail)
-
White – approx. 22 g (face mask, belly, inner ears)
-
Dark brown / charcoal – approx. 10 g (hooves, nose)
-
Medium brown – approx. 28 g (antlers)
Notions & tools:
-
2.5–3.0 mm crochet hook
-
10 mm black safety eyes
-
Polyester fiberfill
-
Yarn needle, stitch markers
-
Optional: thin floral or craft wire (1–1.5 mm) for antler support
🪡 Abbreviations (US Terms)
MR – Magic Ring
sc – Single crochet
inc – Increase (2 sc in one stitch)
dec – Decrease (sc2tog)
sl st – Slip stitch
FO – Fasten off
Worked in continuous rounds unless noted.
🦌 Head (Light Brown)
R1: MR 6 (6)
R2: inc ×6 (12)
R3: (sc, inc) ×6 (18)
R4: (2 sc, inc) ×6 (24)
R5: (3 sc, inc) ×6 (30)
R6: (4 sc, inc) ×6 (36)
R7–R12: sc around (36)
Insert safety eyes between R8–9, spaced 8–9 sts apart.
R13: (4 sc, dec) ×6 (30)
R14: (3 sc, dec) ×6 (24)
Begin stuffing firmly, shaping a smooth round head.
R15: (2 sc, dec) ×6 (18)
R16: (sc, dec) ×6 (12)
R17: dec ×6 (6)
FO and close.
🤍 Face Mask (White)
This mask is oval and sits snugly around the eyes and nose.
R1: MR 6 (6)
R2: inc ×6 (12)
R3: (sc, inc) ×6 (18)
R4: (2 sc, inc) ×6 (24)
R5: (3 sc, inc) ×6 (30)
FO with long tail.
Sew centered on the face, slightly overlapping the eye area and extending downward to the nose.
🟤 Nose (Dark Brown)
R1: MR 6 (6)
R2–R3: sc around (6)
FO, lightly flatten, and sew centered on the lower face mask.
👂 Ears (Make 2)
Outer ear (light brown):
R1: MR 6 (6)
R2: (sc, inc) ×3 (9)
R3: (2 sc, inc) ×3 (12)
R4–R7: sc around (12)
FO.
Inner ear (white):
R1: MR 6 (6)
R2: (sc, inc) ×3 (9)
R3–R5: sc around (9)
FO.
Sew inner ear onto outer ear.
Fold base slightly and stitch closed.
Attach ears high on the head, angled gently outward.
🦌 Body (White Belly → Light Brown)
R1: MR 6 (6)
R2: inc ×6 (12)
R3: (sc, inc) ×6 (18)
R4: (2 sc, inc) ×6 (24)
R5: (3 sc, inc) ×6 (30)
R6–R8: sc around (30)
Switch to light brown.
R9–R18: sc around (30)
R19: (3 sc, dec) ×6 (24)
R20: (2 sc, dec) ×6 (18)
Stuff firmly, shaping a rounded seated body.
R21: (sc, dec) ×6 (12)
R22: dec ×6 (6)
FO and close.
🐾 Front Legs (Make 2)
Hooves (dark brown):
R1: MR 6 (6)
R2: inc ×6 (12)
R3–R4: sc around (12)
Switch to light brown.
R5–R12: sc around (12)
Stuff lightly. FO with long tail.
Sew vertically to the front of the body.
🐾 Back Legs (Make 2)
R1: MR 6 (6)
R2: inc ×6 (12)
R3–R4: sc around (12)
Switch to light brown.
R5–R9: sc around (12)
Flatten opening, sc across to close.
FO and sew to the lower sides of the body so the deer sits naturally.
🦌 Tail (Light Brown)
R1: MR 6 (6)
R2: (sc, inc) ×3 (9)
R3–R4: sc around (9)
FO, stuff lightly, sew centered at the back.
🌿 Antlers (Make 2)
Tall, slim antlers with two branches each.
Main beam:
R1: MR 6 (6)
R2–R18: sc around (6)
Optional wire support:
Fold a thin floral wire in half and insert before stuffing lightly.
FO with long tail.
Branches (2 per antler):
R1: MR 5 (5)
R2–R7: sc around (5)
FO.
Sew branches near the top of the main beam, angled outward and slightly forward.
Attach antlers securely to the top of the head, evenly spaced.
🧷 Assembly
-
Sew head firmly to body
-
Attach front and back legs for a stable seated pose
-
Sew ears above the face mask
-
Attach antlers last for symmetry
-
Weave in all ends neatly
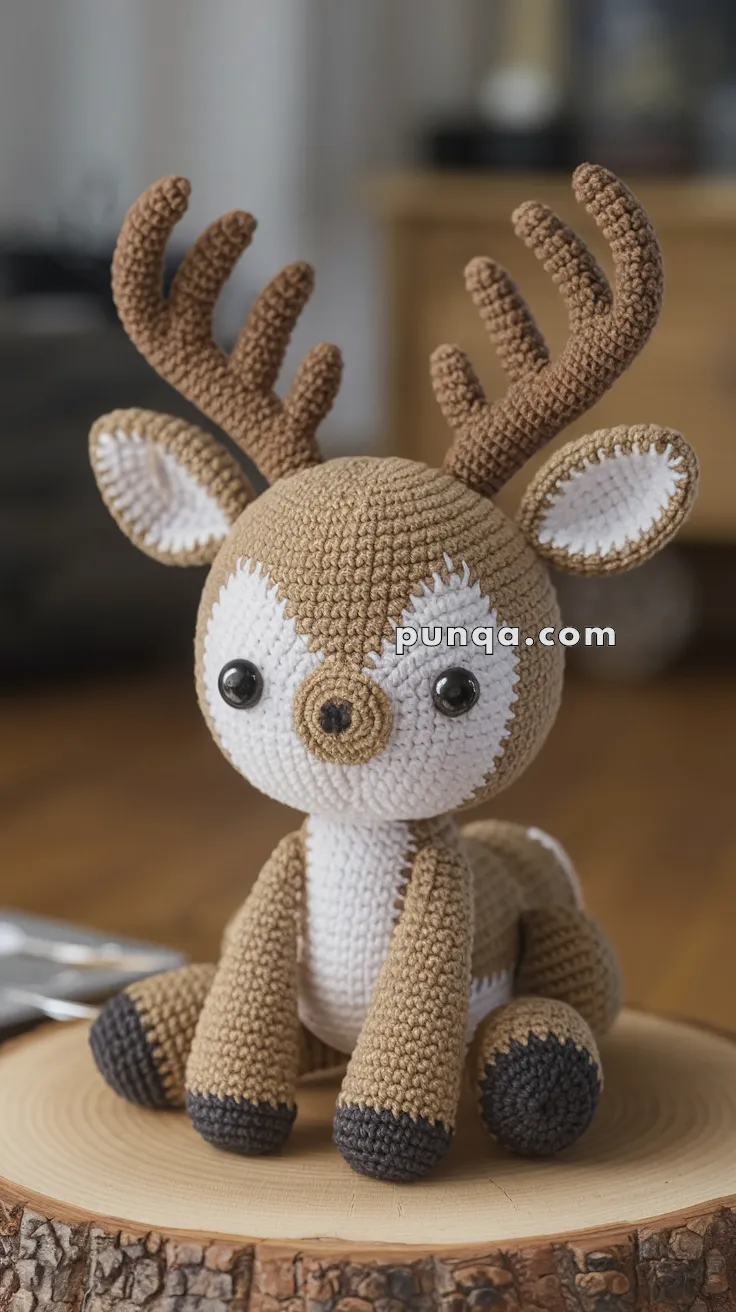
🦌 Finished Deer
This woodland deer sits peacefully with balanced proportions, upright antlers, and soft natural coloring. Its gentle expression and classic shape make it a timeless handmade companion—perfect for nursery décor, seasonal displays, or a thoughtful gift that celebrates calm, cozy craftsmanship.