Burrow into the world of handmade charm with this Amigurumi Mole crochet pattern! 🦔✨ With its tiny paws, round snout, and curious expression, this design brings a delightful underground explorer to life in yarn form. Whether you’re crafting for a nature-themed décor piece, a whimsical gift, or simply love character-inspired amigurumi, this FREE pattern is a fantastic addition to your collection.
Designed for intermediate crocheters, this pattern allows for customization in fur texture, nose details, and even tiny accessories like a miner’s helmet or a little shovel to enhance its personality. Choose classic earthy browns for a realistic look or experiment with soft pastels for a playful twist! Whether displayed as part of a woodland setup or gifted to a fellow crochet enthusiast, this amigurumi mole is sure to dig its way into hearts. Grab your hook, select your favorite yarn, and let’s bring this adorable burrower to life—one stitch at a time! 🧶✨
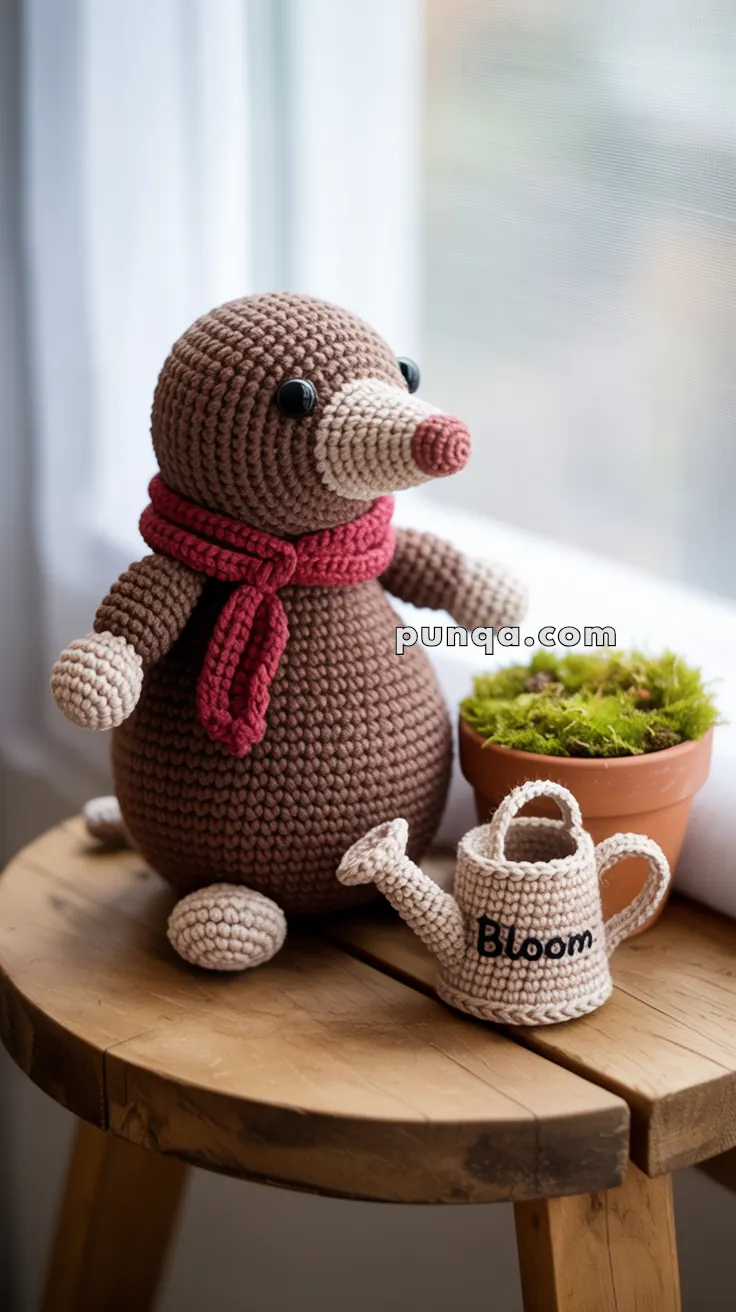
🦔 Amigurumi Mole & Watering Can Crochet Pattern
This sweet little mole features a plump, rounded body, a distinct long snout with a smooth color transition, tiny shaped hands, flat oval feet for balance, and a cozy wrapped scarf. Paired with a structured mini watering can, this project creates a warm, storybook-style character perfect for display 🌿✨
✨ Skill Level
Intermediate
Includes shaping, proportional construction, and detailed finishing.
📏 Finished Size
- Mole: approx. 23–25 cm (9–10 in)
- Watering can: approx. 7–8 cm (3 in)
🧶 Materials & Yarn Amount
- Medium Brown (head & body): 130–150 g
- Light Beige (snout, hands, feet, tail tip): 40–50 g
- Dusty Pink (nose tip): 8–10 g
- Deep Red (scarf): 25–30 g
- Cream (watering can): 30–35 g
- Black (eyes & embroidery): small amount
Other supplies:
- 10–12 mm safety eyes
- Polyester stuffing (~300 g)
- 3.0 mm crochet hook
- Yarn needle, stitch marker
🔤 Abbreviations (US Terms)
MR – magic ring
sc – single crochet
inc – increase
dec – invisible decrease
sl st – slip stitch
ch – chain
FO – fasten off
🟤 Body (Rounded, Weighted Base)
With brown yarn:
R1: MR, 6 sc (6)
R2: inc ×6 (12)
R3: (1 sc, inc) ×6 (18)
R4: (2 sc, inc) ×6 (24)
R5: (3 sc, inc) ×6 (30)
R6: (4 sc, inc) ×6 (36)
R7: (5 sc, inc) ×6 (42)
R8–19: sc around (42)
➡️ Stuff more densely at the bottom to create a stable, rounded base.
R20: (5 sc, dec) ×6 (36)
R21: (4 sc, dec) ×6 (30)
R22: (3 sc, dec) ×6 (24)
Continue stuffing firmly.
R23: (2 sc, dec) ×6 (18)
R24: (1 sc, dec) ×6 (12)
R25: dec ×6 (6)
FO.
🟤 Head (Smooth Sphere)
With brown yarn:
R1: MR, 6 sc (6)
R2: inc ×6 (12)
R3: (1 sc, inc) ×6 (18)
R4: (2 sc, inc) ×6 (24)
R5: (3 sc, inc) ×6 (30)
R6: (4 sc, inc) ×6 (36)
R7–11: sc around (36)
Insert eyes between R8–9, about 7 stitches apart.
R12: (4 sc, dec) ×6 (30)
R13: (3 sc, dec) ×6 (24)
R14: (2 sc, dec) ×6 (18)
Stuff firmly.
R15: (1 sc, dec) ×6 (12)
R16: dec ×6 (6)
FO.
🐽 Snout (Long, Defined & Slightly Tapered)
With beige yarn:
R1: MR, 6 sc (6)
R2: (1 sc, inc) ×3 (9)
R3: (2 sc, inc) ×3 (12)
R4–8: sc around (12)
➡️ Gentle taper toward tip:
R9: (2 sc, dec) ×3 (9)
Switch to dusty pink:
R10–11: sc around (9)
Stuff lightly, keeping the base firm and the tip slightly softer.
FO.
Sew centered on the face so it extends outward cleanly.
🐾 Arms (Tapered with Rounded Hands)
Start with beige yarn:
R1: MR, 6 sc
R2: (1 sc, inc) ×3 (9)
R3: sc around (9)
➡️ Shape wrist:
R4: (1 sc, dec) ×3 (6)
Switch to brown yarn:
R5–11: sc around (6)
Light stuffing only at upper section so arms remain soft.
FO.
🦶 Feet (Oval & Flattened for Stability)
With beige yarn:
R1: MR, 6 sc (6)
R2: inc ×6 (12)
R3: (1 sc, inc) ×6 (18)
R4–5: sc around (18)
➡️ Shape underside:
R6: (1 sc, dec) ×6 (12)
Stuff the front portion firmly.
Flatten base gently before sewing to create a stable sitting position.
FO.
🐾 Tail (Tiny Detail)
With beige yarn:
R1: MR, 4 sc
R2–6: sc around (4)
FO and attach low on the back.
🧣 Scarf (Soft & Wrapped)
With deep red yarn:
Ch 65
Row 1: sc across (64)
Row 2: sc across (64)
FO.
Wrap once around the neck and tie slightly to one side.
🌱 Watering Can
Base (Short, Structured Shape)
With cream yarn:
R1: MR, 6 sc
R2: inc ×6 (12)
R3: (1 sc, inc) ×6 (18)
R4: (2 sc, inc) ×6 (24)
R5: BLO sc around (24)
R6–9: sc around (24)
Lightly stuff or insert a firm base.
Spout (Tapered & Slightly Angled)
R1: MR, 5 sc
R2: (1 sc, inc) ×2, 1 sc (7)
R3–7: sc around (7)
Light stuffing.
Sew at a slight upward angle.
Handle (Rounded Loop)
Ch 18
Row 1: sl st back along chain
Row 2: sc along one side
FO.
Sew from upper rim to side to form a curved handle.
Rim Finish
Join yarn at top and work a loose round of sl st for a neat edge.
Embroidery
Use black yarn to stitch simple lettering on the front.
🪡 Assembly
- Sew snout securely before attaching head
- Attach head slightly forward on body
- Sew arms low and slightly outward
- Attach feet toward the front base for balance
- Add small tail at back
- Wrap scarf naturally
- Place watering can beside figure
✨ Final Shaping
- Smooth the snout so it stays straight and rounded
- Balance stuffing so the figure sits evenly
- Adjust arm angle slightly outward
- Ensure feet are flat and stable
💖 Finished Look
This cozy mole features a soft rounded silhouette, a long expressive snout, tiny hands, and sturdy feet 🐾
Paired with its charming watering can and scarf, it becomes a warm, handcrafted piece full of personality and calm, nature-inspired charm 🌿✨