Creating amigurumi has always been a delightful journey for me, and crafting a gnu amigurumi pattern is no exception! 🦙✨ There’s just something magical about transforming a skein of yarn into a cuddly, miniature version of these unique animals. The appeal lies not only in the finished product, which is both adorable and a bit quirky, but also in the meditative process of crocheting each stitch. Watching the gnu take shape, from its stout little legs to its characteristic horns, fills me with joy and anticipation. It’s a wonderful blend of creativity and skill, offering a peaceful retreat from the hustle and bustle of everyday life.
The process begins with selecting the perfect yarn, ensuring it’s both soft and durable, and picking out a hook that fits comfortably in my hand. I then dive into the actual pattern, starting with a magic ring for the body and working seamlessly to form the gnu’s characteristic features. Each row brings new excitement as the animal starts to come alive under my fingers. Adding little details, like embroidered eyes and tufted mane, is perhaps my favorite part as it gives the gnu its distinct personality. 🧶💖 Whether I’m making it for a friend or just for the joy of creating, the entire process is a wonderful blend of imagination and craftsmanship that never fails to bring a smile to my face.
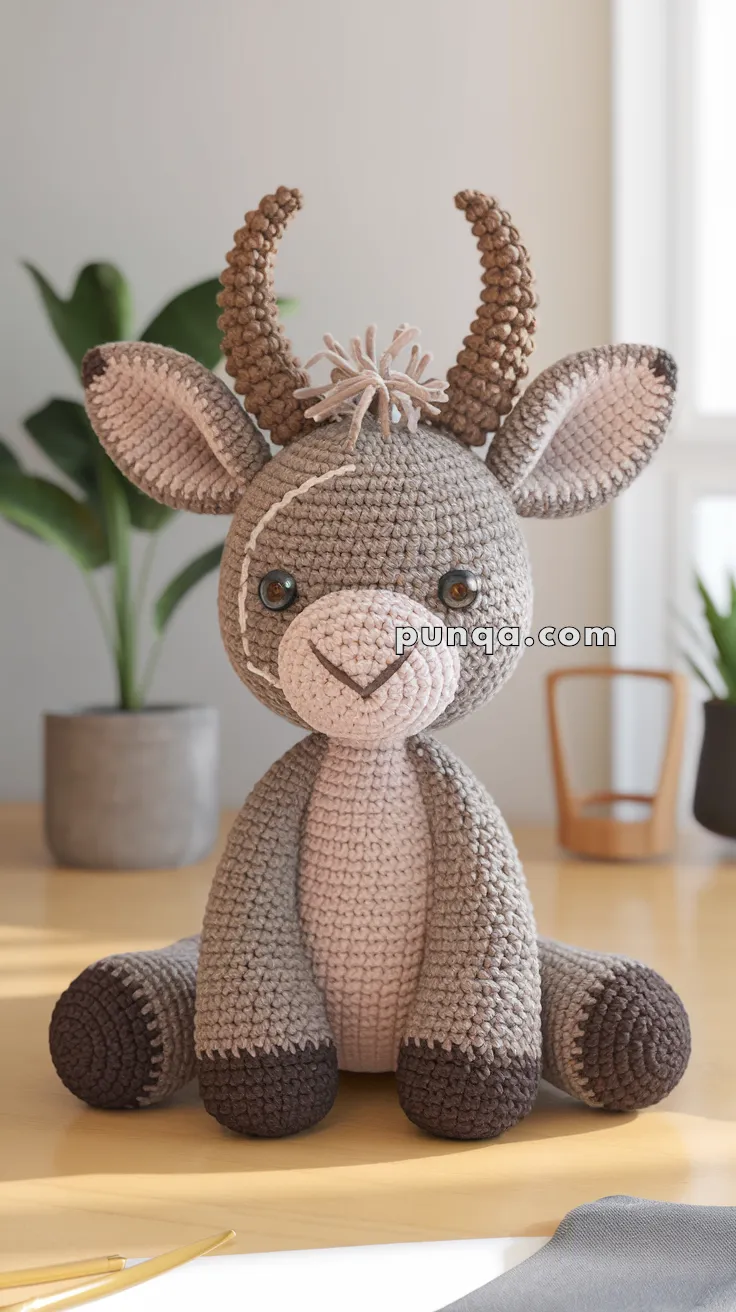
🐃 Amigurumi Gnu Crochet Pattern
This charming amigurumi gnu (also known as a wildebeest) is a lovable addition to your safari-inspired crochet collection. With spiral horns, strong hooves, and a sweet expression, this soft herbivore brings a touch of the wild to your yarn zoo!
✨ Skill Level
Intermediate – Includes color changes, horn shaping, and some minor embroidery.
📏 Finished Size
Approx. 10–12 inches (25–30 cm) tall when using worsted weight yarn and a 3.0–3.5 mm hook.
🧶 Materials
Yarn (Worsted Weight):
-
Light brown or taupe (body & head)
-
Beige or blush (muzzle and belly)
-
Dark brown (hooves & horn tips)
-
Medium brown (horns & mane strands)
-
White or light yarn for eye markings and scars (optional)
Other Supplies:
-
10–12 mm safety eyes
-
Stitch markers
-
Crochet hook (3.0–3.5 mm)
-
Polyfill stuffing
-
Tapestry needle
-
Scissors
🧵 Abbreviations (US Terms)
MR – Magic Ring
sc – Single Crochet
inc – Increase
dec – Decrease
sl st – Slip Stitch
ch – Chain
BLO – Back Loop Only
FO – Fasten Off
🐃 Head (Taupe/Light Brown)
-
MR, 6 sc
-
inc x6 (12)
-
(1 sc, inc) x6 (18)
-
(2 sc, inc) x6 (24)
-
(3 sc, inc) x6 (30)
6–12. sc (30) -
(3 sc, dec) x6 (24)
-
(2 sc, dec) x6 (18)
– Insert safety eyes between R9–10, about 7 sts apart -
(1 sc, dec) x6 (12)
-
dec x6 (6), FO and close
🐽 Muzzle (Blush or Beige)
-
MR, 6 sc
-
inc x6 (12)
-
(1 sc, inc) x6 (18)
-
sc (18), FO
– Embroider mouth line and nostrils in brown
– Sew to bottom center of head
🦱 Mane (Strands)
-
Cut 6–10 strands of brown yarn (about 4″ each)
-
Fold in half and loop through top center of head using a latch-hook method
-
Trim and fluff as desired
🐂 Horns (Make 2 – Brown → Dark Brown Tip)
-
MR, 5 sc
2–3. sc (5) -
(1 sc, inc) x2, sc (7)
5–6. sc (7) -
Switch to dark brown: sc (7), FO
– Lightly stuff, sew to each side of the mane
👂 Ears (Make 2 – Taupe + Pink Inner)
Outer Ear:
-
Ch 5
-
sc in 2nd ch from hook, sc x2, 3 sc in last, rotate: sc x3 (10)
-
sc around, FO
Inner Ear: Repeat with pink yarn, one round smaller
– Sew inner to outer, fold slightly and attach below horns
🐘 Body (Start with Beige → Taupe)
-
MR, 6 sc
-
inc x6 (12)
-
(1 sc, inc) x6 (18)
-
(2 sc, inc) x6 (24)
-
(3 sc, inc) x6 (30)
6–9. sc (30) -
Switch to taupe: sc (30)
11–16. sc (30) -
(3 sc, dec) x6 (24)
-
(2 sc, dec) x6 (18)
– Stuff firmly -
(1 sc, dec) x6 (12)
-
dec x6 (6), FO and close
🐾 Arms (Make 2 – Taupe → Dark Brown Hoof)
-
MR with dark brown, 6 sc
-
inc x6 (12)
-
sc (12)
-
Switch to taupe: sc (12)
5–9. sc (12), FO
– Stuff lightly, sew to sides of body
🐾 Legs (Make 2 – Taupe → Dark Brown Hoof)
-
MR with dark brown, 6 sc
-
inc x6 (12)
-
sc (12)
-
Switch to taupe: sc (12)
5–7. sc (12), FO
– Stuff and attach to bottom of body
✂️ Assembly
-
Sew head to body
-
Attach arms and legs
-
Position and sew horns and ears
-
Embroider or stitch white markings or scars if desired
-
Add fringe between horns as the mane
💡 Optional Add-ons
-
Add tufts to the tail
-
Embroider tribal-style markings or name tag
-
Make a baby gnu version for a cute pair!
🧶 Final Touch
Your noble little gnu is complete and ready to roam the yarn-savannah! 🐃🌾 Whether you’re gifting or decorating, this soft and scruffy friend brings cozy wilderness charm wherever he goes.