Amigurumi Badger Cub – FREE Crochet Pattern

Amigurumi Badger Cub – FREE Crochet Pattern
Spread the love

Bring a touch of woodland charm to your crochet collection with this Amigurumi Badger Cub pattern! With its adorable striped face, soft rounded body, and playful personality, this little badger is ready to burrow its way into your heart. Whether you’re crafting for nature lovers, adding a whimsical touch to your decor, or simply enjoy making cute amigurumi designs, this pattern lets you stitch up a tiny forest friend bursting with character! Perfect for gifting, decorating, or just keeping as a cheerful companion, this crochet creation brings a touch of handmade woodland magic to every stitch. 🦡✨

Designed for customization, this pattern allows you to experiment with different shades of gray, embroidered details, or even tiny accessories like a miniature scarf or acorn for extra charm. Craft a classic badger cub with bold black-and-white markings, create a pastel version for a softer aesthetic, or even stitch up a full set of woodland-inspired amigurumi for a delightful display! Whether gifted as a thoughtful keepsake, displayed as a charming accent, or made simply for the joy of crafting, this Amigurumi Badger Cub is a fun and creative project—perfect for bringing a touch of handmade forest magic to every stitch! 🧶💖✨
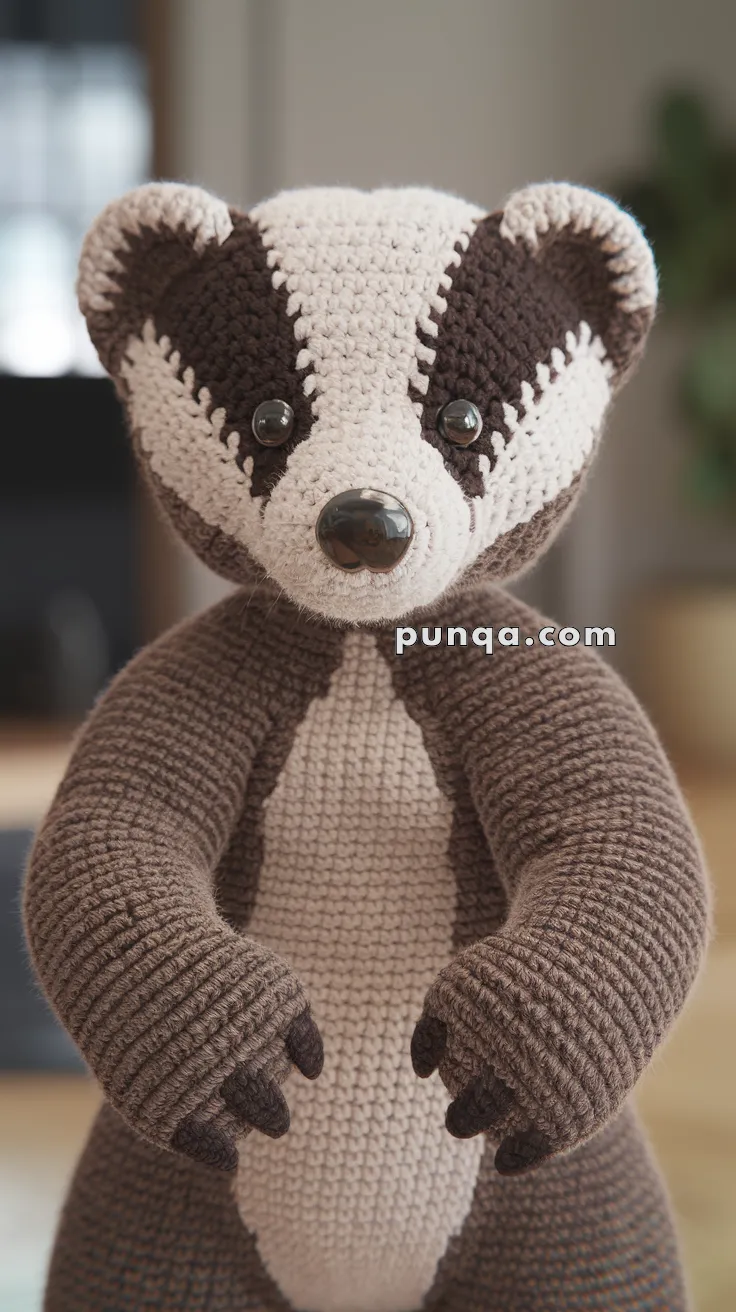
Realistic crochet image for Amigurumi Badger Cub - FREE Crochet Pattern

Pattern Usage Policy

🦡 Amigurumi Badger Cub Crochet Pattern

Meet your new woodland friend — a huggable badger cub with its iconic black-and-white stripes, curious eyes, and little claws. This pattern will guide you step by step to create a realistic badger that looks just like the one in the photo, perfect for nursery decor or as a cuddly companion.


✨ Skill Level

Intermediate – involves color changes, shaping, and assembly.


📏 Finished Size

Approx. 10–12 in (25–30 cm) tall when made with worsted weight yarn and a 3.5 mm hook.


🧶 Materials

  • Worsted weight yarn:

    • Color A: Dark brown (main body, limbs, outer head stripes)

    • Color B: Cream (snout, belly, central face stripe, ear centers)

    • Color C: Black (claws, stripe edges, optional embroidery details)

  • 3.5 mm crochet hook

  • 12 mm black safety eyes

  • 18–20 mm large black safety nose (or embroidered)

  • Polyester fiberfill stuffing

  • Tapestry needle & stitch markers

  • Optional: pink yarn for blush or embroidery


🧵 Abbreviations (US Terms)

  • MR – Magic Ring

  • sc – Single Crochet

  • inc – Increase (2 sc in same st)

  • dec – Decrease (sc2tog)

  • ch – Chain

  • sl st – Slip Stitch

  • FO – Fasten Off

  • BLO – Back Loops Only

  • FLO – Front Loops Only


🪡 Pattern Instructions

🐾 Head (with facial stripes worked in)

Start with cream (Color B).

  1. MR, 6 sc (6)

  2. inc ×6 (12)

  3. (sc, inc) ×6 (18)

  4. (2 sc, inc) ×6 (24)

  5. (3 sc, inc) ×6 (30)

  6. (4 sc, inc) ×6 (36)

Begin stripe shaping (rounds worked with color changes):

  • Use cream (B) for the central panel.

  • Switch to dark brown (A) on either side.

  • Place stitch markers to ensure symmetry.

7–12. Continue sc around, working central 12 sts in cream (B) for the stripe, and sides in dark brown (A). (36 sts)
👉 Insert safety eyes between Rnds 9–10, ~10 sts apart, positioned on the edge between cream and dark brown.

  1. (4 sc, dec) ×6 (30)

  2. (3 sc, dec) ×6 (24)

  3. (2 sc, dec) ×6 (18)
    Stuff head firmly.

  4. (sc, dec) ×6 (12)

  5. dec ×6 (6), FO and close.


🐾 Snout (Cream – Color B)

  1. MR, 6 sc (6)

  2. inc ×6 (12)

  3. (sc, inc) ×6 (18)

  4. (2 sc, inc) ×6 (24)
    5–6. sc around (24)
    👉 Stuff firmly to create a protruding oval shape.
    FO, leaving long tail.
    Attach safety nose at top center. Sew under central cream stripe.


🐾 Ears (Make 2)

Start with cream (B):

  1. MR, 6 sc (6)

  2. inc ×6 (12)
    Switch to dark brown (A):

  3. sc around (12)

  4. (sc, dec) ×4 (8)
    FO, flatten, and sew symmetrically on head.


🐾 Body

Start with cream (B) for belly:

  1. MR, 6 sc (6)

  2. inc ×6 (12)

  3. (sc, inc) ×6 (18)

  4. (2 sc, inc) ×6 (24)

  5. (3 sc, inc) ×6 (30)
    Switch to dark brown (A):
    6–14. sc around (30)

  6. (3 sc, dec) ×6 (24)

  7. (2 sc, dec) ×6 (18)

  8. (sc, dec) ×6 (12)
    Stuff firmly.

  9. dec ×6 (6), FO.


🐾 Arms (Make 2)

With dark brown (A):

  1. MR, 6 sc (6)

  2. (sc, inc) ×3 (9)
    3–10. sc around (9)
    Switch to black (C) for claws:
    11–13. sc around (9)
    Stuff lightly, FO, sew to body at shoulders.


🐾 Legs (Make 2)

With dark brown (A):

  1. MR, 6 sc (6)

  2. (sc, inc) ×3 (9)

  3. (2 sc, inc) ×3 (12)
    4–9. sc around (12)
    Switch to black (C) for claw tips:
    10–12. sc around (12)
    Stuff firmly, FO. Sew to bottom of body angled forward.


🐾 Tail

With dark brown (A):

  1. MR, 6 sc (6)

  2. (sc, inc) ×3 (9)
    3–4. sc around (9)
    FO, sew to back of body.


🐾 Claws (Optional Detail)

For each paw/foot, embroider or crochet 3 short claw shapes in black (C).


🧵 Assembly

  1. Sew head to body, aligning belly cream patch with central head stripe.

  2. Attach arms under head, pointing forward slightly.

  3. Sew legs to bottom sides for standing or seated pose.

  4. Add tail at back.

  5. Secure ears, snout, and nose.

  6. Embroider small mouth under snout and optional cream eyebrows.


🌲 Finishing Touches

  • Use blush or pink yarn to add soft cheeks.

  • Lightly brush belly yarn to mimic fur texture.

  • Accessorize with a tiny scarf or forest prop for extra charm.


✨ Your woodland badger cub is complete! With its bold facial stripes, chunky body, and little claws, it looks just like the real woodland friend in your photo. 🦡


Spread the love