Snuggle up with the Amigurumi Otter Cub, a heart-stealing crochet project that’s full of charm and cuddly vibes! 🦦🧶 With its round little face, tiny paws, and sweet sleepy expression, this baby otter is the perfect companion for cozy days and handmade hugs. Whether floating into a nursery, tucked into a gift basket, or simply lounging on your craft shelf, this otter cub brings gentle joy to every stitch.
Perfect for crocheters who love soft shapes and adorable details, this pattern invites playful customization. Add a tiny seashell, a fuzzy scarf, or even a mini fish friend to give your otter cub a story of its own. Whether you’re crafting for a little one or just indulging your love of woodland creatures, the Otter Cub is a delightful way to stitch up sweetness—one lovable loop at a time! 🌊💙
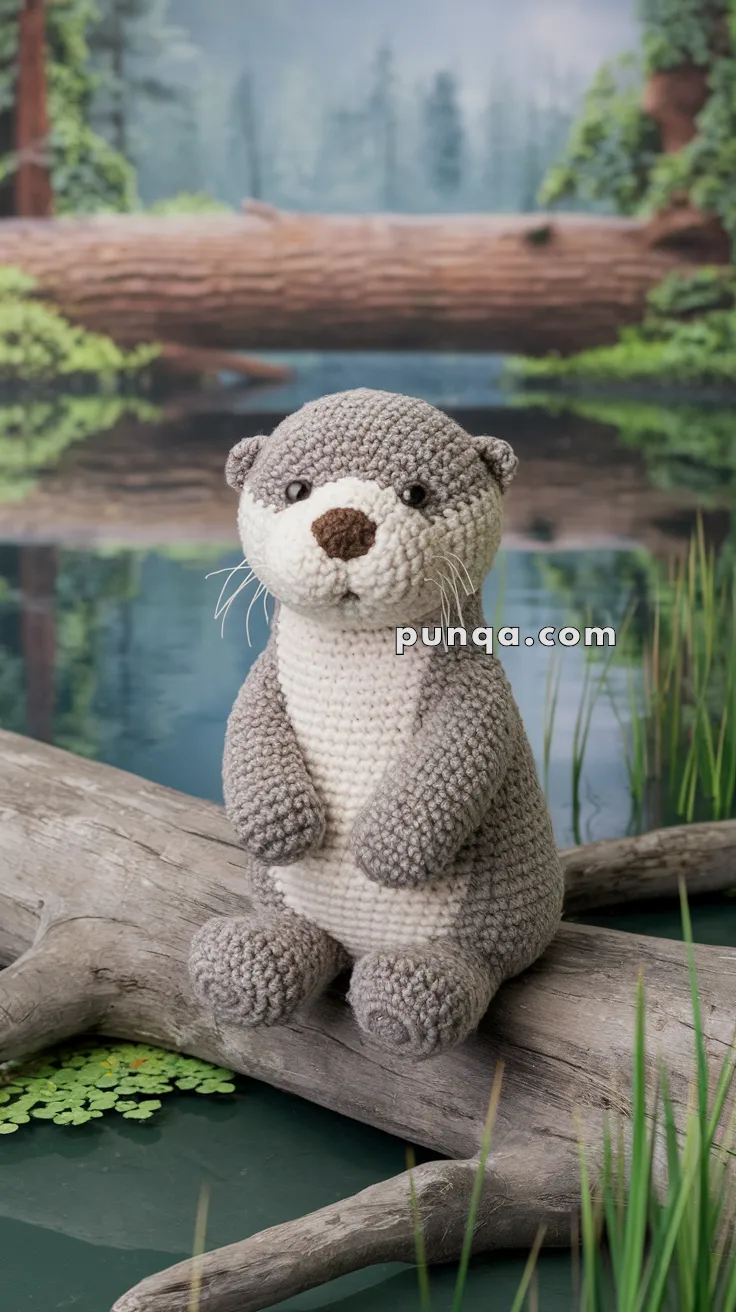
Amigurumi Otter Cub Crochet Pattern
This sweet otter cub, with its round cheeks, soft gray fur, cream belly patch, and charming whiskers, is a cuddly woodland friend that’s full of personality. Its long arms rest gently on its belly, and its short tail helps it sit upright on any surface. Perfect as a nursery companion or a cozy handmade gift, this otter captures all the heartwarming details of a real river otter. 🦦💕
✨ Skill Level
Intermediate – shaping, color transitions, and assembly required.
📏 Finished Size
Approximately 8–9 inches (20–23 cm) tall using worsted yarn and a 3.5 mm hook.
🧶 Materials
- Worsted weight yarn:
- Gray – main fur
- Cream or beige – face and belly patch
- Brown – nose
- 8–10 mm black safety eyes
- 3.5 mm crochet hook
- Fiberfill stuffing
- Fishing line or fine nylon thread – whiskers
- Tapestry needle
- Stitch marker
🧵 Abbreviations (US Terms)
MR – Magic Ring
sc – Single Crochet
inc – Increase (2 sc in one stitch)
dec – Decrease (sc two together)
sl st – Slip Stitch
ch – Chain
FO – Fasten Off
BLO – Back Loop Only
🦦 Head
With gray yarn:
R1: MR, 6 sc [6]
R2: inc ×6 [12]
R3: (sc, inc) ×6 [18]
R4: (2 sc, inc) ×6 [24]
R5: (3 sc, inc) ×6 [30]
R6: (4 sc, inc) ×6 [36]
R7: (5 sc, inc) ×6 [42]
R8–R12: sc around [42]
Eye placement: between R10–11, 7–8 sts apart.
R13: (5 sc, dec) ×6 [36]
R14: (4 sc, dec) ×6 [30]
R15: (3 sc, dec) ×6 [24]
Stuff firmly, shaping cheeks slightly outward.
R16: (2 sc, dec) ×6 [18]
R17: (sc, dec) ×6 [12]
R18: dec ×6 [6]; FO and close.
🐽 Muzzle
With cream yarn:
R1: MR, 6 sc [6]
R2: inc ×6 [12]
R3: (sc, inc) ×6 [18]
R4: (2 sc, inc) ×6 [24]
R5: (3 sc, inc) ×6 [30]
R6: sc around [30]
R7: 12 sc, inc, 4 sc, inc, 12 sc [32]
Lightly stuff and sew to the lower face, slightly overlapping the bottom of the eyes for a soft oval muzzle.
Nose: With brown, MR, 5 sc, sl st to close. FO and sew to the top center of the muzzle. Add a small vertical stitch below for the mouth.
Whiskers: Insert 3–4 short strands of fishing line on each side of the muzzle, securing from inside.
👂 Ears (2×)
With gray yarn:
R1: MR, 5 sc [5]
R2: (sc, inc) ×2, sc [7]
R3: sc around [7]
FO, flatten, and sew slightly behind eye line on each side of the head.
🧸 Body
With cream yarn:
R1: MR, 6 sc [6]
R2: inc ×6 [12]
R3: (sc, inc) ×6 [18]
R4: (2 sc, inc) ×6 [24]
R5: (3 sc, inc) ×6 [30]
R6–R8: sc around [30]
Switch to gray yarn:
R9: (4 sc, inc) ×6 [36]
R10–R14: sc around [36]
R15: (4 sc, dec) ×6 [30]
R16: sc around [30]
R17: (3 sc, dec) ×6 [24]
R18: sc around [24]
R19: (2 sc, dec) ×6 [18]
Stuff firmly, shaping the chest to curve outward slightly.
R20: (sc, dec) ×6 [12]
R21: dec ×6 [6]; FO and close.
🐾 Arms (2×)
With gray yarn:
R1: MR, 6 sc [6]
R2: (sc, inc) ×6 [12]
R3: (2 sc, inc) ×3 [15]
R4–R7: sc around [15]
R8: (3 sc, dec) ×3 [12]
R9–R13: sc around [12]
R14: (2 sc, dec) ×3 [9]
R15–R16: sc around [9]
Lightly stuff, leaving the last few rounds unstuffed for flexibility.
Sew arms high on the sides, angled downward so the paws meet naturally at the belly center.
🦶 Legs (2×)
With gray yarn:
R1: MR, 6 sc [6]
R2: inc ×6 [12]
R3: (sc, inc) ×6 [18]
R4: (2 sc, inc) ×6 [24]
R5: BLO sc around [24] ← defines the paw ridge
R6–R7: sc around [24]
R8: (sc, dec) ×8 [16]
R9: sc around [16]
Stuff firmly; FO and sew to the front base of the body for a stable sitting position.
🐾 Tail
With gray yarn:
R1: MR, 6 sc [6]
R2: (sc, inc) ×3 [9]
R3–R6: sc around [9]
R7: (2 sc, dec) ×2, sc [7]
R8–R9: sc around [7]
Lightly stuff and sew at the lower back, angled slightly downward to support sitting posture.
✂️ Assembly & Finishing
- Sew the head to the body securely, tilting slightly forward for a natural look.
- Attach arms so the paws meet across the belly.
- Position legs so the otter sits balanced.
- Add whiskers and tidy up yarn ends.
- Optional: brush lightly with a soft toothbrush for fluffier texture.
💕 Finishing Touch
Your finished otter cub will sit adorably on any shelf or log, its little paws resting together and whiskers giving it an irresistibly gentle look. This woodland friend brings calm, nature-inspired sweetness to any handmade collection — perfect for gifting, decorating, or simply keeping close as a comforting creation. 🌿🦦