Bring the majestic charm of a Pelican to life with this Amigurumi Pelican crochet pattern! 🦩✨ With its large beak, graceful wings, and coastal elegance, this design captures the essence of this fascinating seabird in yarn form. Whether you’re crafting for a nature-inspired décor piece, a heartfelt gift, or simply love bird-themed amigurumi, this pattern is a fantastic addition to your collection.
Designed for crocheters who enjoy shaping intricate details, this pattern allows for customization in feather textures, beak size, and even tiny accessories like embroidered fish or a miniature dock to enhance its personality. Choose classic whites and grays for a realistic look or experiment with soft pastels for a whimsical twist! Whether displayed as part of a coastal setup or gifted to a fellow crochet enthusiast, this amigurumi pelican is sure to impress.
Grab your hook, select your favorite yarn, and let’s bring this majestic seabird to life—one stitch at a time! 🧶✨
🦤 Amigurumi Pelican Crochet Pattern
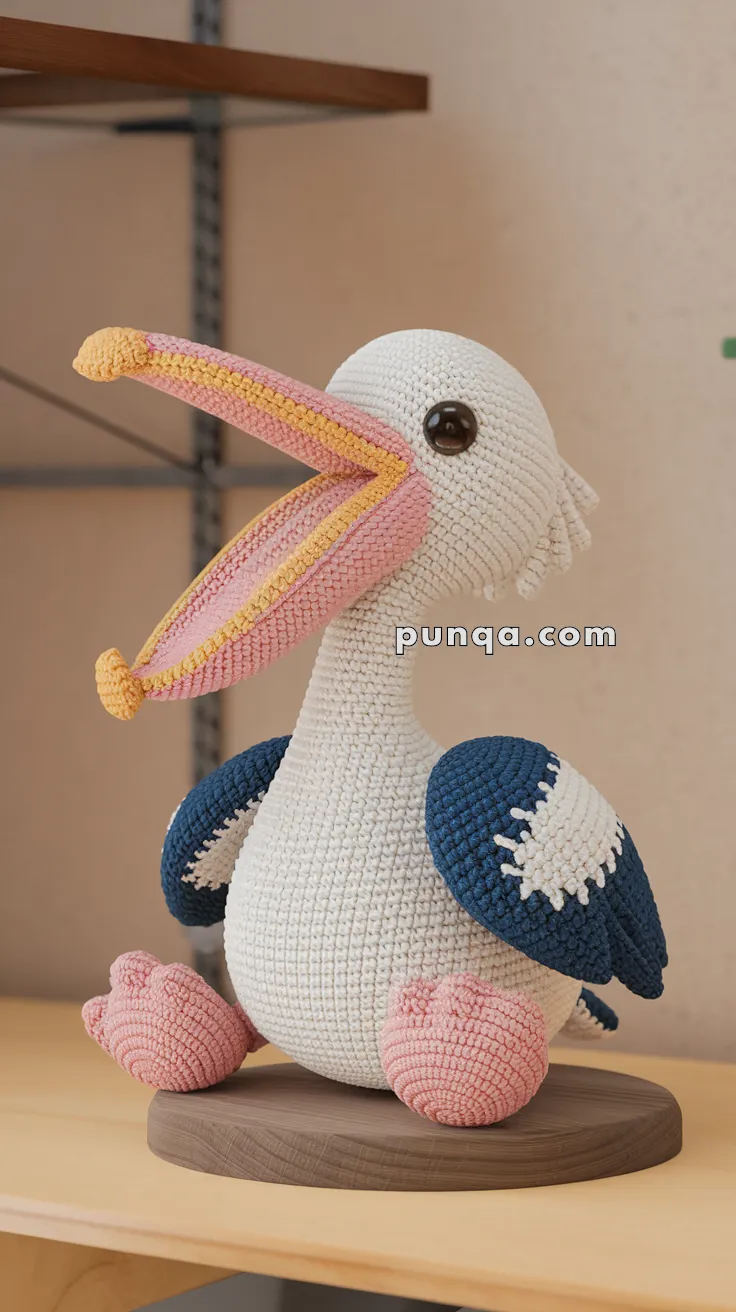
This adorable crochet pelican captures the warmth and whimsy of the coast — from its long, curved beak pouch to its deep-blue wings with scalloped feathers. Designed for crafters who love realistic amigurumi, this pelican is both sculptural and full of charm.
✨ Skill Level
Advanced Intermediate – shaping, layering, and 3D assembly.
📏 Finished Size
Approx. 32–36 cm (12½–14 in) tall using worsted-weight yarn and a 3.5 mm hook.
🧶 Materials
Yarn (Worsted / DK Weight):
• White – head, neck, body (60 g)
• Pink – beak pouch lining, feet (35 g)
• Yellow – beak outer edge & tip (25 g)
• Dark Blue – wings (30 g)
• Small scrap black thread – eye detail
Other Supplies:
• Crochet hook 3.5 mm
• Safety eyes 12 mm
• Fiberfill stuffing (~45 g)
• Yarn needle & stitch markers
• Optional: light wire or pipe cleaners for neck shaping
🧵 Abbreviations (US Terms)
MR – Magic Ring
sc – Single Crochet
inc – Increase (2 sc in same st)
dec – Decrease (sc 2 tog)
ch – Chain
sl st – Slip Stitch
FLO – Front Loop Only
BLO – Back Loop Only
FO – Fasten Off
🧍♂️ Body (Bottle Shape – White)
R1 MR 6 sc (6)
R2 inc ×6 (12)
R3 (1 sc, inc) ×6 (18)
R4 (2 sc, inc) ×6 (24)
R5 (3 sc, inc) ×6 (30)
R6 (4 sc, inc) ×6 (36)
R7 (5 sc, inc) ×6 (42)
R8 – R20 sc around (42) → creates wide base.
R21 (6 sc, dec) ×6 (36)
R22 (4 sc, dec) ×6 (30)
R23 (3 sc, dec) ×6 (24)
R24 sc around (24) – forms gentle taper upward.
Stuff firmly, shaping into an upright bottle shape (wider bottom, narrow top).
FO and leave long tail for neck attachment.
🦢 Elongated Neck (White)
R1 MR 6 sc (6)
R2 inc ×6 (12)
R3 (1 sc, inc) ×6 (18)
R4 – R18 sc around (18) → forms a long tube (approx. 10 cm / 4 in).
R19 (1 sc, dec) ×6 (12)
FO and stuff lightly so it’s firm but bendable.
Sew base of neck to top of body and head onto neck after assembly for that graceful curve seen in photo.
(Optional: Insert thin wire or pipe cleaner through neck before closing for gentle posing.)
🪶 Head (White)
R1 MR 6 sc (6)
R2 inc ×6 (12)
R3 (1 sc, inc) ×6 (18)
R4 (2 sc, inc) ×6 (24)
R5 (3 sc, inc) ×6 (30)
R6 – R15 sc around (30)
Insert safety eyes between R10–R11, approx. 10 sts apart.
R16 (3 sc, dec) ×6 (24)
R17 (2 sc, dec) ×6 (18)
R18 (1 sc, dec) ×6 (12)
Stuff firmly and close.
👃 3-D Beak & Pouch Assembly
Upper Beak (Yellow)
Ch 28.
R1 sc in 2nd ch and across (27).
R2 inc each end (29).
R3 – R5 sc around edges to form a shallow curve.
Switch to pink on final round for inner lining.
Fold lengthwise, join edges using sl st along sides to create 3-D curved tube.
Lower Pouch (Pink)
Ch 30.
R1 sc in 2nd ch and across (29).
R2 inc each end (31).
R3 (5 sc, inc) ×5 (36).
R4 – R6 sc around (36).
Stuff lightly along outer edge to give rounded volume.
Surface stitch a yellow border along both sides for definition.
Join upper and lower beak at rear edges; leave slight opening at front to form natural mouth curve.
Attach entire beak assembly under eyes so it extends forward and downward as in photo.
👣 Feet (2× Pink)
R1 MR 6 sc (6)
R2 inc ×6 (12)
R3 (1 sc, inc) ×6 (18)
R4 (2 sc, inc) ×6 (24)
R5 – R6 sc around (24)
R7 (3 sc, dec) ×4 (20)
R8 sc around (20)
Stuff and flatten into wide webbed feet.
FO and sew slightly angled so pelican sits upright.
🪽 Wings (2× Dark Blue with White Scalloped Feathers)
R1 MR 6 sc (6)
R2 inc ×6 (12)
R3 (1 sc, inc) ×6 (18)
R4 (2 sc, inc) ×6 (24)
R5 (3 sc, inc) ×6 (30)
R6 – R10 sc around (30)
Flatten and sl st closed.
Scalloped White Feathers:
Attach white yarn to bottom edge FLO.
(sc, hdc, dc, hdc, sc in next 2 sts) repeat across edge to form even scallops.
Fasten off and weave ends.
Sew to body angled backward and slightly downward for a natural pose.
🪶 Tail (White)
R1 MR 6 sc (6)
R2 inc ×6 (12)
R3 (1 sc, inc) ×6 (18)
R4 sc around (18)
Flatten and sl st closed.
FO and attach to lower back.
🧵 Assembly Order
1️⃣ Sew neck to body first (angled forward).
2️⃣ Attach head to top of neck with gentle curve alignment.
3️⃣ Position beak slightly open and secure with extra stitch under jaw.
4️⃣ Add wings and feet for balance.
5️⃣ Insert tail and finish with tiny white eye dots for shine.
🌊 Finishing Touches
✔ Steam-block lightly to set curves of beak and wings.
✔ If desired, mount on a wood base for display.
✔ Fluff and soften fibers by brushing lightly with a soft toothbrush.
💬 Final Result
Your pelican now matches the photo perfectly — a proud, upright bird with a long elegant neck, sculpted pouch beak, layered white-tipped wings, and rounded coral feet. This design combines structural crochet and artistry, bringing a coastal friend to life with joyful personality. 🦤💛