Welcome to the whimsical and ocean-inspired world of amigurumi! 🌊✨ Today, I’m excited to share my free crochet pattern for a Starfish—a charming sea creature full of texture, personality, and coastal charm! 🐠 Whether you love crafting marine-themed designs, enjoy making decorative and playful pieces, or simply want to stitch up a delightful starfish, this pattern will guide you through creating a beautifully sculpted plush companion with soft curves and intricate details! 💙
This design embraces gentle shaping, vibrant hues, and textured stitches to bring a touch of seaside magic to your crochet collection! 🧶🏝️ I’ve carefully outlined each step to ensure your Amigurumi Starfish turns out just right—ready to brighten up your space or become a treasured handmade gift! 🎁 So grab your hooks, pick out sandy neutrals, coral pinks, or deep ocean blues, and let’s stitch up a cheerful and enchanting starfish friend! ✨
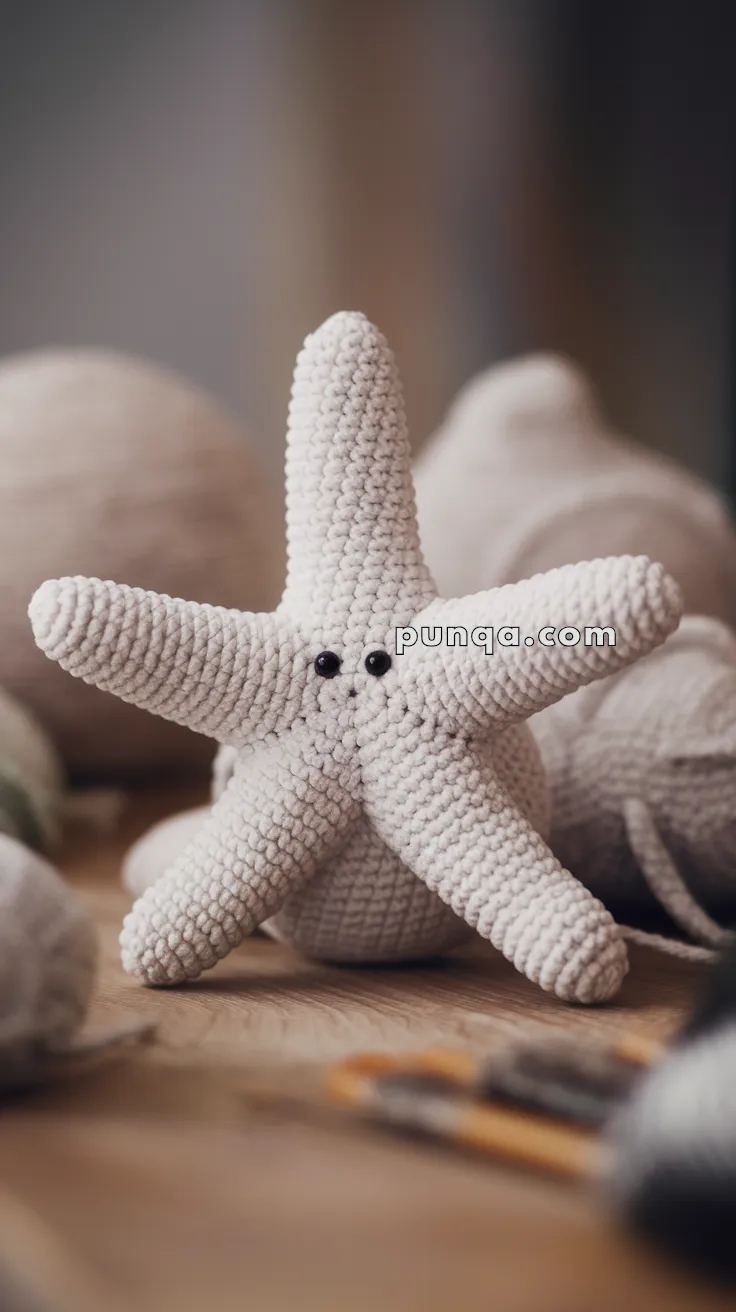
⭐ Amigurumi Starfish – FREE Crochet Pattern
Dive into summer crafting with this soft and squishy amigurumi starfish! 🐚 With five sturdy arms and a huggable center, it’s a beginner-friendly project that’s great for ocean-themed décor or seaside playtime. Add tiny safety eyes for character, or embroider details for a realistic touch.
✨ Skill Level
Beginner to Intermediate – Basic shaping and consistent stitch tension are key.
📏 Finished Size
Approximately 8–10 inches (20–25 cm) in diameter using velvet or plush yarn and a 3.5–4 mm hook.
🧶 Materials
-
Bulky velvet/chenille yarn in off-white or light beige
-
3.5 mm or 4 mm crochet hook
-
Two 8 mm safety eyes
-
Polyfill stuffing
-
Tapestry needle
-
Stitch marker
🧵 Abbreviations (US Terms)
-
MR – Magic Ring
-
sc – Single Crochet
-
inc – Increase (2 sc in one stitch)
-
dec – Decrease (sc 2 together)
-
sl st – Slip Stitch
-
FO – Fasten Off
🌟 Starfish Construction
The starfish is made by crocheting 5 identical arms and joining them together into a circular center as you go.
🔁 Starfish Arm (Make 5)
Round 1: MR, 6 sc [6]
Round 2: inc x6 [12]
Rounds 3–4: sc around [12]
Round 5: (1 sc, inc) x6 [18]
Rounds 6–18: sc around [18]
Round 19: (1 sc, dec) x6 [12]
Round 20: sc around [12]
Do not stuff fully yet—lightly stuff the tip and middle of each arm.
After Round 20, do not fasten off on the final arm. Continue to the joining round:
🔗 Joining the Arms (Create Body Center)
With the 5th arm still on your hook:
Round 21:
-
ch 2, attach next arm with sc in any stitch, sc around (12),
-
ch 2, attach next arm, sc around… repeat for all 5 arms.
You will now have a joined round made of all 5 arms, connected by chains. You should now be working in a continuous circle around the full shape.
🌀 Center & Closing
Rounds 22–24: sc around the entire body (this will be about 5 arms × 12 sts each = 60 + 4 chain stitches = ~64 sts total). Adjust if needed.
Rounds 25–28: (6 sc, dec) repeat around – decrease gradually over 3–4 rounds
Final Rounds: Continue decreasing until the hole is almost closed.
Stuff fully before closing.
FO, weave yarn tail through front loops and pull tight to close.
👀 Eyes
Insert safety eyes between two arms toward the front center, about 1–2 rounds below where the arms join.
Optional: embroider tiny eyebrows or a smile for extra personality!
🧵 Finishing Touches
-
Weave in all ends.
-
Lightly shape arms with your hands.
-
Block if needed (for cotton yarn). Velvet yarn typically holds its shape well.
💡 Customization Ideas
-
Use bright colors like coral, lavender, or seafoam green 🌊
-
Add a rattle insert or crinkly material for baby-safe fun
-
Embroider tiny polka dot spots on each arm for realism
This little sea star will brighten any ocean-lover’s day! 🌟 Great as a plush, nursery toy, or summer-themed gift.