Bring a burst of playful charm to your crochet collection with the Amigurumi Frog on a Swing, a delightful project that’s full of personality! 🐸🧶 With its big expressive eyes, friendly smile, and dangling legs perched on a braided swing, this little frog is sure to brighten any space. Whether it’s hanging in a cozy corner, displayed as part of your décor, or gifted to someone special, this cheerful companion adds a touch of handmade whimsy wherever it goes.
Quick to make and endlessly fun, this frog ornament is perfect for crocheters who love creating pieces that spark joy. Its lightweight design makes it easy to hang from a rearview mirror, shelf, or even a festive display, bringing a smile every time you see it. The Amigurumi Frog on a Swing is a joyful way to crochet character, charm, and a sprinkle of handmade magic—one loop at a time! 🧵✨🌿
🐸 Adorable Amigurumi Frog on a Swing Crochet Pattern
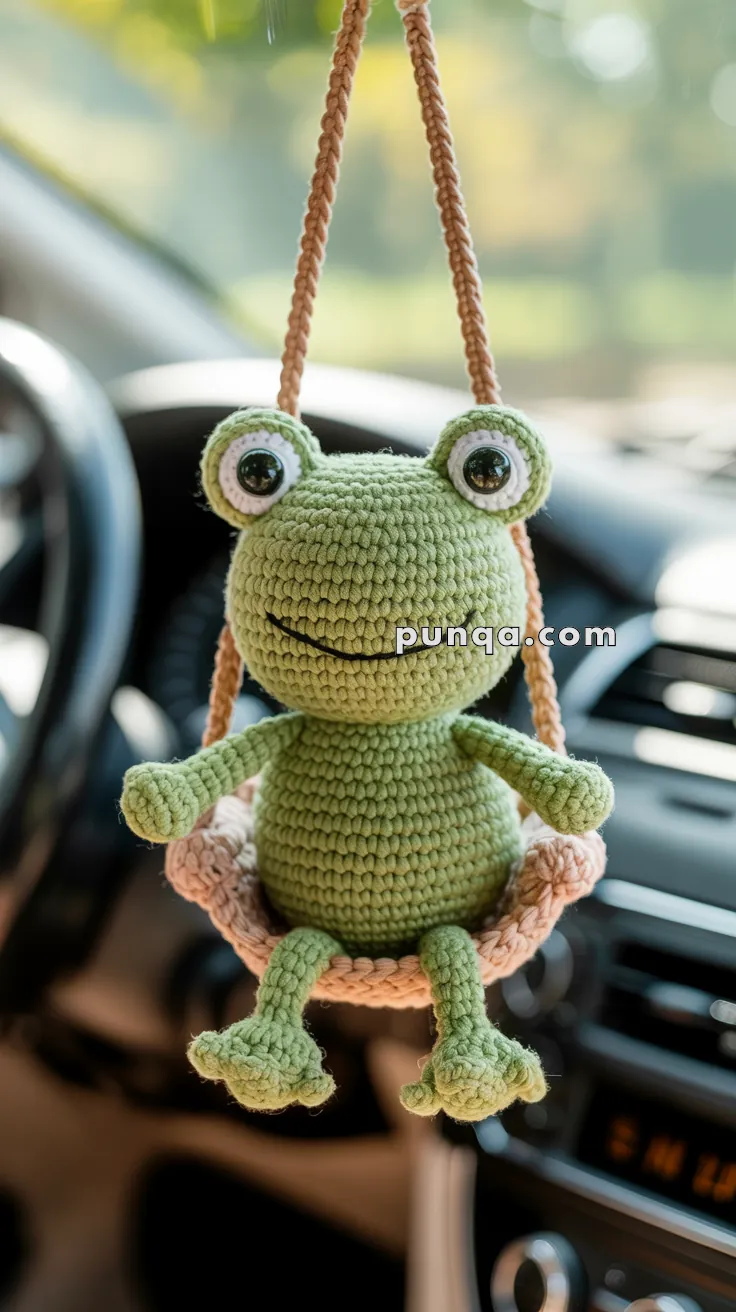
Bring a touch of charm and whimsy to your car or craft space with this delightful amigurumi frog sitting happily on a soft crochet swing. With his big round eyes, chubby face, long legs, three-toe feet, and perfect upright posture, this frog radiates friendliness and joy. The braided straps and deep swing seat complete the look, making him a perfect hanging decoration or thoughtful handmade gift.
✨ Skill Level
🧶 Advanced Beginner – Intermediate
This project includes:
- shaping in the round
- raised eye construction
- toe assembly
- swing construction
- plush chenille yarn handling
📏 Finished Size
Approx. 13–15 cm (5–6 inches) tall while seated in swing
Straps add additional hanging length.
🧶 Materials & Yarn Amount
Yarn
Chenille or velvet yarn recommended for the plush appearance.
- Light sage green: 90–110 g
- White: 10–15 g
- Beige / tan: 40–50 g
- Black embroidery thread: small amount
Supplies
- 4.0–5.0 mm crochet hook
- 12–14 mm safety eyes
- Polyester stuffing
- Yarn needle
- Stitch markers
- Scissors
Optional:
- macramé cord or thicker yarn for extra sturdy straps
🔤 Abbreviations (US Terms)
MR – magic ring
sc – single crochet
inc – increase
dec – invisible decrease
sl st – slip stitch
FO – fasten off
🐸 Head
The head is large, rounded, and slightly wider than the body with a soft forward curve.
Using green yarn:
Rnd 1: MR 6 (6)
Rnd 2: inc ×6 (12)
Rnd 3: (1 sc, inc) ×6 (18)
Rnd 4: (2 sc, inc) ×6 (24)
Rnd 5: (3 sc, inc) ×6 (30)
Rnd 6: (4 sc, inc) ×6 (36)
Rnd 7: (5 sc, inc) ×6 (42)
Rnd 8–15: sc around (42)
Rnd 16: (5 sc, dec) ×6 (36)
Rnd 17: (4 sc, dec) ×6 (30)
Rnd 18: (3 sc, dec) ×6 (24)
Stuff firmly while shaping cheeks evenly.
Rnd 19: (2 sc, dec) ×6 (18)
Rnd 20: (1 sc, dec) ×6 (12)
Rnd 21: dec ×6 (6)
FO and close tightly.
👀 Raised Eye Domes (Make 2)
These create the large protruding frog eyes.
Using green yarn:
Rnd 1: MR 6
Rnd 2: inc ×6 (12)
Rnd 3: (1 sc, inc) ×6 (18)
Rnd 4–5: sc around (18)
FO.
Do not stuff.
The domes should remain shallow and rounded.
⚪ Eye Whites (Make 2)
Using white yarn:
Rnd 1: MR 6
Rnd 2: inc ×6 (12)
Rnd 3: (1 sc, inc) ×6 (18)
FO.
Insert safety eyes through:
- white circles
- green eye domes
- head
Attach eyes high and wide on top portion of face.
The eyes should visibly protrude upward.
😊 Smile
Using black embroidery thread:
Embroider a soft slightly curved smile low across the face.
Keep the smile thin and minimal.
🐸 Body
The body is short, rounded, and wider at the bottom.
Using green yarn:
Rnd 1: MR 6 (6)
Rnd 2: inc ×6 (12)
Rnd 3: (1 sc, inc) ×6 (18)
Rnd 4: (2 sc, inc) ×6 (24)
Rnd 5: (3 sc, inc) ×6 (30)
Rnd 6–10: sc around (30)
Rnd 11: (3 sc, dec) ×6 (24)
Rnd 12–13: sc around (24)
Stuff firmly.
Rnd 14: (2 sc, dec) ×6 (18)
FO leaving long tail.
The body should remain pear-shaped and rounded.
🐸 Arms (Make 2)
The arms are short, narrow, and softly tapered.
Using green yarn:
Rnd 1: MR 6 (6)
Rnd 2–9: sc around (6)
Lightly stuff only hand area.
Flatten top edge.
FO leaving long tail.
The arms should stay slim and slightly floppy.
🐸 Legs (Make 2)
The legs are longer than the arms and lightly curved.
Using green yarn:
Rnd 1: MR 6 (6)
Rnd 2: (1 sc, inc) ×3 (9)
Rnd 3–16: sc around (9)
Light stuffing only.
FO leaving tail.
The legs should remain flexible and dangling.
🐾 Frog Feet (Make 2)
Each foot has three rounded toes.
Toes (Make 3 per Foot)
Using green yarn:
Rnd 1: MR 5
Rnd 2: sc around (5)
FO.
Do not stuff.
Foot Base
Using green yarn:
Rnd 1: MR 6
Rnd 2: inc ×6 (12)
Rnd 3–4: sc around (12)
Lightly stuff.
FO.
Joining Toes
Sew the three toes side-by-side onto front edge of foot base.
Position:
- center toe facing forward
- outer toes angled outward slightly
Attach leg securely to back-center of foot.
The finished foot should appear wide and rounded.
🪵 Swing Seat
The swing is soft and deeply curved like a tiny hammock.
Using beige yarn:
Ch 12
Seat Panel
Row 1: sc in 2nd ch from hook and across (11)
Rows 2–12: sc across (11)
Curved Border
Work evenly around rectangle:
Rnd 1: sc around with 3 sc in each corner
Rnd 2: sc around
Rnd 3: sc around
Lightly shape upward by hand.
The seat should naturally curve into a bowl shape.
🪢 Braided Hanging Straps
Cut:
- 6 long strands of beige yarn
Divide into:
- 2 groups of 3 strands
Create:
- 2 tight braids
Attach one braid securely to each side of swing seat.
Reinforce attachment points with extra stitching.
🧩 Assembly
🪡 Sew head to body with slight forward tilt
🪡 Attach arms high near neck seam
🪡 Attach legs low on front underside of body
🪡 Sew feet angled outward naturally
🪡 Stitch frog lightly into center of swing
🪡 Attach braided straps securely to swing edges
The frog should sit deeply inside the swing with legs hanging freely over edge.
✨ Shaping Tips
✨ Keep head large and rounded
✨ Eye domes should visibly protrude
✨ Arms remain tiny and slim
✨ Legs should dangle naturally
✨ Swing should curve upward at sides
✨ Avoid overstuffing limbs
💚 Finished Frog Swing
This adorable hanging frog combines plush texture, oversized expressive eyes, dangling legs, and a cozy swing into one irresistibly cute crochet project 🐸🧶 The rounded body, tiny arms, soft smile, and braided hanging cords create a playful decoration perfect for mirrors, nursery décor, gifts, or cozy handmade spaces.