Rev up your hooks for a quick and cheerful project with the Amigurumi Car Keychain, a pint-sized crochet cutie that’s ready to roll wherever you go! 🚗🧶 With its cartoon-style eyes, bright headlights, and sweet smile, this tiny car is bursting with personality. The side windows and bold wheels give it that classic road-ready look, making it a fun and functional accessory for your keys, backpack, or gift-giving stash.
Perfect for crocheters who love speedy makes and playful designs, this pattern invites you to explore bold colors, simple shaping, and charming details. Whether you’re crafting it for a little car enthusiast, adding flair to your own keyring, or whipping up a batch for market season, the Amigurumi Car Keychain is a delightful way to stitch up joy, whimsy, and a whole lot of handmade charm—one loop at a time! 🧵💨
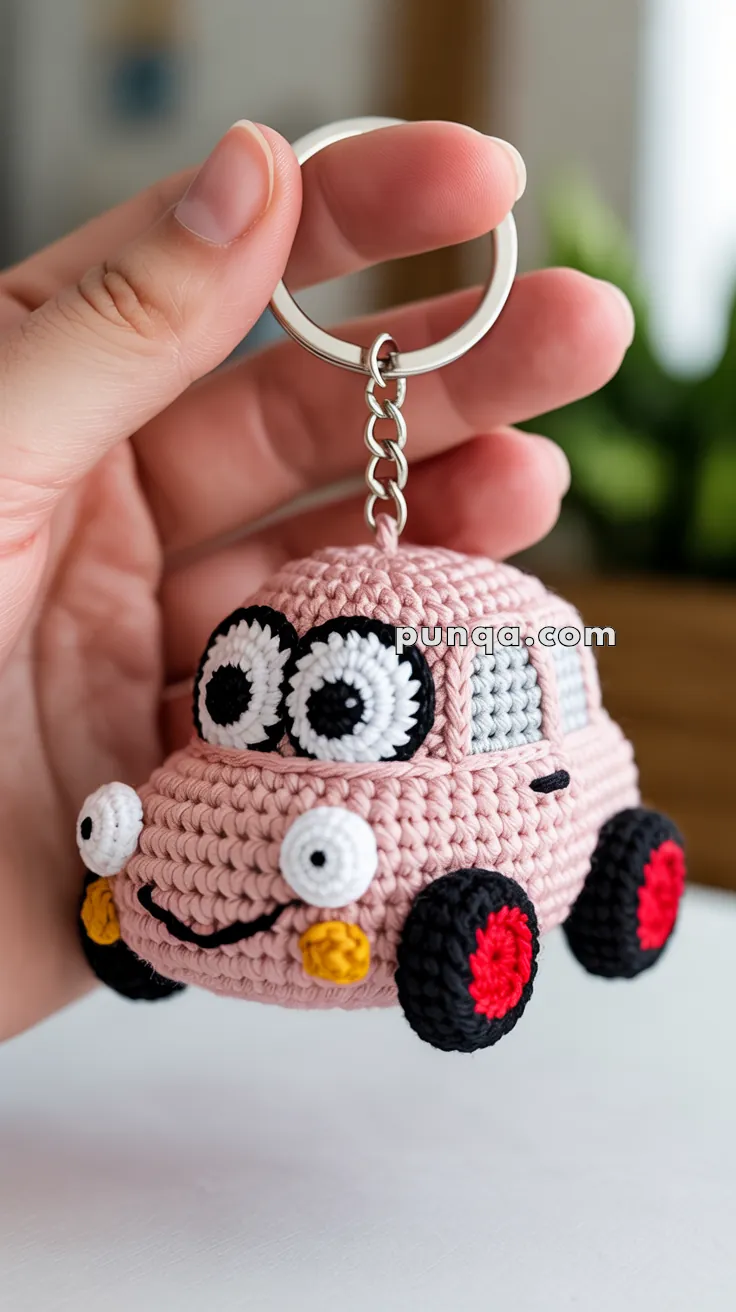
🚗 Amigurumi Cartoon Car Keychain Crochet Pattern
Bring a smile to your keys with this adorable mini crochet car keychain!
With its oversized eyes, cheerful grin, and bright details, this amigurumi car looks like it just rolled out of a cartoon. Compact, colorful, and irresistibly cute — it’s a quick project that’s sure to impress.
✨ Skill Level
Intermediate – Small parts, shaping, color changes, and detailed assembly.
📏 Finished Size
Approximately 2.5–3 in (6–7.5 cm) long when made with DK yarn and a 2.5–3 mm hook.
🧶 Materials
- DK or sport weight yarn
- Light pink – main car body
- Grey – windows
- White – eyes and light borders
- Black – wheel tires, pupils, smile, outlines
- Red – wheel centers
- Yellow – headlights
- Crochet hook: 2.5–3 mm
- Fiberfill stuffing
- Metal keychain ring with small chain
- Tapestry needle, stitch marker, scissors
🧵 Abbreviations (US Terms)
MR – Magic Ring
sc – Single crochet
inc – Increase (2 sc in same st)
dec – Decrease (sc2tog)
sl st – Slip stitch
FO – Fasten off
ch – Chain
🚗 Body (Light Pink)
1️⃣ MR, 6 sc (6)
2️⃣ inc ×6 (12)
3️⃣ (1 sc, inc) ×6 (18)
4️⃣ (2 sc, inc) ×6 (24)
5️⃣ (3 sc, inc) ×6 (30)
6–13️⃣ sc around (30)
Front-hood shaping:
14️⃣ sc 26, turn, sc 26 → repeat 2 more times to raise front.
15️⃣ Resume in round → (3 sc, dec) ×6 (24)
16️⃣ (2 sc, dec) ×6 (18) – stuff firmly.
17️⃣ (1 sc, dec) ×6 (12)
18️⃣ dec ×6 (6), FO and close.
Before closing, make a yarn loop through top center for the keychain chain.
🛞 Wheels (Make 4)
With red yarn:
1️⃣ MR, 6 sc (6)
Switch to black:
2️⃣ (1 sc, inc) ×6 (18)
3️⃣ sc around (18)
4️⃣ sc around (18) → creates depth.
Stuff lightly, flatten slightly, FO.
Attach two wheels to each side near bottom edges.
👀 Eyes (Make 2, Joined)
With black (pupil):
1️⃣ MR, 6 sc (6)
Switch to white:
2️⃣ inc ×6 (12)
3️⃣ (1 sc, inc) ×6 (18)
Switch to black:
4️⃣ sc around (18) for outline. Do not FO first eye yet.
Work second eye same way, then join with sl st and continue 4 more sc to connect them side-by-side.
FO. Sew eyes tilted slightly inward on front top of car.
Add a tiny white stitch on each pupil for sparkle.
💡 Headlights (Make 2)
With yellow:
1️⃣ MR, 6 sc (6)
2️⃣ (1 sc, inc) ×3 (9)
Switch to white:
3️⃣ sc around (9)
Stuff lightly to form rounded “button” shape, FO.
Sew symmetrically under eyes at front corners.
⚪ Bumper Lights / Nose Dots (Make 2)
With white:
MR, 6 sc (6)
sc around (6)
FO and attach on each side of front grille area below headlights.
🪟 Windows (Grey with Pink Border, Make 2)
With grey:
1️⃣ Ch 6. Work 1 sc, 1 hdc, 2 dc, 1 hdc, 1 sc along chain to create arched shape.
2️⃣ Turn, sc across bottom edge to close oval.
Switch to pink and sc evenly around for a thin border.
FO. Sew one on each side aligned with eyes’ top edge.
Optional: surface-stitch a vertical divider between front and side windows.
😊 Smile
With black yarn, embroider a wide smile curve 1–2 rounds above bottom edge, between the headlights.
Add a tiny black dash above each eye for eyebrows.
🔗 Keychain Loop
Cut a 15 cm strand of pink yarn.
Thread through top center, tie secure knot, and attach keychain ring chain to loop.
Reinforce the stitch area inside with a drop of clear fabric glue for durability.
🧩 Assembly & Finishing Touches
- Sew wheels so front pair sit slightly lower for “forward lean.”
- Attach eyes tilted inward, touching at center.
- Position headlights below eyes and nose dots below those.
- Sew windows flush to sides with borders visible.
- Stuff the car firmly to maintain its rounded hood and slightly domed roof.
- Pinch front gently upward to shape the smiling curve.
🌟 Finishing Tips
- Use a slightly tighter gauge for firmer sides.
- For an extra cute look, lightly blush the front cheeks with pink fabric paint.
- Reinforce wheel seams for durability if using as a keychain.
💕 Result
You’ve just made a crochet car keychain!
Its big eyes, domed top, and cheerful grin make it look alive — a tiny friend to carry everywhere you go.
Quick, durable, and full of charm — this is one amigurumi project that’s sure to drive smiles!