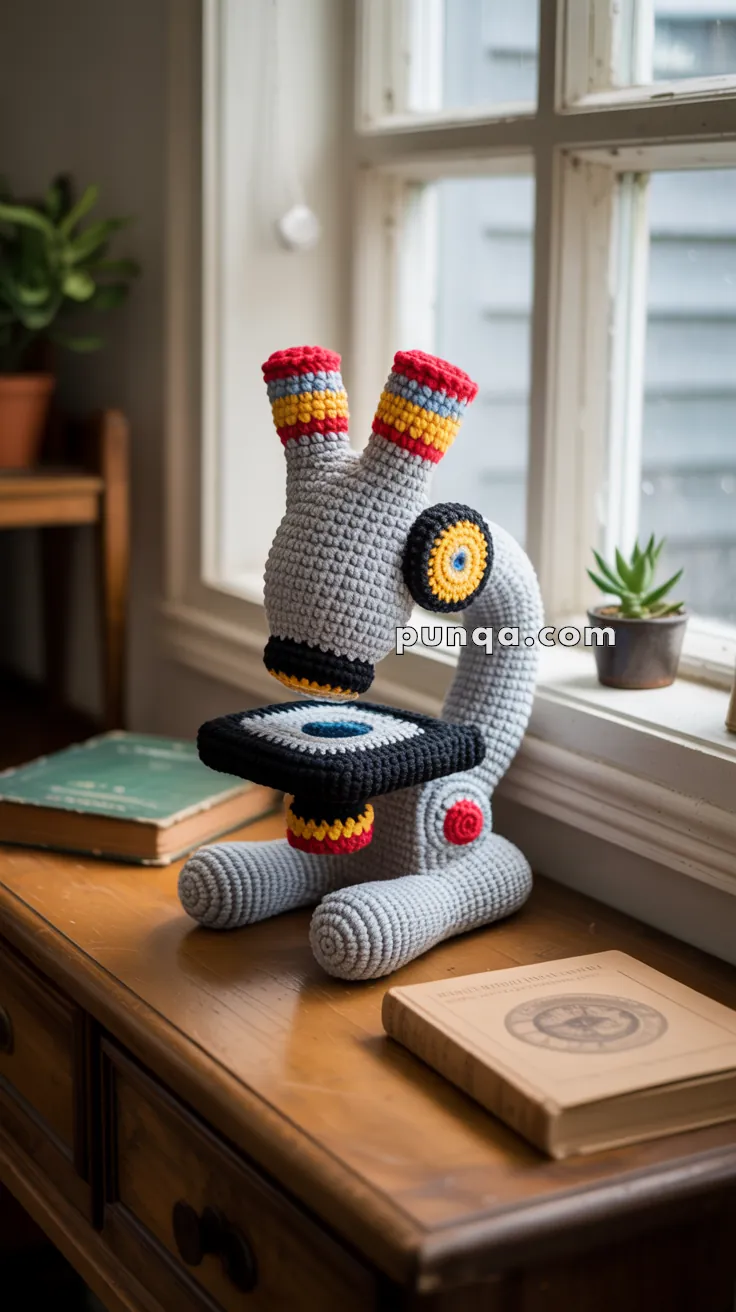
Zoom in on creativity with the Amigurumi Microscope, a clever crochet project that brings science and stitching together in the cutest way! 🔬🧶 With its classic shape, tiny knobs, and playful yarn details, this miniature microscope is perfect for science lovers, teachers, or anyone who enjoys quirky handmade décor. Whether it’s perched on a desk, gifted to a lab enthusiast, or added to a STEM-themed collection, it’s sure to spark curiosity and smiles.
Perfect for crocheters who enjoy crafting unique objects and thoughtful gifts, this pattern invites you to play with colors, add embroidered accents, or even pair it with other science-inspired amigurumi. It’s a fun way to celebrate learning, creativity, and the joy of handmade surprises. The Amigurumi Microscope is a delightful way to stitch up wonder—one tiny loop at a time! 🧵✨
🔬Amigurumi Microscope Crochet Pattern
Looking for a unique and geeky crochet project? This amigurumi microscope is perfect for science lovers, classrooms, or as a playful desk decoration. With its bold colors, curved frame, and realistic stage and knobs, it’s a show-stopping handmade piece that will make everyone smile.
✨ Skill Level
Intermediate to Advanced – You’ll need to be comfortable working in the round, changing colors, assembling multiple parts, and using structural support like wire or cardboard.
📏 Finished Size
Approx. 10–12 in (25–30 cm) tall, when made with worsted weight yarn and a 3.5 mm hook.
🧶 Materials
- Worsted weight yarn in:
- Light gray (main body & stand)
- Black (lens housing, stage)
- Red, yellow, blue (eyepiece stripes, accents)
- Crochet hook: 3.0–3.5 mm
- Yarn needle & stitch markers
- Polyfill stuffing
- Reinforcements: thick craft wire / flexible plastic tubing (for curved stand), thin cardboard or plastic sheet (for stage and base)
- Scissors
🔤 Abbreviations (US Terms)
- MR = Magic Ring
- sc = single crochet
- inc = increase (2 sc in same st)
- dec = decrease (sc2tog)
- sl st = slip stitch
- ch = chain
- BLO = back loop only
- FO = fasten off
🧵 Pattern Instructions
1. Base Feet (Make 2 – Light Gray)
These are the two rounded supports at the bottom.
- MR, 6 sc (6)
- inc ×6 (12)
- Work even in sc until piece measures ~5 in (12 cm).
- FO, stuff firmly.
📌 Insert a strip of plastic canvas or popsicle stick before stuffing for sturdiness.
2. Curved Stand (Light Gray)
This part connects the base to the eyepieces.
- MR, 6 sc (6)
- inc ×6 (12)
- (1 sc, inc) ×6 (18)
- Work even in sc until piece measures ~12 in (30 cm).
- FO, stuff as you go.
📌 Insert a length of thick wire or flexible tubing inside before bending it into a curve. Attach one end between the two feet and the other under the eyepiece section.
3. Eyepiece Tubes (Make 2 – Striped)
- MR, 6 sc (6)
- inc ×6 (12)
- Work even for ~2 in.
- Add stripes in this order:
- 2 rnds red
- 2 rnds yellow
- 2 rnds blue
- 2 rnds gray
- 2 rnds red (top edge)
- FO, stuff firmly.
📌 Sew both eyepiece tubes close together at the top of the stand, tilted slightly inward.
4. Lens Housing (Black + Yellow Trim)
- MR, 6 sc (6)
- inc ×6 (12)
- (1 sc, inc) ×6 (18)
- 2 rnds sc (18)
- Switch to yellow: 1 rnd sc (18)
- FO, stuff lightly.
📌 Sew under eyepieces, directly above the stage.
5. Stage (Black Rectangle)
- Ch 16, turn, sc across (15).
- Work 12 rows of sc.
- Make 2 panels.
📌 Place a piece of thin cardboard or plastic sheet between panels, sew edges together.
📌 Embroider a blue and white circle in the center to mimic a glass slide.
📌 Attach stage horizontally to the curved stand, below lens housing.
6. Focus Knobs
Large Side Knob (Black + Yellow + Blue):
- MR, 6 sc (6)
- inc ×6 (12)
- (1 sc, inc) ×6 (18)
- 2 rnds sc (18)
- Add 1 rnd yellow, then embroider blue circle in center.
- FO, stuff firmly. Sew to side of stand.
Small Knob (Red):
- MR, 6 sc (6)
- inc ×6 (12)
- 1 rnd sc (12)
- FO, stuff, attach lower on the stand.
⚙️ Assembly
- Sew base feet side by side.
- Attach bottom of curved stand across both feet.
- Attach eyepieces at top of stand.
- Sew lens housing under eyepieces.
- Attach reinforced stage below lens.
- Sew large knob on one side and small red knob lower down.
- Adjust curve of stand before final sewing, making sure everything aligns upright.
✨ Finishing Touches
- Use firm stuffing + reinforcements so the stand keeps its curved shape.
- Block stage edges flat with light steam.
- Double-stitch knobs so they pop out firmly.
- Add extra embroidery details if desired (rings or lines).
🎉 Final Result
You now have a one-of-a-kind crochet microscope with bold colors, sturdy structure, and playful detail. It’s a perfect project for gifting to a science lover, decorating a classroom, or adding a quirky handmade piece to your home!