Bring a touch of nature’s serenity to your crochet collection with this Amigurumi Bird on a Branch pattern! This peaceful scene features a sweet little bird perched gracefully on a crocheted branch, surrounded by delicate blossoms and soft leaves. Whether you’re crafting for spring décor, gifting to a nature lover, or simply indulging in a tranquil project, this charming design captures the quiet magic of a moment in bloom. 🧶🐦🌸
Designed for detail and harmony, this pattern invites you to explore gentle shaping, floral accents, and creative assembly. Customize your bird with seasonal colors, add tiny eggs or a nest for storytelling flair, or mount the whole scene in a hoop for wall art. Whether perched on a shelf, nestled in a gift basket, or starring in a handmade tribute to the beauty of the outdoors, this Bird on a Branch Amigurumi is a joyful and satisfying project—perfect for stitching up a little handmade calm, one loop at a time! 💖✨🌿
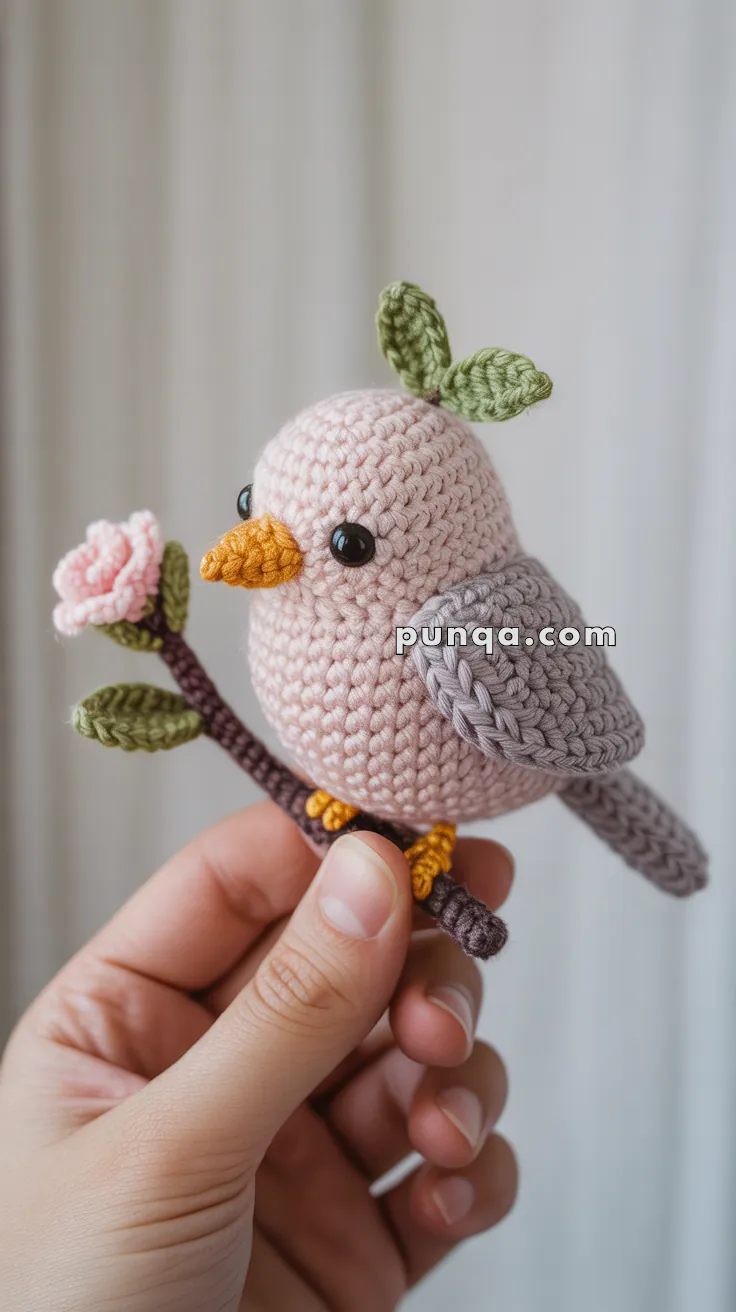
🐦 Amigurumi Spring Bird on a Blossom Branch Crochet Pattern
This sweet little amigurumi bird is perched gracefully on a blooming branch, complete with textured wings, leaf accents, and a soft round body. It’s the perfect decorative project for spring, Easter baskets, or nursery decor. Learn how to shape its distinctive plump head-and-body silhouette for a lifelike yet whimsical look!
✨ Skill Level
Intermediate – Basic amigurumi with subtle shaping, assembly, and small parts (wings, leaves, flower).
📏 Finished Size
Approx. 4.5–5 inches (12–13 cm) long when using sport or DK yarn and a 2.25–2.75 mm hook.
🧶 Materials
- Sport or DK weight yarn in:
- Blush Pink (Body/Head)
- Soft Grey (Wings & Tail)
- Mustard (Beak & Feet)
- Brown (Branch)
- Green (Leaves)
- Light Pink (Flower)
- 2.25–2.75 mm crochet hook
- 6 mm safety eyes (or black beads)
- Tapestry needle
- Polyfill stuffing
- Stitch marker
- Hot glue (optional for attaching flower/leaves)
🧵 Abbreviations (US Terms)
- MR – Magic Ring
- sc – Single Crochet
- inc – Increase (2 sc in one stitch)
- dec – Decrease (sc 2 together)
- sl st – Slip Stitch
- ch – Chain
- FLO/BLO – Front/Back Loops Only
- FO – Fasten Off
🧠 Shaping the Head & Body as One Continuous Form
This bird’s round, slightly oval shape is formed by crocheting the head and body in one seamless piece, gradually increasing the width for the belly and then tapering back to a point at the tail.
🐦 Head + Body (in blush pink)
- MR, 6 sc
- inc x6 (12)
- (1 sc, inc) x6 (18)
- (2 sc, inc) x6 (24)
- (3 sc, inc) x6 (30)
- (4 sc, inc) x6 (36)
7–11. sc around (36) - (5 sc, inc) x6 (42) ← creates the widest part of the bird’s belly
13–15. sc around (42) - (5 sc, dec) x6 (36)
- (4 sc, dec) x6 (30)
- (3 sc, dec) x6 (24)
– Place safety eyes between R6–7, approx. 6–7 stitches apart
– Begin stuffing - (2 sc, dec) x6 (18)
- (1 sc, dec) x6 (12)
– Shape slightly longer in the back to form tail end - dec x6 (6)
Stuff fully and FO, weave tail to close.
Tips for shaping:
- Push stuffing firmly toward the top of the bird to make the head rounder
- Leave the bottom fuller for a classic “fat bird” silhouette
- If needed, shape with your fingers once stuffed
🪶 Wings (Make 2 – grey yarn)
- MR, 6 sc
- (1 sc, inc) x3 (9)
- (2 sc, inc) x3 (12)
- (3 sc, inc) x3 (15)
5–6. sc around (15) - dec, 5 sc, dec, 6 sc (13)
- sc around
- dec, 4 sc, dec, 5 sc (11)
FO, flatten, do not stuff
Sew to sides of bird slightly downward and back from eyes
🐤 Beak (Mustard)
- MR, 4 sc
- (1 sc, inc) x2 (6)
- sc around (6)
FO, stuff lightly, sew below eyes.
🦶 Feet (Make 2 – Mustard)
- ch 4
- sc in 2nd ch from hook and next 2 sts
Repeat to make 3 toes
Sew to bottom of body or stitch directly to branch
🪶 Tail (Grey)
- ch 8
- sc in 2nd ch from hook, hdc in next, dc x4, tr in last
Turn and work down other side with same stitch pattern
FO, sew to back of bird
🌸 Blossom Branch
🌿 Leaves (Green – Make 3–5)
- ch 5
- sc in 2nd ch from hook, hdc, dc, sc in last
Turn to opposite side: sc, dc, hdc, sc
FO and weave in tail
🌺 Flower
- MR, 5 sc (do not join), sl st to first
- ch 2, 3 dc in same st, sl st next – repeat in each st around (5 petals)
FO and sew to branch
🪵 Branch (Brown)
- ch 26
- sc in 2nd ch from hook and across
Optionally, add a second row for more thickness
Sew or glue to feet and flower
🧷 Assembly Tips
- Attach wings, tail, beak, and eyes securely
- Position feet first, then sew or glue branch under
- Add leaf and flower decor where desired
- Slightly tilt the bird’s head when positioning to give it character
- Gently shape with your hands if needed
💡 Customization Ideas
- Use pastel colors for spring themes
- Hang from thread as a mobile
- Make a matching pair for decor or gifts
- Embroider blush cheeks for a cuter look
This charming bird on a flowered perch is a joyful project that brings a bit of nature and love into your crochet collection. Perfect for spring, baby gifts, or just to make you smile! 🐦🌸💚