Rev up your style with this Moto-Chic Crochet Handbag pattern—a bold and edgy accessory that brings biker flair to your handmade wardrobe! Styled to mimic the sleek lines and attitude of a classic leather jacket, this black crochet bag features clever detailing like faux zippers, lapels, and textured stitches that scream confidence and cool. Whether you’re heading out for a night on the town or just want to add a little rock-and-roll to your everyday look, this bag is the perfect blend of fashion and function. 🖤🧶👜
Designed for crocheters who love a statement piece, this pattern invites you to play with structure, shaping, and stylish accents like metallic buttons or chain straps. Add a pop of color with a bold lining or keep it classic with all-black everything. Whether you’re gifting it to a fashion-forward friend or rocking it yourself, this Moto-Chic Handbag is a fierce and satisfying project—perfect for stitching up a little handmade attitude, one loop at a time! 💖✨🏍️
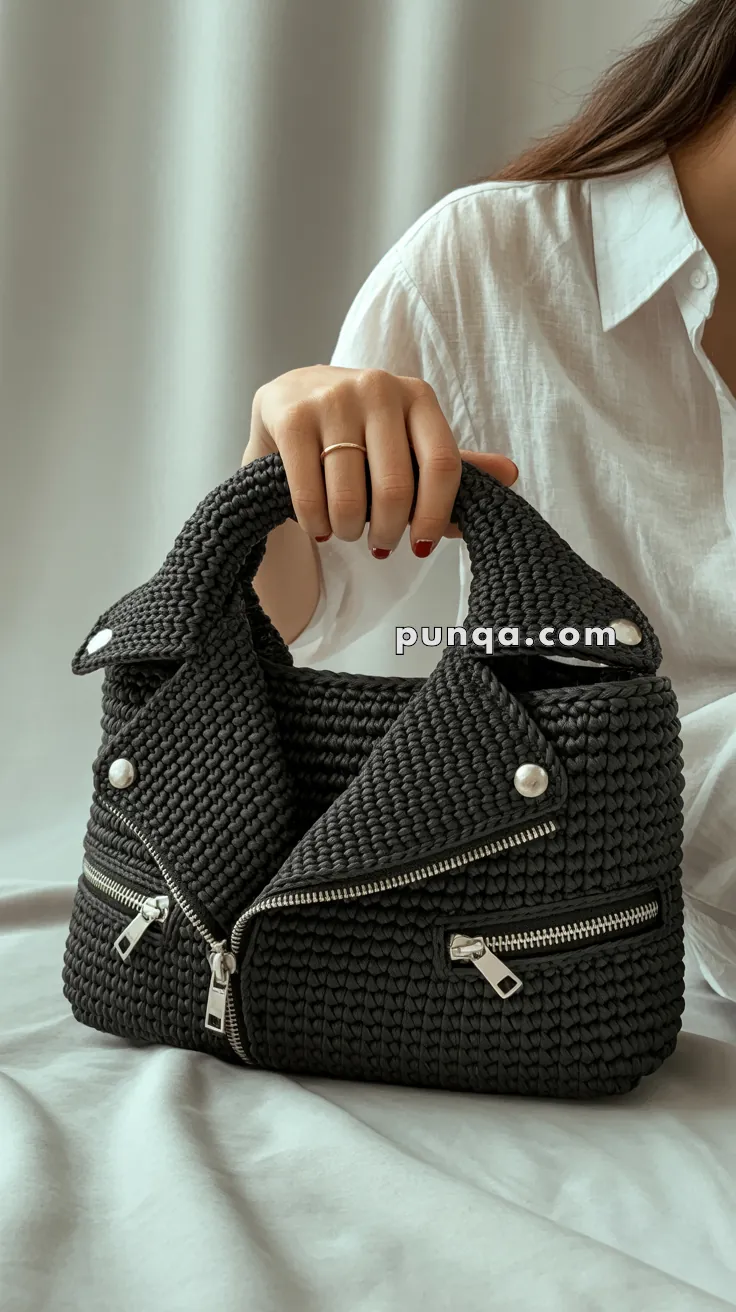
👜 Moto-Chic Crochet Handbag Pattern
Channel the bold attitude of a biker jacket in a sleek, hand-crocheted handbag. This modern accessory is worked in sturdy 5 mm cord yarn and styled with angled lapels, diagonal metal zippers, a structured silhouette, and soft rolled handles. Despite its edgy look, the construction is simple and satisfying, with minimal shaping and clear steps.
✨ Skill Level
Adventurous Beginner → Intermediate — uses basic stitches, light shaping, and simple hardware application.
📏 Finished Size
- Height: 9 in / 23 cm
- Width: 11 in / 28 cm
- Depth: 4 in / 10 cm
- Handle Drop: 5 in / 13 cm
(Easily resized by adding or removing foundation chains or body rounds.)
🧶 Materials
Yarn
- 400 g braided cotton cord (5 mm) — Jet Black
Hook
- 6 mm (J) crochet hook
Hardware
- (2) 9 in / 23 cm metal zippers (for lapel edges)
- (1) 7 in / 18 cm metal zipper (optional interior pocket)
- (2) silver dome snaps (lapel tips)
- (1) magnetic snap or 11 in separating zipper (main closure)
Extras
- Strong black thread
- Zipper foot or hand-sewing needle
- Clips or pins
- Scissors
- Optional: cotton lining fabric (½ yd / 0.5 m)
🪡 Abbreviations
sc – single crochet
sl st – slip stitch
ch – chain
inc – increase
dec – decrease
MR – magic ring
st – stitch
BLO – back loop only
FLO – front loop only
FO – fasten off
1️⃣ Bag Base (Worked Flat)
Ch 26.
Row 1: sc in 2nd ch from hook and each across (25). ch 1, turn.
Rows 2–20: sc across (25). ch 1, turn.
You now have a rectangle approx. 11 × 4 in (28 × 10 cm).
Do not fasten off.
Rotate the piece and sc evenly around all edges, placing 3 sc in each corner.
You should end with 84 sc around. sl st to join.
2️⃣ Body (Worked in the Round)
Begin a continuous spiral:
Round 1: ch 1, sc around (84).
Rounds 2–24: sc around (84).
Move marker each round.
This forms the main body tube.
3️⃣ Handle Openings
Round 25
- sc 18
- skip 16 sts, ch 16
- sc 16
- skip 16 sts, ch 16
- sc to marker
(Still 84 sts total.)
Rounds 26–27
sc into every stitch and chain around (84).
Optional Round 28
BLO sc around for a subtle ridge.
Rounds 29–31
sc around. sl st and FO.
4️⃣ Rolled Handles (Make 2)
Ch 10. Join into a ring.
Rounds 1–38: sc around (9 sts).
Stuff lightly as you go so the tube remains firm and rounded.
FO.
Sew each tube neatly over the chain arches to form the two rolled handles.
5️⃣ Lapels (Make 2)
These triangular pieces create the moto-jacket shape.
Ch 20.
Row 1: sc in 2nd ch from hook and across (19). ch 1, turn.
Row 2: dec, sc to end (18). ch 1, turn.
Rows 3–16: repeat Row 2, decreasing only at the start of every row.
FO.
Edge Finish:
sc evenly around the two straight sides only, leaving the long diagonal edge unworked (for the zipper).
6️⃣ Zipper Panels (Make 2)
Ch 14.
Rows 1–4: sc across (13). FO.
Sew each panel to the inner edge of a 9-inch metal zipper so the zipper looks neatly inset.
7️⃣ Assembly
Attach Lapels
Pin each triangle along the top rim:
- Short sides attach to the rim
- Long diagonal edges point inward
- Lapel tips angle downward
Whip-stitch short sides to the rim securely.
Sew Zippers
Place the zipper tape along each diagonal lapel edge.
Sew with a zipper foot or hand-stitch close to the teeth.
When both zippers close, they naturally form the classic angled “V” shape.
Add Lapel Snaps
Attach silver dome snaps to each lapel tip.
Sew the matching snap pieces to the bag body so the lapels can fold back neatly.
Choose Your Main Closure
Option A — Magnetic Snap
Attach one half inside front rim and the other inside the back rim.
Option B — Separating Zipper
Sew around the top edge from the inside, stitching only through inner loops so the seam remains invisible outside.
8️⃣ Optional Interior Pocket
Ch 18.
Work 8–10 rows of sc to form a rectangle.
Sew a 7-inch zipper along one long edge.
Attach to lining or interior wall of the bag.
9️⃣ Lining (Recommended)
- Trace the flattened bag base and body onto fabric.
- Cut with 1 cm seam allowance.
- Sew side seams and press.
- Insert lining into bag and fold upper edge inward.
- Hand-stitch the lining right below the rim.
- If using a zipper closure, also stitch lining to zipper tape.
🌟 Customization Ideas
- Add a chain strap with D-rings
- Decorate with metal studs or patches
- Work the lapels in a contrasting color
- Make a mini version by starting with ch 18
- Add a crossbody detachable strap
🧽 Care Instructions
- Spot-clean with a damp cloth
- Avoid machine washing due to hardware
- Lay flat to dry, reshaping while damp
🎉 You’re Done!
Your Moto-Chic Crochet Handbag is complete — structured, edgy, stylish, and fully handmade. This modern accessory pairs beautifully with denim jackets, casual outfits, and street-style looks.