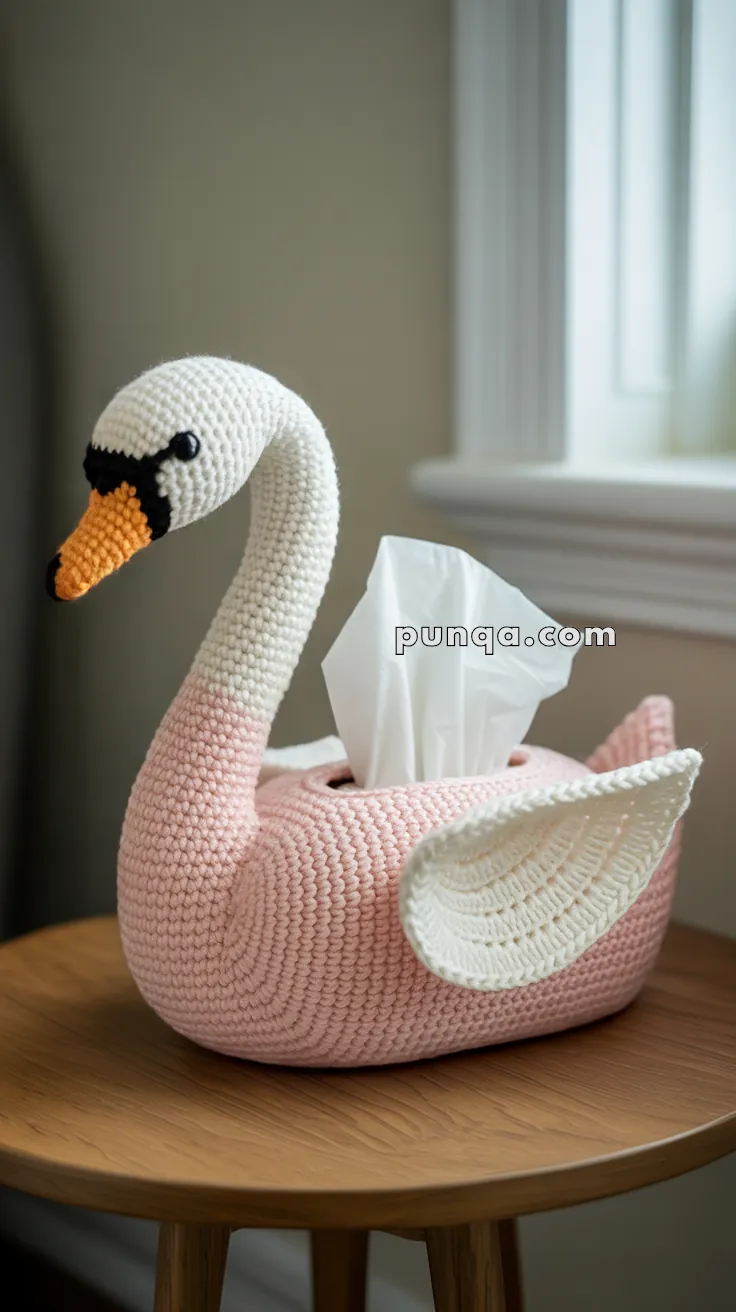
Add a graceful touch to your home with this Amigurumi Swan Tissue Box Cover crochet pattern! With its elegant neck curve, soft white feathers, and charming beak, this swan transforms an everyday tissue box into a whimsical piece of decor. Whether you’re sprucing up a bathroom, adding flair to a nursery, or gifting a handmade treasure to a fellow crochet lover, this project brings beauty and function together in the most delightful way. 🦢🧶✨
Designed for both charm and creativity, this pattern invites you to play with textured stitches, delicate shaping, and sweet extras like a tiny crown, floral accents, or even a blushing cheek. Customize your swan with pastel hues or classic white and gold for a regal look. Whether perched on a vanity or gliding across a shelf, this Swan Tissue Box Cover is a joyful and satisfying project—perfect for stitching up a little elegance, one tissue at a time! 💖🌸🧻
🦢 Crochet Swan Tissue Box Cover Pattern
Transform an ordinary tissue box into an elegant swan! This charming cover features a gracefully curved neck, dimensional wings, and a soft pink body that adds a touch of whimsy to any room. Perfect for nurseries, bedrooms, or as a thoughtful handmade gift.
✨ Skill Level
Intermediate – oval construction, sculpted parts, and dimensional assembly.
📏 Finished Size
Fits a standard rectangular tissue box
Approx. 24 × 13 × 11 cm (9.5 × 5 × 4.5 in)
🧶 Materials
Yarn (Worsted or smooth DK for best stitch definition)
- Soft Blush Pink – body
- White – head, neck, wings
- Orange – beak
- Black – eyes & beak detail
Notions
- 4.0 mm crochet hook
- Polyester fiberfill
- Optional: 16–18 gauge floral wire (neck shaping)
- Yarn needle, stitch marker, scissors
🧵 Abbreviations (US Terms)
MR – magic ring
sc – single crochet
inc – increase
dec – decrease
ch – chain
sl st – slip stitch
BLO – back loop only
FLO – front loop only
FO – fasten off
🌸 Body (Pink – Rounded Bowl Shape)
Worked in continuous rounds.
Foundation
- Ch 22
Round 1
Sc in 2nd ch from hook, sc 19, 3 sc in last ch;
continue on opposite side: sc 19, 2 sc in first ch (44)
Round 2
Inc, sc 19, inc ×3, sc 19, inc ×2 (50)
Round 3
(sc, inc), sc 19, (sc, inc) ×3, sc 19, (sc, inc) ×2 (56)
Round 4
2 sc, inc, sc 19, (2 sc, inc) ×3, sc 19, (2 sc, inc) ×2 (62)
Rounds 5–8
Sc around (62)
Round 9 (BLO)
Sc around (creates soft base ridge)
Rounds 10–18
Sc around (62)
🧻 Tissue Opening (Oval & Soft)
Round 19
Sc 14, ch 16, skip 16 sts, sc 32 (62)
Round 20
Sc 14, sc 16 into ch-space, sc 32 (62)
Rounds 21–23
Sc around (62)
FO.
Lightly stuff only the side walls; keep center hollow.
🦢 Head & Neck (White – One Piece)
Head
- R1: MR 6 sc (6)
- R2: inc ×6 (12)
- R3: (sc, inc) ×6 (18)
- R4: (2 sc, inc) ×6 (24)
- R5–R7: sc around (24)
Insert small black eyes between R6–R7.
- R8: (2 sc, dec) ×6 (18)
- R9: (sc, dec) ×6 (12)
Stuff firmly.
Neck
- R10–R28: sc around (12)
Stuff lightly.
Insert wire if using.
Base Flare (for Attachment)
- R29: (sc, inc) ×6 (18)
- R30: (2 sc, inc) ×6 (24)
- R31: sc around (24)
FO with long tail.
🧡 Beak (Orange)
- R1: MR 6 sc (6)
- R2: (sc, inc) ×3 (9)
- R3–R4: sc around (9)
FO, lightly stuff.
Sew centered to face.
Embroider a short horizontal black band where the beak meets the face.
🪽 Wings (Make 2 – White, Sculpted & Layered)
Worked flat in rows to create feather definition.
Foundation
- Ch 9
Row 1
Sc in 2nd ch from hook and across (8), ch 1, turn
Row 2
Inc, sc 6, inc (10), ch 1, turn
Row 3
Sc 10, ch 1, turn
Row 4 (Feather Ridge – FLO)
Sc 10 in FLO only, ch 1, turn
Row 5
Inc, sc 8, inc (12), ch 1, turn
Row 6
Sc 12, ch 1, turn
Row 7 (Feather Ridge – FLO)
Sc 12 in FLO only, ch 1, turn
Row 8
Sc 12
FO.
Do not stuff.
Gently curve lengthwise so ridges remain visible.
🪡 Assembly
- Attach neck to the narrow front of the body, leaning slightly forward
- Sew beak to head and add black band detail
- Attach wings mid-to-upper body, about 2–3 rounds below neck join; sew only inner edges
- Shape neck into a soft S-curve
- Insert tissue box and adjust opening
💡 Optional Touches
- Add satin bow or crochet crown to neck.
- Use gold thread for beak edge highlight.
- Embroider thin nostrils with black thread.
📸 Display Suggestions
This elegant swan looks beautiful:
- On nursery changing tables
- Bedroom nightstands
- Coffee tables in living rooms
- Bathroom countertops
- Guest room dressers
- As a baby shower centerpiece
- On office desks for a whimsical touch
🧼 Care Instructions
- Spot clean with damp cloth
- Hand wash in cool water if needed
- Lay flat to dry
- Reshape while damp if necessary
- Remove tissue box before washing
- Fluff wings gently after washing
⏱️ Estimated Time
Approximately 10-14 hours depending on experience level
💭 Tips for Success
- Neck shaping: The wire insert is highly recommended for maintaining the elegant curve
- Wing attachment: Sew through multiple points on each wing for security
- Stuffing: Don’t overstuff the neck or it won’t curve gracefully
- Tissue opening: Test fit your tissue box and adjust the opening size in Round 23 if needed
- Blocking: Lightly steam or wet block the wings for crisp feather definition
This graceful swan brings elegance and charm to any space while keeping tissues beautifully accessible. The combination of soft colors and dimensional details creates a piece that’s both functional and decorative. Happy crocheting! 🦢✨


Your Swan pattern is beautiful. I can’t wait to try it. Thank you for sharing it freely.