Welcome to the proud and celebratory world of milestone amigurumi! 🎓✨ Today, I’m excited to share my FREE crochet pattern for an Amigurumi Graduation Cap—a tiny, tasseled triumph perfect for commemorating big achievements! Whether you’re crafting a keepsake for a grad, decorating a party, or stitching a symbolic charm for someone’s next adventure, this mini mortarboard is packed with sentimental details: a sleek square top, dangling tassel (customizable to school colors!), and even an optional year tag or tiny diploma scroll. 📜🎉
This design is quick, customizable, and full of pomp-and-stitch-circumstance! I’ve included easy-to-follow instructions for both classic black caps and vibrant variations (because why not a glittery gold tassel or rainbow yarn for extra flair?). Pose it atop an amigurumi grad’s head, attach it to a keychain as a lucky charm, or create a whole cluster as festive decor! So grab your hooks, pick your graduate’s favorite colors, and let’s crochet a little symbol of big dreams—because every stitch counts when you’re crafting a future! “Off the hook and onto greatness!” 🎓

🎓 Amigurumi Graduation Cap Crochet Pattern
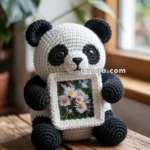
Celebrate academic achievements with this handmade amigurumi graduation cap! Whether as a thoughtful gift, party centerpiece, or keepsake for a proud graduate, this crochet cap adds a personal and charming touch. Complete with a golden tassel and embroidered “Congratulations,” it’s a perfect project for graduations of all kinds.
✨ Skill Level
Beginner to Intermediate – Simple shaping and flat-top construction.
📏 Finished Size
Approx. 5″ wide x 3.5″ tall (13 x 9 cm) using worsted weight yarn and a 3.5 mm hook.
🧶 Materials
- Yarn (Worsted Weight):
- Color A: Royal Blue (for cap body and top)
- Color B: Mustard/Gold (for tassel)
- Color C: White (for embroidery)
- Crochet hook: 3.5 mm
- Tapestry needle
- Stitch marker
- Polyfill stuffing
- Embroidery needle
- Cardboard (optional for inner stiffness)
🧵 Abbreviations (US Terms)
- MR – Magic Ring
- sc – Single Crochet
- inc – Increase (2 sc in same stitch)
- dec – Decrease (sc 2 together)
- sl st – Slip Stitch
- ch – Chain
- BLO – Back Loops Only
- FO – Fasten Off
🎓 Cap Base (Work in continuous spiral)
With Color A:
- MR, 6 sc (6)
- inc x6 (12)
- (1 sc, inc) x6 (18)
- (2 sc, inc) x6 (24)
- (3 sc, inc) x6 (30)
- (4 sc, inc) x6 (36)
- (5 sc, inc) x6 (42)
8–18. sc around (42) - BLO sc around (42)
20–22. sc around (42)
FO, stuff firmly and close with sl st.
🟥 Square Top of Cap (Work in rows)
With Color A:
- Ch 21
- Row 1: sc in 2nd ch from hook and across (20)
3–20. Ch 1, turn, sc across (20)
FO and weave in ends.
Block the square gently for crisp corners.
Sew the center of the square to the top of the cap base, letting the corners hang over evenly.
🎀 Tassel
With Color B:
- Cut 10–12 strands about 6″ long.
- Bundle and tie at one end tightly with a strand of yarn.
- Fold the bundle in half and wrap a new strand around the top to form the tassel head.
- Attach a long chain cord (~20 ch) from the top of the cap to the tassel.
- Sew the chain cord to the center button of the cap top.
✏️ Embroidery (Optional)
Using Color C and a tapestry or embroidery needle:
- Stitch “Congratulations” across the front of the cap base using backstitch or chain stitch.
- Optional: Personalize with initials or the graduation year.
💡 Customization Ideas
- Change the yarn colors to match school colors
- Embroider the graduate’s name or initials
- Add a safety pin or magnet to use as decor or a pin
This adorable amigurumi graduation cap is sure to make a memorable gift or party decoration. Celebrate success with handmade charm and heartfelt stitches! 🎉🎓
🧰 How to Form the Graduation Cap (as in the photo)
1. Square Top – Keep It Firm and Flat
The key to the crisp, structured look:
- Use a dense stitch: Single crochet (sc) with tight tension helps.
- Block the square:
- After crocheting the square top, wet it slightly or steam it lightly.
- Pin it to a flat surface (foam board or towel) and let it dry fully to set its shape.
- Insert support inside:
- Optional but highly recommended: Cut a piece of cardboard or plastic canvas the same size as your crocheted square (just under 5″ x 5″).
- Place this between the crocheted square and the cap body when sewing them together.
- This ensures the square top stays perfectly flat and doesn’t sag over time.
2. Cap Base – Forming the Cylindrical Shape
To get that nicely shaped drum-like base:
- Work in back loops only (BLO) at the transition row (as written in Round 19) to create a defined edge between the side and the top.
- Stuff the base firmly:
- Use polyfill stuffing and make sure to shape it evenly.
- Use your fingers to press the sides outward slightly while shaping to match the photo’s smooth curve.
3. Attaching the Top Square to the Base
- Position the square so its center aligns exactly with the top of the stuffed cylinder.
- Sew only the center area of the square (about a 1–1.5″ circle) to the top of the base.
- Let the corners of the square extend freely over the edges, creating that authentic graduation cap overhang.
- If you added an internal square (like cardboard), make sure it’s centered and securely sewn in.
4. Adding the Button & Tassel
- Make a small crocheted or yarn-wrapped ball and sew it in the center of the square.
- Attach the tassel’s chain cord under the button and let it hang down naturally from one corner.
🪄 Extra Shaping Tips
- Use yarn stiffener or diluted white glue (optional) to stiffen the square top or tassel if needed.
- Store or gift the cap in a box to preserve its shape.
With these shaping and construction techniques, your amigurumi graduation cap will look just like the photo—clean, structured, and celebration-ready! 🎓