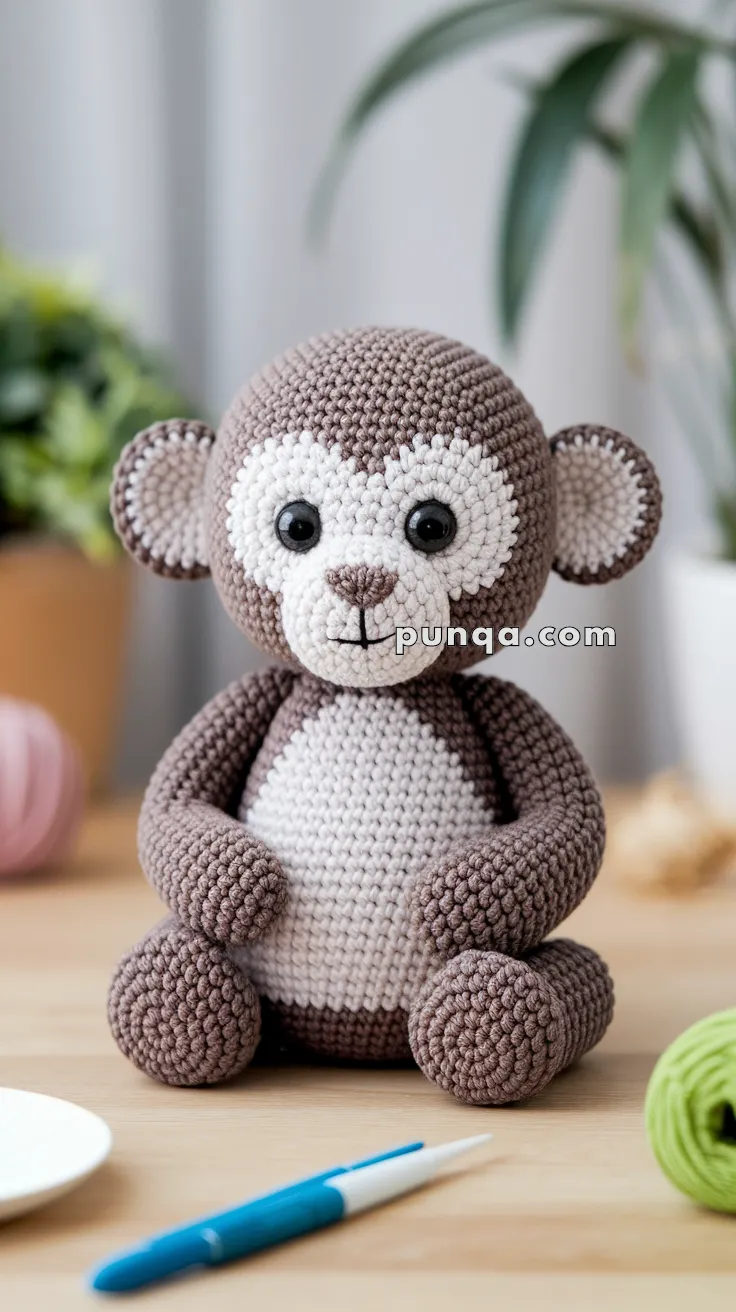
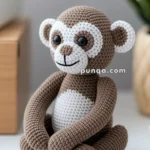
🐵 Amigurumi Gibbon Baby Crochet Pattern
Make your very own adorable gibbon baby with this versatile crochet pattern! Whether you love the ease of no-sew projects or prefer the classic construction with separate parts, this pattern has you covered. Designed with clean color transitions and a chubby shape, this little primate makes a charming handmade gift or nursery addition.
✨ Skill Level
Intermediate
Includes:
- face shaping
- curved limb construction
- color placement
- seated posture assembly
- symmetrical shaping
📏 Finished Size
Using DK cotton yarn and a 2.75–3.0 mm hook:
- Seated height: approx. 24–26 cm (9.5–10 in)
🧶 Materials & Yarn Amount
Warm Taupe Brown Yarn
Approx. 80–95 g
Used for:
- head
- body
- arms
- legs
- outer ears
Cream / Off-White Yarn
Approx. 40–50 g
Used for:
- face mask
- muzzle
- belly patch
- inner ears
Dark Brown Yarn
Small amount
Used for:
Black Yarn
Small amount
Used for:
Supplies
- 2.75–3.0 mm crochet hook
- 10–12 mm safety eyes
- Polyester stuffing
- Yarn needle
- Stitch markers
- Scissors
🔤 Abbreviations (US Terms)
- MR – magic ring
- sc – single crochet
- inc – increase
- dec – invisible decrease
- sl st – slip stitch
- FO – fasten off
Work in continuous spirals unless noted otherwise.
🐵 Head
The head is a smooth oversized sphere with full cheeks and a softly flattened front face area.
With Brown Yarn
R1
MR 6 sc (6)
R2
inc x6 (12)
R3
(sc, inc) x6 (18)
R4
(2 sc, inc) x6 (24)
R5
(3 sc, inc) x6 (30)
R6
(4 sc, inc) x6 (36)
R7
(5 sc, inc) x6 (42)
R8
(6 sc, inc) x6 (48)
R9
(7 sc, inc) x6 (54)
R10–18
sc around (54)
Insert safety eyes between R14–15 with approximately 10 stitches between them.
The eyes should sit slightly lower than center to create the baby expression.
R19
(7 sc, dec) x6 (48)
R20
(6 sc, dec) x6 (42)
R21
(5 sc, dec) x6 (36)
Begin stuffing firmly.
R22
(4 sc, dec) x6 (30)
R23
(3 sc, dec) x6 (24)
R24
(2 sc, dec) x6 (18)
R25
(sc, dec) x6 (12)
R26
dec x6 (6)
FO and close.
The finished head should remain very round and smooth.
🤍 Face Mask
The face mask creates the large cream facial area wrapping around the eyes and muzzle.
The top edges rise above the eyes in soft curves, forming the rounded heart-like shape visible in the plush.
With Cream Yarn
R1
MR 6 sc (6)
R2
inc x6 (12)
R3
(sc, inc) x6 (18)
R4
(2 sc, inc) x6 (24)
R5
(3 sc, inc) x6 (30)
R6
(4 sc, inc) x6 (36)
R7
6 sc
inc x3
18 sc
inc x3
6 sc
(42)
R8–9
sc around (42)
FO leaving a long tail.
Before sewing:
- gently shape upper edges upward
- narrow the top center slightly
- widen lower cheeks softly
The finished mask should resemble a rounded heart shape rather than a simple oval.
🐽 Muzzle
The muzzle is small, softly raised, and centered low on the face.
With Cream Yarn
R1
MR 6 sc (6)
R2
inc x6 (12)
R3
(sc, inc) x6 (18)
R4
sc around (18)
FO leaving tail.
Lightly stuff before attaching to lower center of face mask.
👃 Nose & Mouth
Nose
Using dark brown yarn:
- embroider a tiny rounded triangular nose
Mouth
Using black yarn:
- embroider a short vertical line downward
- add two tiny curved stitches forming a soft smile
Keep embroidery delicate and minimal.
👂 Ears (Make 2)
The ears are rounded with large cream centers and thin brown borders.
Inner Ear (Cream)
R1
MR 6 sc
R2
inc x6 (12)
R3
(sc, inc) x6 (18)
FO.
Outer Ear (Brown)
Repeat same rounds.
Place cream circle over brown circle and crochet together with one round of sc.
Flatten slightly before attaching.
Ear Placement
Attach:
- slightly below top of head
- aligned near eye height
- tilted gently outward
🧸 Body
The body is compact and pear-shaped with a rounded tummy and stable seated base.
With Brown Yarn
R1
MR 6 sc (6)
R2
inc x6 (12)
R3
(sc, inc) x6 (18)
R4
(2 sc, inc) x6 (24)
R5
(3 sc, inc) x6 (30)
R6
(4 sc, inc) x6 (36)
R7–12
sc around (36)
R13
(4 sc, dec) x6 (30)
R14–16
sc around (30)
Stuff firmly.
R17
(3 sc, dec) x6 (24)
R18
(2 sc, dec) x6 (18)
R19
(sc, dec) x6 (12)
R20
dec x6 (6)
FO and close.
Flatten the bottom slightly so the monkey sits securely.
🤍 Belly Patch
The belly patch is tall, narrow, and softly rounded.
With Cream Yarn
R1
MR 6 sc
R2
inc x6 (12)
R3
(sc, inc) x6 (18)
R4
(2 sc, inc) x6 (24)
R5–8
sc around (24)
FO leaving long tail.
Flatten lightly before sewing centered onto body front.
The patch should extend from under the chin to near the lower tummy.
💪 Arms (Make 2)
The arms are softly curved inward and positioned close to the belly.
With Brown Yarn
R1
MR 6 sc
R2
(sc, inc) x3 (9)
R3–8
sc around (9)
R9
(sc, dec) x3 (6)
R10–12
sc around (6)
Stuff lightly in the hands only.
FO leaving long tail.
🦵 Legs (Make 2)
The legs are chunky with rounded seated feet.
With Brown Yarn
R1
MR 6 sc
R2
inc x6 (12)
R3
(sc, inc) x6 (18)
R4
(2 sc, inc) x6 (24)
R5–7
sc around (24)
R8
(2 sc, dec) x6 (18)
R9–11
sc around (18)
Stuff firmly.
FO leaving long tail.
Flatten slightly where attached.
🪡 Assembly
Head
Attach head securely with a slight forward tilt.
Face
- Sew face mask first
- Attach muzzle second
- Embroider nose and mouth last
Arms
Attach high on the body sides.
Hands should naturally curve inward toward the belly center.
Legs
Attach low and slightly outward for seated posture.
Feet should rest flat forward.
Ears
Attach symmetrically with gentle outward tilt.
✨ Final Shaping
- Shape cheeks outward gently
- Keep head very spherical
- Flatten seated base slightly
- Position arms inward naturally
- Keep facial embroidery tiny and centered
🌟 Finished Baby Monkey
Your finished monkey features:
- oversized rounded baby head
- softly curved cream face markings
- tiny rounded muzzle
- compact seated body
- chunky rounded feet
- curved inward arms
- balanced baby proportions
- gentle expressive face
The finished plush has a warm, cuddly appearance with smooth sculpted curves and soft shaping, making it perfect for nursery décor, gifting, or a lovable handmade companion. 🐵🤎✨


Predivno i HVALA OD❤️🫶