Capture the joy of crafting with the Amigurumi Camera, a playful crochet project that’s perfect for shutterbugs and yarn lovers alike! 📸🧶 With its bold two-tone design, three colorful buttons, and a realistic lens, this tiny camera is packed with personality and charm. Whether you’re decorating a creative workspace, gifting to a photography enthusiast, or adding a quirky touch to your amigurumi collection, this little accessory is sure to make you smile.
Ideal for crocheters who enjoy fun shapes and vibrant details, this pattern invites you to explore color play and clever construction. Customize your camera with retro hues, add a tiny strap, or stitch up a whole set in different styles for extra flair. The Amigurumi Camera is a joyful way to stitch up creativity, nostalgia, and a sprinkle of handmade whimsy—one loop at a time! 🧵🎞️
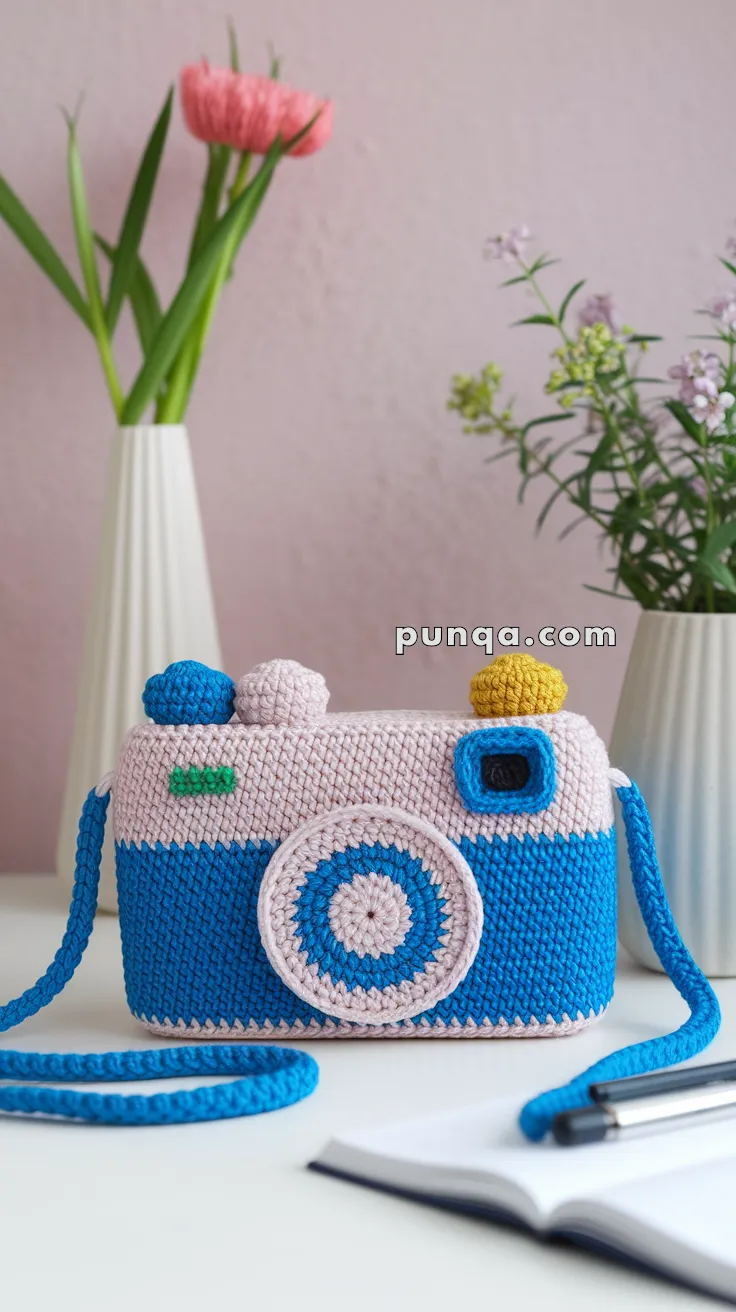
📸 Amigurumi Camera Bag Crochet Pattern
Snap a statement piece! This sturdy, playful crochet camera bag has a bright blue base, pale-pink top, and a three-ring lens (pink–blue–pink). It features two green LED details, a blue viewfinder with a black center, and three colorful buttons on top — the perfect handmade accessory for kids or camera lovers.
🎯 Skill Level
Beginner – Intermediate — dense stitches, simple shaping, and fun colorwork.
📏 Finished Size
Approx. 16 cm W × 12 cm H × 5 cm D (strap adjustable)
🧶 Materials
- Chunky cotton cord yarn (3–4 mm)
- Bright blue – ≈ 80 m (base, strap, large button, viewfinder)
- Baby pink – ≈ 60 m (top, side tabs, outer lens ring)
- White – ≈ 10 m (lens accents)
- Yellow – scrap (small button)
- Green – scrap (two LEDs)
- Black – scrap (viewfinder center)
- 4.0 mm hook
- Yarn needle & stitch marker
- Optional: thin cardboard for structure, zipper or lining
- Small amount of fiberfill for top buttons only
✨ Abbreviations (US Terms)
MR – Magic Ring
ch – Chain
sc – Single Crochet
inc – Increase (2 sc in same stitch)
dec – Decrease (sc2tog)
sl st – Slip Stitch
spk-sc – Spike Single Crochet (worked one row below)
BLO – Back Loop Only
FO – Fasten Off
💡 Work tightly for the dense, knit-like texture visible in the photo.
🧵 Pattern Instructions
🩵 Front & Back Panels (×2)
With blue, ch 21.
Rows 1–14: sc across (20).
Row 15: Switch to pink; alternate spk-sc into the blue row below, sc next st for the zigzag line.
Rows 16–20: sc across (20). FO.
Make a second identical panel.
🩵 Side Strip (Depth)
With blue, ch 56.
Rows 1–5: sc across (55). FO, leaving long tail.
🌸 Side Tabs (×2)
With pink, ch 6.
Rows 1–3: sc 5. FO.
Fold into loops when attaching strap.
🎯 Lens (Three Rings)
With pink:
Rnd 1: MR, sc 6 (6)
Rnd 2: inc around (12)
Rnd 3: (sc, inc)×6 (18)
Switch to blue:
Rnd 4: (2 sc, inc)×6 (24)
Rnd 5: (3 sc, inc)×6 (30)
Switch to pink:
Rnd 6: (4 sc, inc)×6 (36)
FO and flatten.
Join pink to BLO of last round and sl st around to raise the outer rim.
Embroider a tiny pink star in the center.
🔷 Viewfinder
With blue, ch 8.
Rnd 1 (around chain): sc 6, 3 sc in end ch; sc 5 on the opposite side, 3 sc in first ch (18).
Rnd 2: sc 6, inc, sc, inc, sc 6, inc, sc, inc (22). FO.
With black, embroider a small rectangle at the center.
🟩 LED Details (×2)
With green, ch 3, sc in 2nd ch and next (2). FO.
Sew side-by-side on top-left pink area.
🔵 Top Buttons (Left → Right)
Large Blue Button (left):
Rnd 1: MR, sc 6
Rnd 2: inc around (12)
Rnd 3: (sc, inc)×6 (18)
Rnd 4: sc around (18)
FO and lightly stuff.
Medium Pink Button (middle):
Rnd 1: MR, sc 6
Rnd 2: inc around (12)
Rnd 3: sc around (12)
FO and lightly stuff.
Small Yellow Button (right):
Rnd 1: MR, sc 6
Rnd 2: sc around (6)
FO and lightly stuff.
🔗 Strap (Tubular Romanian Cord)
With blue yarn:
Ch 2.
Sc in 2nd ch.
Insert hook under the vertical bar of last sc, yarn over, pull up a loop, yarn over, pull through both loops.
Repeat until ≈ 150 cm long. FO.
🧩 Assembly
1️⃣ Decorate Front: Sew the lens centered across the pink/blue line.
2️⃣ Attach the viewfinder (top-right) and both green LEDs (top-left).
3️⃣ Add top buttons: 🔵 blue (left), 🌸 pink (middle), 🟡 yellow (right).
4️⃣ Pin the blue side strip around one panel; stitch using pink yarn for the subtle pink edge.
5️⃣ Sew the second panel on top to close.
6️⃣ Add pink side tabs and secure strap through them.
7️⃣ (Optional) Insert cardboard for a firm shape and add a lining or zipper if desired.
🧺 Care Notes
Hand-wash gently in cold water.
Shape while damp and dry flat.
Avoid machine washing to maintain structure.
💖 Outro
And that’s it! You’ve created a playful crochet camera bag that looks just like the real thing — complete with bright buttons, a detailed lens, and a thick rope strap. 🎞️
Perfect as a photo-prop, gift, or everyday mini purse. Wherever you go, it’ll make people smile and say “Cheese!” 📷💙