Welcome to the charming and cozy world of amigurumi! 🍵✨ Today, I’m excited to share my free crochet pattern for an Amigurumi Teapot—a delightful and whimsical creation perfect for tea lovers, cottagecore décor, or anyone who enjoys crafting adorable and functional plush designs! ☕ Whether you love stitching up kitchen-themed accessories, creating textured and lifelike figures, or simply want to add a cute teapot to your handmade lineup, this pattern will guide you through crafting a beautifully sculpted plush with a round body, elegant spout, and a cozy lid! 💖
This design embraces soft curves, intricate shaping, and charming details to bring a warm and inviting presence to your crochet projects! 🧶✨ I’ve carefully outlined each step to ensure your Amigurumi Teapot turns out just right—ready to brighten up your space or become a treasured handmade gift! 🎁 So grab your hooks and let’s stitch up a lovely teapot! 🍵
🍵 Amigurumi Teapot Crochet Pattern
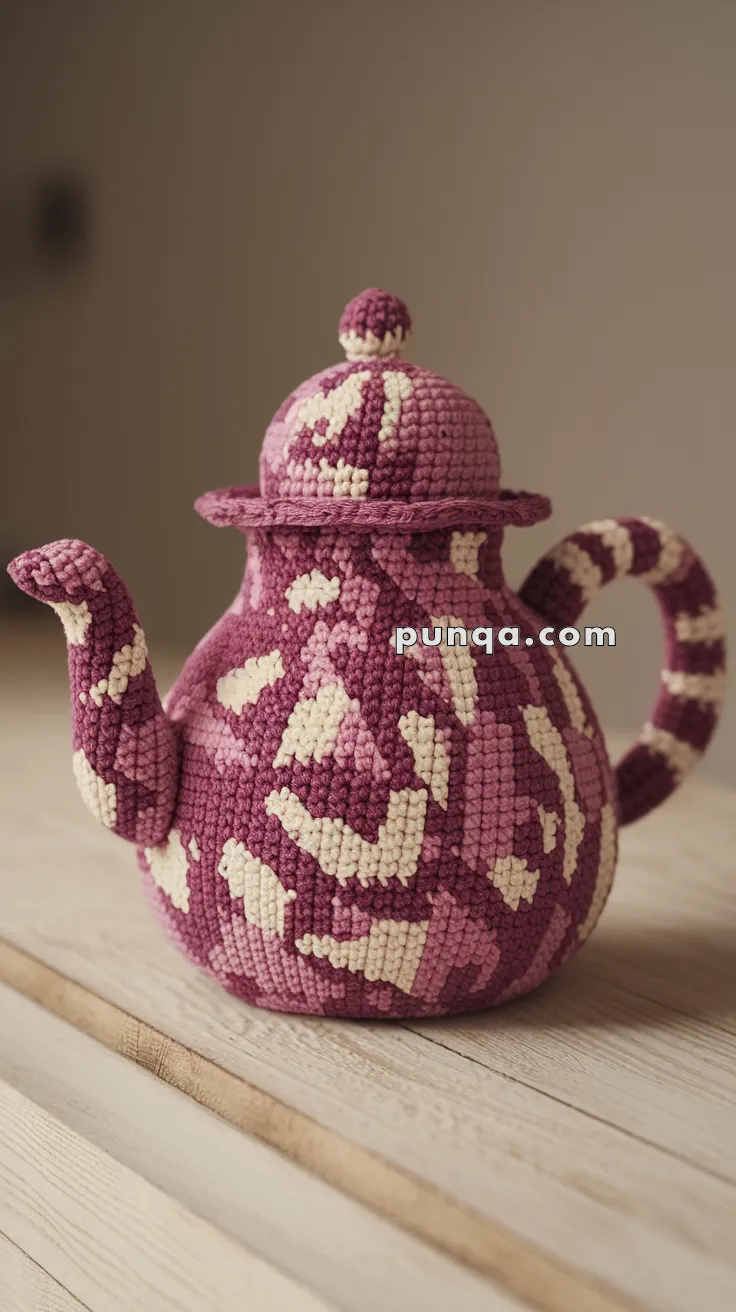
Brew up some handmade joy with this whimsical amigurumi teapot! Featuring elegant curves, a classic spout, and a decorative lid, it makes a charming centerpiece or a cozy gift for tea lovers. Use colorwork to create your favorite vintage floral patterns!
✨ Skill Level
Intermediate – includes 3D shaping, color changes (tapestry crochet), and assembly of curved parts.
📏 Finished Size
Approx. 7.5 inches (19 cm) tall when using super bulky velvet yarn and a 4.0 mm hook (as seen in the photo).
🪶 If using worsted yarn + 3.0 mm hook, finished size ≈ 6 in (15 cm).
🧶 Materials
Yarn (Super Bulky Velvet or Chenille):
-
Color A (Deep Rose): 70 g
-
Color B (Cream): 50 g
Hook: 4.0 mm
Stuffing: Polyester fiberfill (firmly packed)
Other:
-
Tapestry needle
-
Stitch markers
-
Optional: flexible wire or pipe cleaners for handle & spout support
🔤 Abbreviations (US Terms)
MR – Magic Ring
sc – single crochet
inc – increase (2 sc in same st)
dec – decrease (sc2tog)
sl st – slip stitch
ch – chain
BLO – back loop only
FLO – front loop only
FO – fasten off
🍯 Teapot Body (Main Section)
Work in continuous rounds. Begin with Color A and randomly switch to Color B for marbled pattern (carry unused yarn inside).
R1: MR, 6 sc (6)
R2: inc ×6 (12)
R3: (1 sc, inc) ×6 (18)
R4: (2 sc, inc) ×6 (24)
R5: (3 sc, inc) ×6 (30)
R6: (4 sc, inc) ×6 (36)
R7: (5 sc, inc) ×6 (42)
R8: (6 sc, inc) ×6 (48)
R9: (7 sc, inc) ×6 (54)
R10–R18: sc around (54) → This builds the bulbous middle section.
🔸 Optional: Create random marbled patches by alternating colors every few stitches using tapestry crochet technique.
R19: (8 sc, dec) ×6 (48)
R20: (7 sc, dec) ×6 (42)
R21: (6 sc, dec) ×6 (36)
R22: (5 sc, dec) ×6 (30)
R23: (4 sc, dec) ×6 (24)
R24: (3 sc, dec) ×6 (18)
🧵 Stuff firmly, ensuring an even round shape with a slightly narrowed top.
R25: (2 sc, dec) ×6 (12)
R26: dec ×6 (6)
FO and close.
☕ Spout
Spout is moderately curved with a gentle taper. Use Color A with touches of Color B.
R1: MR, 6 sc (6)
R2–3: sc around (6)
R4: (1 sc, inc) ×3 (9)
R5–7: sc around (9)
R8: (2 sc, inc) ×3 (12)
R9–13: sc around (12)
Lightly stuff and curve the piece slightly before sewing.
FO with long tail.
📍 Tip: Insert pipe cleaner or floral wire inside before attaching if you want the spout to hold shape.
🍶 Handle
Handle alternates colors in spirals (cream + rose stripes).
R1: MR, 6 sc (6)
R2–16: Alternate colors every 2 rounds for a striped pattern.
Stuff lightly or insert wire for firmness.
Shape into a gentle “C” curve.
FO with tail for sewing.
🎩 Lid & Knob
Lid (Color A with cream patches)
R1: MR, 6 sc (6)
R2: inc ×6 (12)
R3: (1 sc, inc) ×6 (18)
R4: (2 sc, inc) ×6 (24)
R5: (3 sc, inc) ×6 (30)
R6: sc around (30)
R7: BLO sc around (30) → creates rim ridge
R8: (3 sc, dec) ×6 (24)
R9: (2 sc, dec) ×6 (18)
R10: (1 sc, dec) ×6 (12)
FO, stuff lightly, close top.
📍 Lid sits high and domed, not flat. The ridge from BLO round adds the brim.
Lid Knob (2-color small sphere)
R1: With Color A, MR, 6 sc (6)
R2: inc ×6 (12)
R3: Switch to Color B, sc around (12)
R4: (1 sc, dec) ×4 (8)
R5: dec ×4 (4), FO.
Stuff lightly and sew to center of lid.
🧩 Assembly Order
1️⃣ Sew spout to front curve of teapot — about halfway up the body height.
2️⃣ Attach handle opposite the spout, ensuring both align symmetrically.
3️⃣ Center lid on top opening; either leave removable or stitch in place.
4️⃣ Shape the handle and spout — curve naturally outward, not vertically.
5️⃣ Adjust stuffing to maintain teapot silhouette (slightly bulbous middle, narrowing top and bottom).
💡 Colorwork Notes (for Marbled Look)
-
Alternate Color A & B every 2–6 stitches irregularly to mimic glaze patterns.
-
Do not cut yarn at each change; instead, carry unused color inside the stitch.
-
To form organic patches, occasionally use Color B for 2 consecutive rounds.
-
Keep tension consistent to avoid bumps where colors overlap.
This delightful teapot will add a touch of warmth and whimsy to your handmade collection—no hot water required! 🧵🍂