Step into a world of adventure with this Amigurumi Treehouse crochet pattern! Whether you’re crafting for whimsical decor, imaginative play, or simply love nature-inspired designs, this free pattern lets you stitch up a charming treehouse full of personality. With its cozy wooden textures, leafy canopy, and tiny details like windows and ladders, this crochet creation captures the magic of childhood hideaways and enchanted forest retreats. Perfect for nursery accents, storytelling fun, or gifting to a fellow crochet enthusiast, this amigurumi treehouse is a delightful way to bring a touch of woodland wonder to your stitches! 🌳✨
Designed for customization, this pattern allows you to experiment with different colors, textured stitches, or even tiny accessories like miniature swings, lanterns, or tiny creatures peeking out for extra charm. Craft a classic rustic treehouse, create a fairy-inspired version with soft pastels, or even stitch up a full enchanted forest scene with matching cottages! Whether displayed as a whimsical accent, gifted as a thoughtful handmade keepsake, or made simply for the joy of crochet, this Amigurumi Treehouse is a magical and creative project—perfect for bringing fantasy to life, one stitch at a time! 🧶🏡
🏡 Amigurumi Treehouse Crochet Pattern
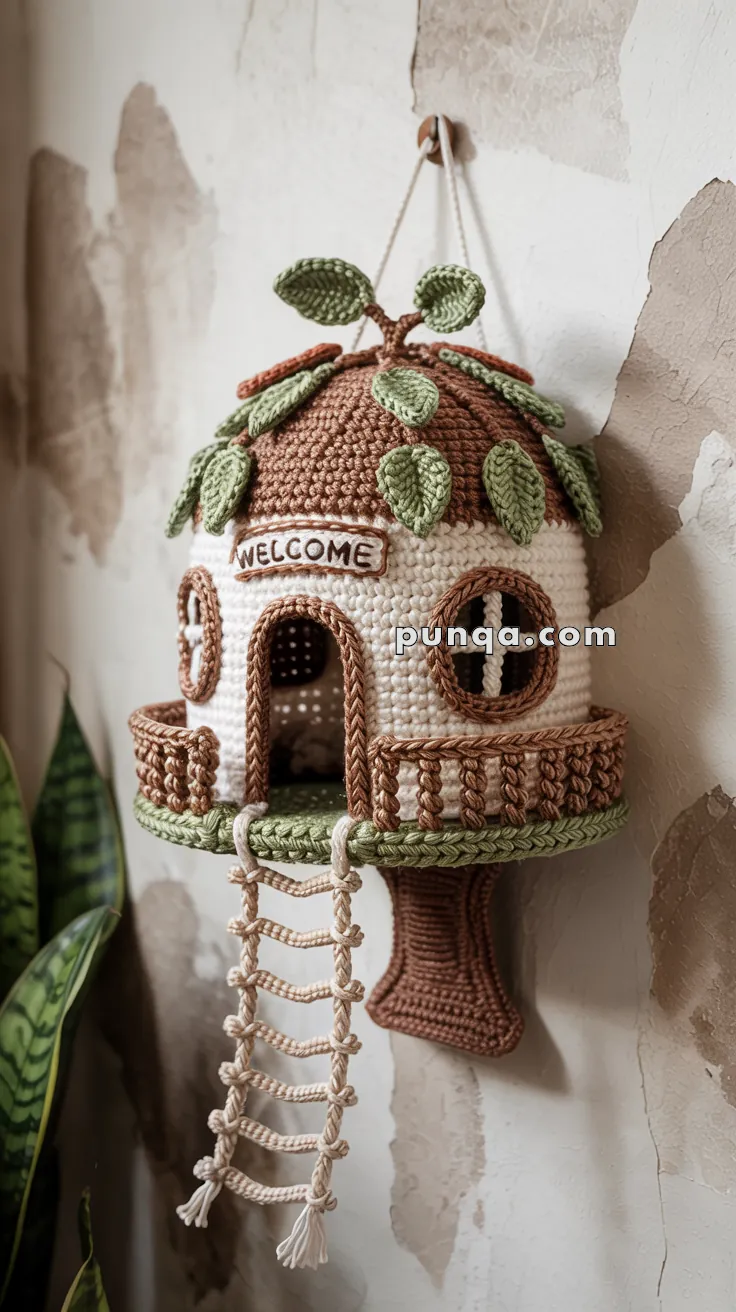
Welcome your woodland dreams with this charming amigurumi hanging treehouse, complete with leafy rooftop, ladder, windows, and a “WELCOME” sign! Ideal as a whimsical wall hanging, nursery decor, or fairy tale playhouse accessory.
✨ Skill Level
Advanced Intermediate – Combines structural shaping, layering, assembly, and decorative elements.
📏 Finished Size (Approx.)
- Total height (including ladder): 12 in / 30 cm
- Treehouse body: 6 in / 15 cm tall
- Diameter: 5 in / 13 cm
🧶 Materials
- DK or worsted weight yarn in:
- Brown (roof, railing, door frame, trunk)
- Cream/white (walls)
- Green (leaves, base floor)
- Beige (ladder)
- Hook: 2.5–3.0 mm
- Tapestry needle
- Stitch markers
- Fiberfill stuffing
- Cardboard (optional, for base stability)
- Wooden ring/string (for hanging)
- Optional: embroidery thread for “WELCOME” sign
🧵 Abbreviations (US Terms)
- MR – Magic Ring
- sc – Single Crochet
- inc – Increase (2 sc in 1 st)
- dec – Decrease (sc 2 together)
- sl st – Slip Stitch
- ch – Chain
- FO – Fasten Off
- BLO – Back Loop Only
- FLO – Front Loop Only
🪵 Tree Trunk (Brown)
- MR, 6 sc
- inc x6 (12)
- (1 sc, inc) x6 (18)
- (2 sc, inc) x6 (24)
5–20. sc around (24)
FO, stuff firmly.
🏡 Treehouse Base (Green)
- MR, 6 sc
- inc x6 (12)
- (1 sc, inc) x6 (18)
- (2 sc, inc) x6 (24)
- (3 sc, inc) x6 (30)
- (4 sc, inc) x6 (36)
- (5 sc, inc) x6 (42)
- (6 sc, inc) x6 (48)
- BLO sc around (48) ← creates bottom edge
10–11. sc around (48)
FO, weave in ends. Sew or attach on top of tree trunk.
🧱 House Walls (Cream/White)
- MR, 6 sc
- inc x6 (12)
- (1 sc, inc) x6 (18)
- (2 sc, inc) x6 (24)
- (3 sc, inc) x6 (30)
- (4 sc, inc) x6 (36)
- (5 sc, inc) x6 (42)
- (6 sc, inc) x6 (48)
9–18. sc around (48)
Leave a door opening by skipping 8 stitches on 3–4 rounds.
FO. Stitch ends neatly.
🚪 Door Frame (Brown)
- ch 12
- sc across, ch 1 turn
- Repeat for 3–4 rows to desired thickness
FO, sew around door opening.
🪟 Windows (Make 2)
Outer ring (Brown):
- MR, 6 sc
- inc x6 (12)
- (1 sc, inc) x6 (18)
- sl st to finish, FO
Window Crossbars (Optional):
- Use brown yarn to stitch a plus-sign across the circle
Sew onto walls symmetrically.
🪴 Balcony Rail (Brown)
Floor edge:
Attach brown yarn to edge of green base
sc around once (48)
Railing:
- ch 5, sl st every 4 stitches
Repeat for full circle
Use puff or popcorn stitches in between for wood texture
FO
🌰 Roof (Brown)
- MR, 6 sc
- inc x6 (12)
- (1 sc, inc) x6 (18)
- (2 sc, inc) x6 (24)
- (3 sc, inc) x6 (30)
- (4 sc, inc) x6 (36)
- (5 sc, inc) x6 (42)
- (6 sc, inc) x6 (48)
9–14. sc around (48) - sl st around for edging
FO. Stuff lightly and sew on top of wall cylinder.
🍃 Leaves (Green – Make 8–10)
- ch 7
- sc, hdc, dc x3, hdc, sc
- Work around other side of chain with same pattern
- sl st around
Sew randomly onto roof.
🪜 Ladder (Beige)
- Cut 2 strands approx. 10 in long
- Tie short chains between for rungs (ch 6–8, sl st back)
- Knot ends, trim fringe
- Sew to door base or rail.
🪧 “WELCOME” Sign
- ch 12, sc back and forth (2–3 rows) in brown
- FO and embroider “WELCOME” with white thread
- Sew over door arch
🧵 Final Assembly
- Sew house to base
- Attach trunk below (stuffed)
- Add door frame, windows, leaves, and railing
- Position ladder at door base
- Attach hanging loop to top (yarn or wooden ring)
💡 Customization Ideas
- Add a chimney or swing
- Embroider tiny flowers around the base
- Use it as a fairy house for tiny amigurumi dolls!
🏡 This cozy treehouse makes the perfect wall accent or whimsical play prop—handmade with warmth and woodsy charm.🌳✨