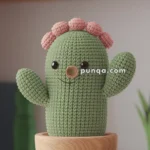
Bring a touch of everlasting greenery to your crochet collection with this Amigurumi Succulent pattern! Inspired by the beauty of real succulents, this charming design captures their plump leaves, soft textures, and natural elegance in every stitch. Whether you’re crafting for plant lovers, adding a cozy botanical accent to your decor, or simply enjoy making nature-inspired amigurumi designs, this pattern lets you stitch up a miniature succulent bursting with charm! Perfect for brightening up any space, this crochet creation brings a touch of handmade greenery to your collection. 🌿✨
Designed for customization, this pattern allows you to experiment with different shades of green, embroidered details, or even tiny accessories like a miniature pot or decorative pebbles for extra flair. Craft a classic succulent with rich earthy tones, create a whimsical version with pastel hues, or even stitch up a full set of garden-inspired amigurumi for a stunning display! Whether gifted as a thoughtful keepsake, displayed as a cheerful accent, or made simply for the joy of crafting, this Amigurumi Succulent is a fun and creative project—perfect for bringing a touch of handmade botanical magic to every stitch! 🧶💖✨
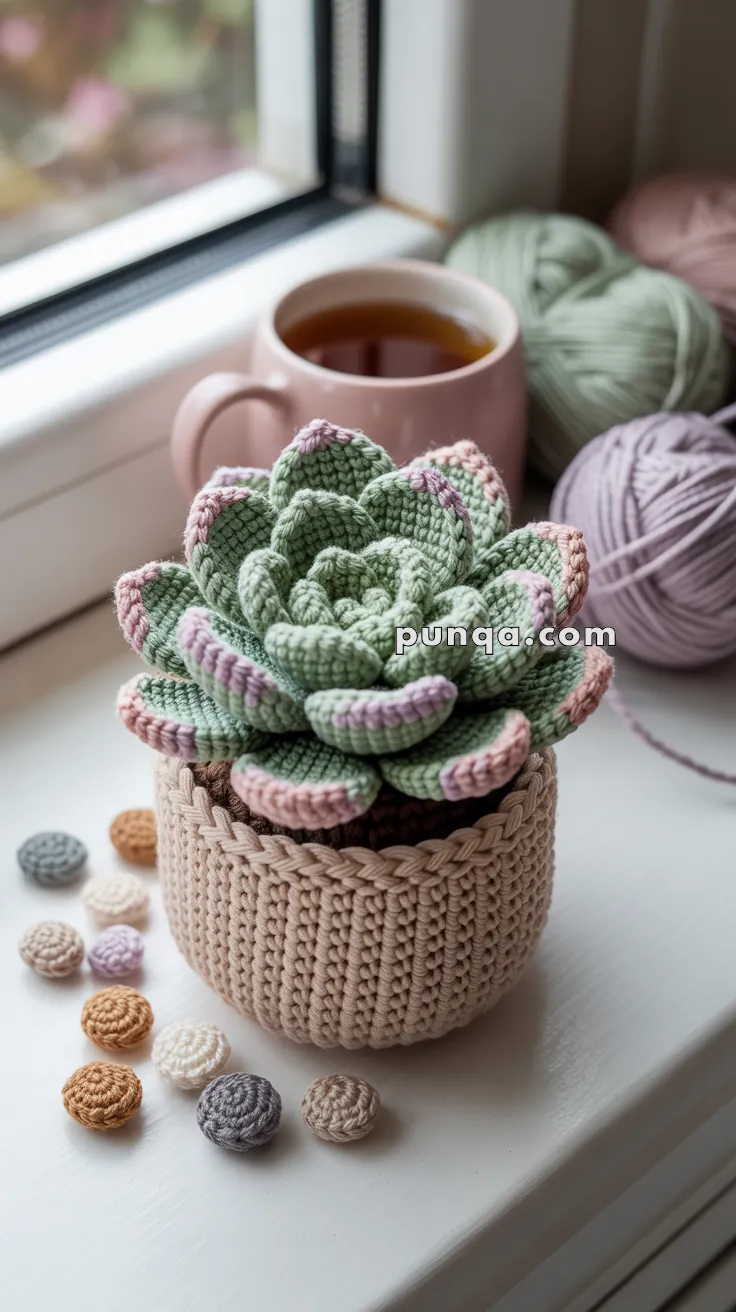
🌵 Amigurumi Succulent in a Pot Crochet Pattern
Add a sweet touch of greenery to your decor without ever needing to water it! This adorable amigurumi succulent, with layered petals in soft green and blush pinks, is the perfect handmade addition to your desk, windowsill, or craft corner. Featuring petal-by-petal shaping and a lovely textured pot, this piece looks as cozy as it feels— and it never needs watering. 🌿💗
✨ Skill Level
Intermediate
Includes layered construction, shaping, surface detail, and clean color edging.
📏 Finished Size
Approx. 13–14 cm (5–5.5 in) wide
Pot height: 6.5–7 cm (2.5–2.75 in)
🧶 Materials
Yarn (DK / Light Worsted Cotton Recommended)
- Soft Sage Green – main succulent
- Blush Pink – petal edging
- Beige / Sand – pot
- Dark Brown – soil
Optional scraps in cream, gray, taupe, lavender for decorative pebbles.
Tools
- 2.5–3.0 mm crochet hook
- Tapestry needle
- Stitch marker
- Scissors
- Polyfill (small amount)
🧵 Abbreviations (US Terms)
- MR – Magic Ring
- sc – Single Crochet
- inc – Increase (2 sc in same stitch)
- dec – Invisible Decrease
- sl st – Slip Stitch
- ch – Chain
- BLO – Back Loop Only
- FO – Fasten Off
🌱 Succulent Petals
All petals are thick, slightly cupped, and unstuffed, allowing them to curl naturally like the photo.
Petals are worked in continuous rounds, then lightly shaped by hand.
🌿 Inner Petals (Make 7 – Small)
With Sage Green:
R1: MR, 6 sc (6)
R2: inc ×6 (12)
R3: (sc, inc) ×6 (18)
R4–R5: sc around (18)
Switch to Blush Pink for edging:
R6: sl st loosely around, FO (18)
Do not stuff. Flatten gently into a shallow cup.
🌿 Middle Petals (Make 8)
With Sage Green:
R1: MR, 6 sc (6)
R2: inc ×6 (12)
R3: (sc, inc) ×6 (18)
R4: (2 sc, inc) ×6 (24)
R5–R6: sc around (24)
Switch to Blush Pink:
R7: sl st loosely around, FO (24)
🌿 Outer Petals (Make 9)
With Sage Green:
R1: MR, 6 sc (6)
R2: inc ×6 (12)
R3: (sc, inc) ×6 (18)
R4: (2 sc, inc) ×6 (24)
R5: (3 sc, inc) ×6 (30)
R6–R7: sc around (30)
Switch to Blush Pink:
R8: sl st loosely around, FO (30)
🌿 Succulent Assembly (Rosette Shape)
- Place inner petals tightly together, overlapping slightly
- Sew only the base edges, keeping tops free
- Add middle petals between inner gaps
- Finish with outer petals, spacing evenly
- Curve petal tips upward and outward with your fingers
The finished rosette should be compact, layered, and slightly domed, not flat.
🌰 Soil Base
With Dark Brown:
R1: MR, 6 sc (6)
R2: inc ×6 (12)
R3: (sc, inc) ×6 (18)
R4: (2 sc, inc) ×6 (24)
R5: (3 sc, inc) ×6 (30)
R6–R7: sc around (30)
Lightly stuff just enough to keep shape.
FO, leave long tail.
🪴 Pot (Textured, Straight Sides)
With Beige / Sand:
Base
R1: MR, 6 sc (6)
R2: inc ×6 (12)
R3: (sc, inc) ×6 (18)
R4: (2 sc, inc) ×6 (24)
R5: (3 sc, inc) ×6 (30)
Walls
R6: BLO sc around (30)
R7–R14: sc around (30)
Braided Rim (Photo-Accurate)
R15: (sl st, ch 1) in each stitch around, working loosely to form a raised braided edge
FO neatly.
🧷 Final Assembly
- Insert soil base into pot and stitch securely
- Center succulent rosette on soil
- Sew firmly through the lowest petal layer only
- Adjust petals so they sit naturally layered and full
🪨 Mini Crochet Pebbles (Optional)
Use assorted neutral scraps.
R1: MR, 6 sc (6)
R2: inc ×6 (12)
R3: sc around (12)
FO
Leave unstuffed for flat stones, or add a pinch of fiberfill for rounded ones.
Scatter loosely around the pot base as shown in the photo.
✨ Final Touch
Your crocheted succulent is now complete — soft, sculptural, and beautifully realistic. With its layered rosette, gentle pink-edged petals, and cozy textured pot, it’s a timeless accent piece that adds warmth and calm to any corner of your home.
Happy crocheting, and enjoy your forever-green plant! 🌵💚