Get ready to stitch up some woodland cuteness with the Amigurumi Squirrel Baby, a playful crochet project that’s full of charm and cozy character! 🐿️🧶 With its fluffy tail, tiny paws, and sweet little face, this baby squirrel looks like it just scampered out of a forest fairytale. Whether you’re crafting for a nature-themed nursery, a seasonal display, or simply adding to your amigurumi critter collection, this little nut-lover is sure to delight.
Perfect for crocheters who enjoy expressive shaping and whimsical details, this pattern invites you to explore soft textures, warm tones, and a sprinkle of forest magic. Add a tiny acorn, stitch on a scarf, or pair it with other woodland babies for a full handmade menagerie. The Amigurumi Squirrel Baby is a heartwarming way to stitch up snuggles, smiles, and a dash of handmade mischief—one loop at a time! 🧵🍂
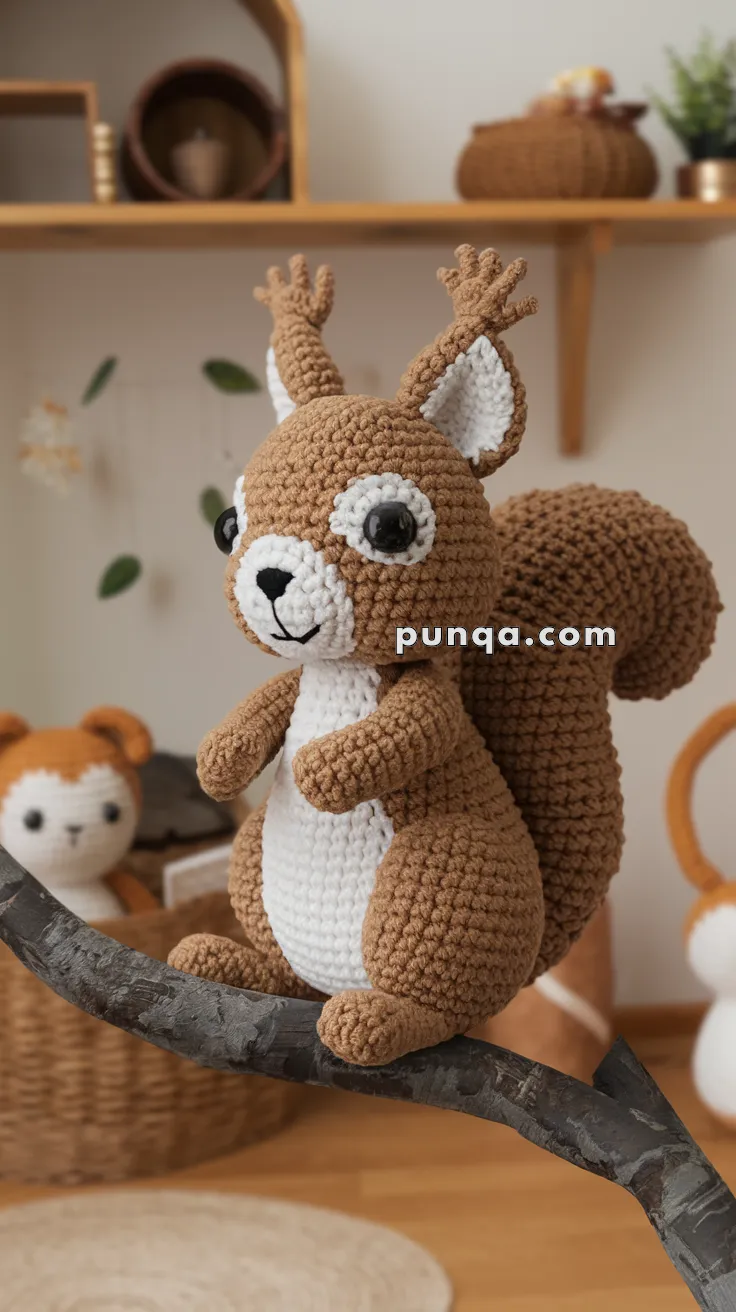
🐿 Amigurumi Squirrel Baby Crochet Pattern
Bring a touch of woodland magic into your home with this adorable squirrel baby! 🍂 With its fluffy curled tail, perky tufted ears, big white tummy patch, and bright eyes, this squirrel makes the perfect fall companion or nursery decor.
Whether you’re an advanced beginner or a confident crocheter, this little forest friend is a joy to make.
✨ Skill Level
Intermediate – Involves shaping, color changes, and sewing separate pieces (belly, eye patches, tufts, tail).
📏 Finished Size
Approx. 9–10 inches (23–25 cm) tall when using worsted weight yarn and a 3.5 mm hook.
🧶 Materials
-
Worsted weight yarn:
-
Color A: Medium Brown (body, head, limbs, ears, tail)
-
Color B: White (belly patch, snout, ear lining, eye patches)
-
Color C: Black (nose, mouth embroidery)
-
-
3.5 mm crochet hook
-
10–12 mm safety eyes
-
Polyfill stuffing
-
Tapestry needle & scissors
-
Stitch markers
🧵 Abbreviations (US Terms)
-
MR – Magic Ring
-
sc – Single Crochet
-
inc – Increase (2 sc in same st)
-
dec – Decrease (sc2tog)
-
sl st – Slip Stitch
-
ch – Chain
-
FO – Fasten Off
🐿 Pattern
Head (Brown – Color A)
-
MR, 6 sc (6)
-
inc x6 (12)
-
(1 sc, inc) x6 (18)
-
(2 sc, inc) x6 (24)
-
(3 sc, inc) x6 (30)
6–14. sc around (30) → gives fuller, round head -
(3 sc, dec) x6 (24)
-
(2 sc, dec) x6 (18)
-
(1 sc, dec) x6 (12)
-
dec x6 (6)
FO, stuff and close.
👉 Insert safety eyes between Rounds 8–9, spaced ~6 sts apart. Sew on white oval patches before attaching eyes.
Snout (White – Color B)
-
MR, 6 sc (6)
-
inc x6 (12)
-
(1 sc, inc) x6 (18)
-
sc around (18)
FO, stuff lightly, sew centered below eyes.
Embroider small black nose and vertical mouth line.
Eye Patches (Make 2 – White)
Ch 5.
Row 1: sc in 2nd ch, hdc, dc, hdc, sc. (Work around both sides of chain for oval.)
FO, leave tail for sewing.
👉 Sew behind safety eyes so they stand out like in the photo.
Ears (Make 2 – Brown with White Lining)
Outer Ear (Brown):
-
MR, 6 sc (6)
-
inc x6 (12)
-
(1 sc, inc) x6 (18)
-
sc around (18)
FO.
Inner Ear (White):
Repeat rounds 1–3 (finish at 12 sts).
Sew white inner ear to brown ear, fold slightly.
Ear Tufts:
Cut 6–8 short strands of brown yarn. Fold in half, knot through the top of each ear, trim to desired tuft length.
Body (Brown – Color A)
-
MR, 6 sc (6)
-
inc x6 (12)
-
(1 sc, inc) x6 (18)
-
(2 sc, inc) x6 (24)
-
(3 sc, inc) x6 (30)
6–12. sc around (30) -
(3 sc, dec) x6 (24)
-
(2 sc, dec) x6 (18)
-
(1 sc, dec) x6 (12)
-
dec x6 (6)
FO, stuff firmly, close.
Belly Patch (White – Color B)
-
MR, 6 sc (6)
-
inc x6 (12)
-
(1 sc, inc) x6 (18)
-
(2 sc, inc) x6 (24)
-
(3 sc, inc) x6 (30)
FO, leave tail.
👉 Sew vertically down front of body, starting just below snout.
Arms (Make 2 – Brown)
-
MR, 6 sc (6)
-
inc x6 (12)
3–10. sc around (12) -
(2 sc, dec) x3 (9)
FO, stuff lightly, sew angled forward to chest.
Legs (Make 2 – Brown)
-
MR, 6 sc (6)
-
inc x6 (12)
-
(1 sc, inc) x6 (18)
4–6. sc around (18) -
(2 sc, dec) x6 (12)
FO, stuff firmly. Flatten slightly and sew to base so squirrel sits.
Tail (Brown – Enlarged for Fullness)
-
MR, 6 sc (6)
-
inc x6 (12)
-
(1 sc, inc) x6 (18)
-
(2 sc, inc) x6 (24)
-
(3 sc, inc) x6 (30)
6–20. sc around (30)
FO, stuff lightly. Curve tail into a spiral and sew firmly to back of body.
✂️ Assembly
-
Sew head to body securely, making sure belly patch lines up with snout and stripe.
-
Attach arms slightly forward so they “hold” the belly.
-
Sew legs to bottom sides.
-
Attach ears with tufts at top of head.
-
Add large curved tail at the back.
-
Embroider final details: nose, mouth, and any extra accents.
🌰 Final Touch
Your squirrel baby is complete! 🐿 With its round tummy, fluffy tail, and tufted ears, it looks ready to leap from the branch and collect acorns. A perfect woodland friend for cozy displays or heartfelt handmade gifts.