Get ready to spark some joy with the Amigurumi Pikachu, a cheerful crochet creation inspired by one of the most iconic characters in pop culture! ⚡🧶 With its bright yellow body, rosy cheeks, pointy ears, and lightning-shaped tail, this adorable plush brings all the charm and energy of everyone’s favorite electric-type companion. Whether you’re crafting for a Pokémon fan, adding to your character collection, or just love stitching up cute creatures, Pikachu is sure to be a hit.
Perfect for crocheters who enjoy playful designs and expressive details, this pattern invites you to bring a beloved character to life—one stitch at a time. Add tiny accessories, customize the facial expression, or pair Pikachu with other amigurumi Pokémon for a fun display. The Amigurumi Pikachu is a joyful way to stitch up nostalgia, personality, and a sprinkle of handmade magic—one loop at a time! 🧵✨💛
⚡ Amigurumi Pikachu Crochet Pattern
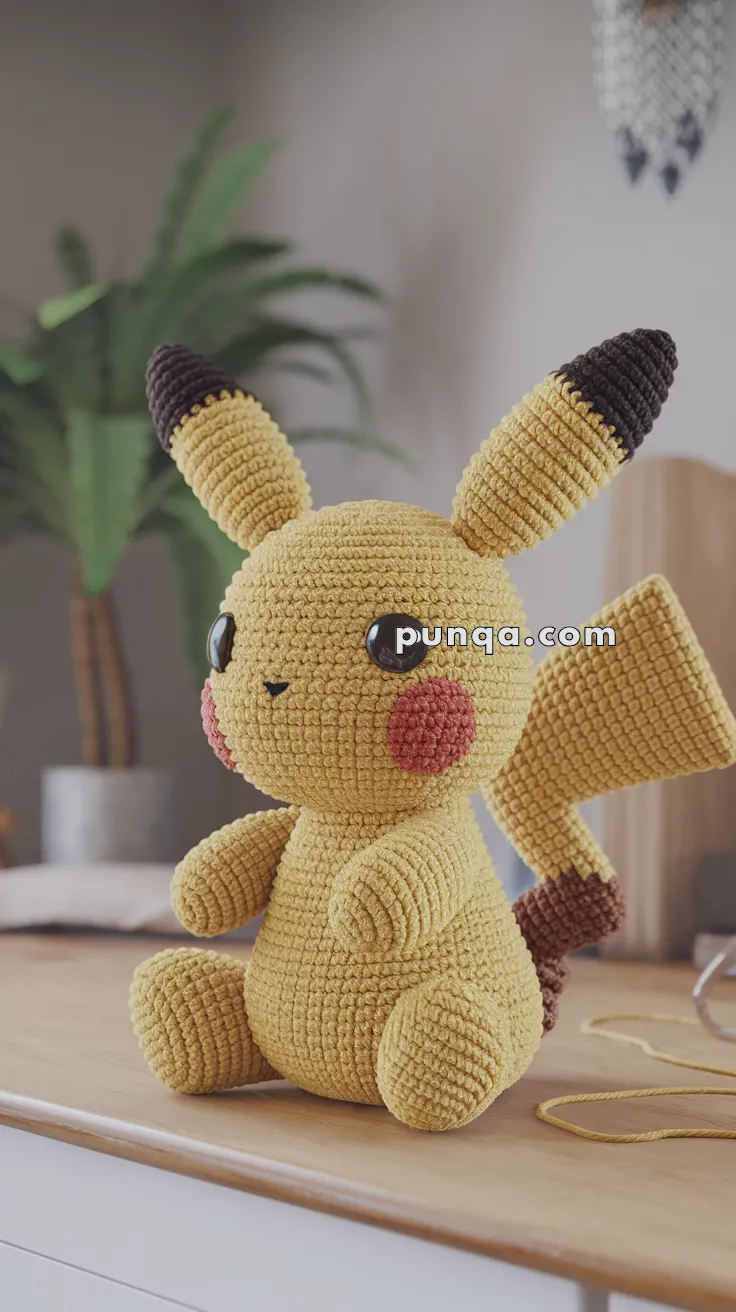
Who can resist this cuddly little Pikachu? With its round cheeks, upright ears, and lightning-bolt tail, this pattern perfectly captures the heart of everyone’s favorite electric mouse. Made in soft velvet yarn, it’s delightfully squishy, photo-accurate, and ready to bring a spark of joy to your crochet collection! 💛⚡
✨ Skill Level
Intermediate – Includes shaping, color changes, and tail construction with joined flat pieces.
📏 Finished Size
Approximately 9 inches (23 cm) tall when made with velvet or chenille yarn and a 4.0 mm crochet hook.
🧶 Materials
You’ll need about 105 grams of yarn in total:
-
80 g golden yellow (main body, head, limbs, upper tail, and ears)
-
15 g dark brown (ear tips, tail base, and two horizontal stripes)
-
5 g soft red (cheeks)
-
Less than 1 g black embroidery thread (mouth and nose detail)
-
12 mm safety eyes (black glossy finish)
-
4.0 mm crochet hook
-
Fiberfill stuffing
-
Yarn needle and stitch markers
-
Scissors
🧵 Abbreviations (US Terms)
MR – Magic Ring
sc – Single Crochet
inc – Increase (2 sc in same stitch)
dec – Decrease (sc 2 together)
ch – Chain
sl st – Slip Stitch
FO – Fasten Off
🧠 Head
With yellow yarn:
Round 1 – MR 6 sc (6)
Round 2 – inc ×6 (12)
Round 3 – (1 sc, inc) ×6 (18)
Round 4 – (2 sc, inc) ×6 (24)
Round 5 – (3 sc, inc) ×6 (30)
Round 6 – (4 sc, inc) ×6 (36)
Rounds 7–14 – sc around (36)
Insert 12 mm safety eyes between Rounds 11–12, spaced roughly 7 stitches apart.
Round 15 – (4 sc, dec) ×6 (30)
Round 16 – (3 sc, dec) ×6 (24)
Round 17 – (2 sc, dec) ×6 (18)
Stuff head firmly for a rounded shape.
Round 18 – (1 sc, dec) ×6 (12)
Round 19 – dec ×6 (6)
FO and close tightly.
Embroider a tiny sideways “V” mouth between Rounds 13–14 using black thread for that subtle, accurate expression.
🧍 Body
With yellow yarn:
Round 1 – MR 6 sc (6)
Round 2 – inc ×6 (12)
Round 3 – (1 sc, inc) ×6 (18)
Round 4 – (2 sc, inc) ×6 (24)
Round 5 – (3 sc, inc) ×6 (30)
Rounds 6–10 – sc around (30)
Round 11 – (3 sc, dec) ×6 (24)
Round 12 – (2 sc, dec) ×6 (18)
Stuff firmly.
Round 13 – (1 sc, dec) ×6 (12)
Round 14 – dec ×6 (6)
FO and close.
Sew head to body, slightly tilting it forward for a natural sitting posture.
💪 Arms (×2)
With yellow yarn:
Round 1 – MR 6 sc (6)
Round 2 – inc ×6 (12)
Rounds 3–6 – sc around (12)
Round 7 – (2 sc, dec) ×3 (9)
Stuff lightly.
FO and sew to body sides at shoulder level, angled slightly forward so the arms rest against the belly.
🦵 Legs (×2)
With yellow yarn:
Round 1 – MR 6 sc (6)
Round 2 – inc ×6 (12)
Round 3 – (1 sc, inc) ×6 (18)
Rounds 4–6 – sc around (18)
Round 7 – (1 sc, dec) ×6 (12)
Stuff firmly.
FO and flatten top slightly before sewing to the lower front of the body. The legs should help Pikachu sit upright with balance.
👂 Ears (×2 – Yellow + Brown)
Start with brown yarn:
Round 1 – MR 5 sc (5)
Round 2 – (1 sc, inc) ×2 + sc (7)
Round 3 – sc around (7)
Switch to yellow yarn.
Round 4 – (2 sc, inc) ×2 + sc (9)
Rounds 5–11 – sc around (9)
FO and stuff lightly.
Sew ears to the top of the head so they angle outward and slightly backward, just as shown in the reference photo.
🐽 Cheeks (×2 – Red)
Round 1 – MR 6 sc (6)
Round 2 – inc ×6 (12)
Round 3 – sc around (12)
FO and sew directly beneath the eyes.
Use soft red velvet yarn or fuzzy chenille for the most accurate plush texture.
⚡ Tail (Yellow + Brown Stripes)
The lightning-bolt tail is worked flat in rows and joined later.
Make two identical pieces and single-crochet them together at the end.
Start with brown yarn:
Ch 8.
Row 1 – sc in 2nd ch from hook and across (7), ch 1, turn.
Rows 2–3 – sc across (7), ch 1, turn.
Switch to yellow yarn.
Rows 4–6 – sc across (7), ch 1, turn.
Switch to brown yarn for the first stripe.
Rows 7–8 – sc across (7), ch 1, turn.
Switch to yellow yarn.
Rows 9–10 – sc across (7), ch 1, turn.
Switch to brown for the second stripe.
Rows 11–12 – sc across (7), ch 1, turn.
Switch back to yellow.
Row 13 – sc across (7), ch 1, turn.
Row 14 – sc across first 4 st only (leave rest unworked), ch 1, turn.
Row 15 – sc across (4), ch 1, turn.
Row 16 – inc, sc 2, inc (6), ch 1, turn.
Row 17 – sc across (6), ch 1, turn.
Row 18 – sc first 3 only, ch 1, turn.
Row 19 – sc 3, FO.
Make a second identical piece.
Place both together and single-crochet around edges to join.
Lightly stuff if desired for a padded look.
Sew tail to Pikachu’s back so it tilts slightly upward and to the right.
This two-stripe version exactly matches the tail seen in the image.
😄 Final Assembly
Sew head to body securely.
Attach arms, legs, and ears in position.
Add red cheeks, safety eyes, and a tiny black embroidered nose and mouth.
For extra realism, glue small white felt dots to the eyes for shine.
Ensure all parts are firmly attached, then gently shape by hand.