Step into the world of fairy tales with this Amigurumi Little Red Riding Hood and the Wolf crochet pattern! Inspired by the beloved story, this charming design captures the adventurous spirit of Little Red Riding Hood and the mischievous nature of the Big Bad Wolf in every stitch. With carefully crafted details like Red’s iconic hooded cape and the wolf’s sly expression, this crochet duo is perfect for adding a touch of storytelling magic to your handmade collection. Whether you’re crafting for fairy tale lovers, creating a whimsical display piece, or simply enjoy making character-inspired amigurumi designs, this pattern lets you stitch up a delightful pair bursting with personality! 🧶🐺✨
Designed for customization, this pattern allows you to experiment with different colors, embroidered details, or even tiny accessories like a miniature basket or forest scenery for extra flair. Craft a classic Little Red Riding Hood with her signature red cape, create a playful version with pastel hues, or even stitch up a full set of fairy tale-inspired amigurumi for an enchanting display! Whether gifted as a cherished keepsake, displayed as a nostalgic accent, or made simply for the joy of crafting, this Amigurumi Little Red Riding Hood and the Wolf is a fun and creative project—perfect for bringing a touch of handmade storytelling magic to every stitch! 🧶💖✨
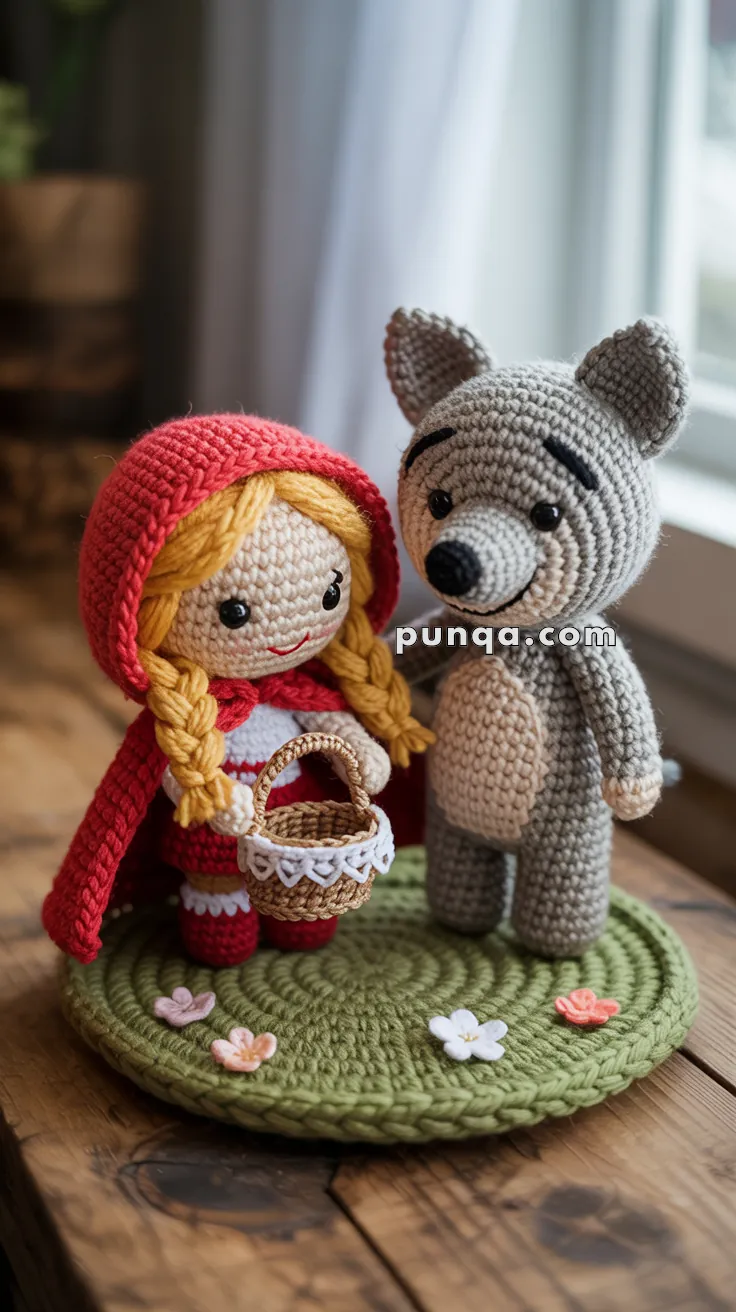
🧺 Amigurumi Little Red Riding Hood & The Wolf Crochet Pattern
Bring a beloved fairytale to life with this enchanting amigurumi duo! Sweet Little Red Riding Hood stands ready with her hooded cape and basket, accompanied by her gentle wolf companion. This delightful set makes a perfect storytelling companion, nursery decoration, or thoughtful handmade gift.
✨ Skill Level
Intermediate – Includes basic shaping, color changes, small accessories, and surface crochet techniques.
📏 Finished Size
Each character measures approximately 6–7 inches (15–18 cm) tall using DK or worsted weight yarn and a 2.5–3.0 mm hook.
🧶 Materials
Yarn (DK or Worsted Weight)
- Skin tone (beige/light tan): 30g / 60 yards
- Yellow (hair): 15g / 30 yards
- Red (cape and dress): 45g / 90 yards
- Brown (basket): 10g / 20 yards
- White (dress trim and wolf snout): 15g / 30 yards
- Grey (wolf body): 40g / 80 yards
- Cream/tan (wolf belly and accents): 15g / 30 yards
- Black (wolf details): Small amount for embroidery
- Green (base mat): 35g / 70 yards
- Assorted pastels (flowers): 5g each of 3-4 colors / 10 yards each
Other Supplies
- Crochet hook: 2.5–3.0 mm
- Safety eyes: 8 mm (4 total – 2 per character)
- Tapestry needle
- Stitch markers
- Polyfill stuffing
- Black embroidery thread or thin yarn
- Pink embroidery thread for cheeks (optional)
- Scissors
🧵 Abbreviations (US Terms)
- MR – Magic Ring
- sc – Single Crochet
- inc – Increase (2 sc in same stitch)
- dec – Decrease (invisible decrease)
- sl st – Slip Stitch
- ch – Chain
- hdc – Half Double Crochet
- dc – Double Crochet
- tr – Treble Crochet
- FO – Fasten Off
- BLO – Back Loop Only
- st(s) – Stitch(es)
👧 Little Red Riding Hood
Head (Skin Color)
Round 1: MR, 6 sc (6)
Round 2: inc x6 (12)
Round 3: (1 sc, inc) x6 (18)
Round 4: (2 sc, inc) x6 (24)
Round 5: (3 sc, inc) x6 (30)
Rounds 6–11: sc around (30)
Round 12: (3 sc, dec) x6 (24)
Round 13: (2 sc, dec) x6 (18)
Insert safety eyes between rounds 8–9, approximately 7 stitches apart.
Round 14: (1 sc, dec) x6 (12)
Round 15: dec x6 (6)
Stuff firmly. FO and close the opening.
Face Details:
- Embroider a gentle curved smile using red or pink thread between rounds 10–11
- Add small pink cheek circles with embroidery or fabric paint if desired
Body (Red with White Trim)
Round 1: MR, 6 sc (6)
Round 2: inc x6 (12)
Round 3: (1 sc, inc) x6 (18)
Round 4: (2 sc, inc) x6 (24)
Rounds 5–7: sc around (24)
Round 8: Switch to white: (3 sc, inc) x6 (30)
Round 9: Switch to red: sc in BLO around (30)
Rounds 10–14: sc around (30)
Round 15: (3 sc, dec) x6 (24)
Round 16: (2 sc, dec) x6 (18)
Stuff firmly. FO, leaving a long tail for sewing to head.
Arms (Make 2 – Skin Color transitioning to Red)
Round 1: MR, 5 sc (5)
Rounds 2–3: sc around (5)
Round 4: Switch to red: sc around (5)
Rounds 5–9: sc around (5)
Stuff lightly. FO, leaving tail for sewing. Attach to sides of body at round 4–5.
Legs (Make 2 – Red)
Round 1: MR, 6 sc (6)
Round 2: (1 sc, inc) x3 (9)
Rounds 3–6: sc around (9)
FO first leg, leaving a long tail. Do not cut yarn on second leg.
Stuff lightly and sew to bottom of body, positioned slightly apart.
Hair (Yellow)
Hair Cap:
Round 1: MR, 6 sc (6)
Round 2: inc x6 (12)
Round 3: (1 sc, inc) x6 (18)
Round 4: (2 sc, inc) x6 (24)
Round 5: (3 sc, inc) x6 (30)
Rounds 6–8: sc around (30)
FO, leaving long tail. Sew onto head securely.
Bangs/Fringe:
- Cut 4–5 strands of yellow yarn, each about 2 inches long
- Attach across front hairline using lark’s head knots
- Trim to desired length for a wispy fringe effect
Surface Crochet Braids:
- With yellow yarn, insert hook from front to back through hair cap at side of head (around round 4–5)
- Pull up a loop and ch 18–20
- Work sl st back down the chain to create a flat, rope-like braid
- Secure at the bottom with a small knot
- Repeat on opposite side
- Optional: Tie small red yarn bows at the ends of braids
Hooded Cape (Red)
Hood (worked in rows):
Row 0: Ch 28
Row 1: sc in 2nd ch from hook, sc across (27)
Rows 2–6: ch 1, turn, sc across (27)
Row 7: ch 1, turn, dec, sc 23, dec (25)
Row 8: ch 1, turn, dec, sc 21, dec (23)
Rows 9–10: ch 1, turn, sc across (23)
FO, leaving long tail. Fold piece in half lengthwise and seam the top together to form the back of the hood. Turn right side out.
Face Opening Edging:
- Attach red yarn to face opening edge
- Work sc evenly around entire opening (approximately 24–26 sc)
- This creates the structured frame around the face
- FO
Cape Body:
Row 0: Ch 20
Row 1: sc in 2nd ch from hook, sc across (19)
Rows 2–8: ch 1, turn, sc across (19)
FO, leaving long tail for assembly.
Assembly:
- Sew hood to top edge of cape body
- Add a small ch-3 tie at center front of neck opening
Basket (Brown with White Trim)
Round 1: MR, 6 sc (6)
Round 2: inc x6 (12)
Round 3: (1 sc, inc) x6 (18)
Round 4: sc in BLO around (18)
Rounds 5–6: sc around (18)
FO, leaving long tail.
Handle:
- Ch 10 with brown yarn
- Attach both ends to opposite sides of basket rim
Optional Decorative Trim:
- With white yarn, embroider small chain stitches or lazy daisy stitches around the rim for a lace effect
Stuff basket lightly to hold shape, then place in Little Red’s hand and secure with a few stitches.
🐺 The Wolf
Head (Grey)
Round 1: MR, 6 sc (6)
Round 2: inc x6 (12)
Round 3: (1 sc, inc) x6 (18)
Round 4: (2 sc, inc) x6 (24)
Round 5: (3 sc, inc) x6 (30)
Rounds 6–11: sc around (30)
Round 12: (3 sc, dec) x6 (24)
Round 13: (2 sc, dec) x6 (18)
Insert safety eyes between rounds 8–9, approximately 6–7 stitches apart.
Round 14: (1 sc, dec) x6 (12)
Round 15: dec x6 (6)
Stuff firmly. FO and close.
Snout (Cream/Tan)
Round 1: MR, 6 sc (6)
Round 2: (1 sc, inc) x3 (9)
Round 3: (2 sc, inc) x3 (12)
Rounds 4–5: sc around (12)
Round 6: (2 sc, dec) x3 (9)
Stuff lightly. FO, leaving long tail.
Sew snout onto face centered between the eyes, around rounds 8–10. The stuffing will make it protrude naturally.
Black Nose:
- Using black embroidery thread, create a small triangular nose at the tip of the snout
Eyebrows (optional):
- Embroider small angled lines above eyes with black thread for expression
Body (Grey with Cream Belly)
Round 1: MR, 6 sc (6)
Round 2: inc x6 (12)
Round 3: (1 sc, inc) x6 (18)
Round 4: (2 sc, inc) x6 (24)
Rounds 5–14: sc around (24)
Round 15: (2 sc, dec) x6 (18)
Round 16: (1 sc, dec) x6 (12)
Round 17: dec x6 (6)
Stuff firmly. FO and close.
Belly Patch (Cream):
Row 0: Ch 8
Round 1: sc in 2nd ch from hook, sc 5, 3 sc in last ch; working on opposite side of chain: sc 5, 2 sc in first st
Round 2: inc, sc 5, inc x3, sc 5, inc x2
FO, leaving long tail. Sew onto front of body, centered.
Arms (Make 2 – Grey)
Round 1: MR, 5 sc (5)
Rounds 2–9: sc around (5)
Stuff lightly. FO, leaving tail for sewing. Attach to sides of body.
Optional Cream Paw Pads:
- Embroider small ovals on end of each arm with cream yarn
Legs (Make 2 – Grey with Cream Pads)
Round 1: MR, 6 sc in grey (6)
Round 2: (1 sc, inc) x3 (9)
Round 3: sc around (9)
Round 4: sc 3 in grey, sc 3 in cream, sc 3 in grey (9)
Rounds 5–8: sc around in grey (9)
Stuff lightly. FO first leg with long tail; do not cut yarn on second leg.
Attach legs to bottom of body, positioned slightly apart for standing stability.
Ears (Make 2)
Outer Ear (Grey):
Round 1: MR, 4 sc (4)
Round 2: (1 sc, inc) x2 (6)
Round 3: (2 sc, inc) x2 (8)
Round 4: (3 sc, inc) x2 (10)
Round 5: sc around (10)
Round 6: (3 sc, dec) x2 (8)
FO, leaving long tail.
Inner Ear (Cream):
Round 1: MR, 4 sc (4)
Round 2: (1 sc, inc) x2 (6)
Round 3: sc around (6)
FO, leaving tail.
Assembly:
- Place cream inner ear piece inside grey outer ear
- Pinch the bottom together and sew to create a triangular shape
- Attach to head at rounds 3–4, angled outward for alert wolf ears
Tail (Grey)
Round 1: MR, 4 sc (4)
Rounds 2–6: sc around (4)
FO, leaving tail. Attach to back of body.
Optional: Add a small cream tip by working last round in cream color.
🌿 Ground Display Mat (Green)
Round 1: MR, 6 sc (6)
Round 2: inc x6 (12)
Round 3: (1 sc, inc) x6 (18)
Round 4: (2 sc, inc) x6 (24)
Round 5: (3 sc, inc) x6 (30)
Round 6: (4 sc, inc) x6 (36)
Round 7: (5 sc, inc) x6 (42)
Round 8: (6 sc, inc) x6 (48)
Round 9: (7 sc, inc) x6 (54)
Round 10: (8 sc, inc) x6 (60)
Continue increasing in this pattern until mat reaches desired diameter (approximately 5–6 inches across).
Final Round: sl st in BLO around for a decorative ridged edge.
FO and weave in ends.
Decorative Flowers (Make 4–5 in Assorted Pastel Colors)
5-Petal Flower:
Round 1: MR, 5 sc (5)
Round 2: (sl st in next st, ch 2, 2 dc in same st, ch 2, sl st in same st) – this creates one petal
Repeat from * in each of the remaining 4 sc for a total of 5 petals.
FO, leaving tail for sewing.
Alternative 4-Petal Flower:
Round 1: MR, ch 3, 2 tr in ring, ch 3, sl st in ring – first petal
Repeat from * 3 more times for 4 petals total.
FO, leaving tail.
Optional Yellow Centers:
- Add a French knot or small yellow bead in the center of each flower
Assembly:
- Sew flowers randomly around the green mat
- Vary colors and petal types for visual interest
🎨 Assembly & Finishing
- Little Red Riding Hood:
- Sew head securely to body
- Attach arms at shoulder level
- Position cape around shoulders and neck
- Place basket in one hand and secure
- The Wolf:
- Sew head to body
- Attach arms and legs securely
- Add tail to back
- Display:
- Position both characters on the green mat
- Arrange so Little Red and Wolf are facing each other
- You can add a tiny stitch to temporarily secure feet to mat for display stability
💡 Tips for Success
- Tension: Keep your stitches tight and consistent to prevent stuffing from showing through
- Stuffing: Use small amounts at a time and stuff firmly for best shape
- Safety Eyes: Always insert before closing the head. Test placement before securing permanently
- Color Changes: When switching colors mid-round, change in the last pull-through of the previous color
- Embroidery: Use a single strand of embroidery floss for delicate facial features
- Photography: Display near a window for soft natural lighting that shows off your beautiful work
🌟 Customization Ideas
- Create multiple wolves in different colors for the three little pigs story
- Add Granny’s nightcap and glasses to the wolf for the classic scene
- Make a miniature cottage backdrop
- Craft a woodsman character to complete the story
- Scale up or down by changing yarn weight and hook size
- Add a drawstring closure to the cape
- Embroider flowers or patches on Little Red’s dress
- Create a tiny book to place in the basket
Pattern designed for intermediate crocheters. Approximate completion time: 8–12 hours.
Happy Crocheting! 🧺🐺❤️