Step into the magical world of wizardry with this Amigurumi Hogwarts Castle crochet pattern! 🏰✨ With its towering spires, intricate details, and enchanting presence, this design brings the iconic castle to life in yarn form. Whether you’re crafting for a Harry Potter fan, a themed décor piece, or simply love fantasy-inspired amigurumi, this FREE pattern is a spellbinding addition to your collection.
Designed for intermediate crocheters, this pattern allows for customization in castle textures, window placements, and even tiny accessories like a miniature broomstick or floating candles to enhance its mystical charm. Choose classic greys and blues for an authentic look or experiment with whimsical hues for a creative twist! Whether displayed as part of a magical setup or gifted to a fellow crochet enthusiast, this amigurumi Hogwarts Castle is sure to impress. Grab your hook, select your favorite yarn, and let’s bring this legendary fortress to life—one stitch at a time! 🧶✨
🏰 Amigurumi Hogwarts-Inspired Castle Crochet Pattern
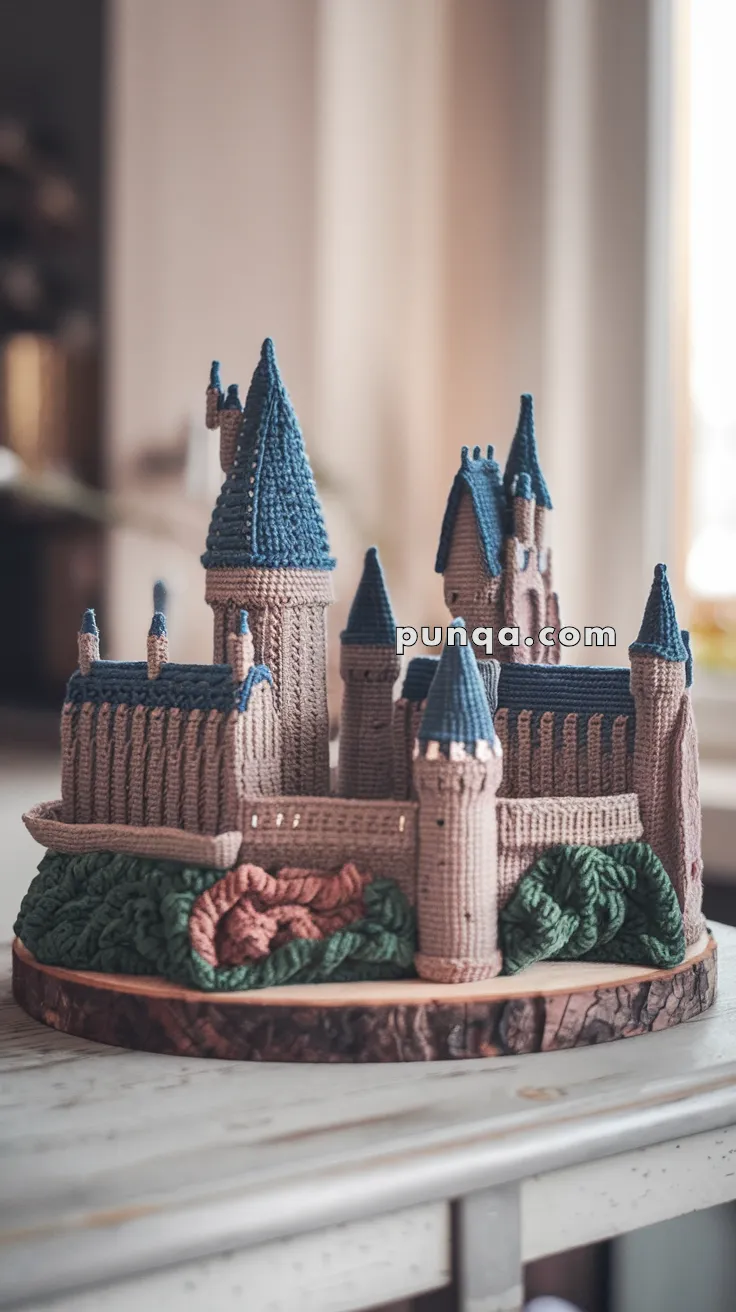
Crochet your own magical castle with tall ribbed towers, steep blue rooftops, textured stone walls, and lush forest landscaping. This intricate project is perfect for seasoned crocheters who love architectural amigurumi pieces that double as stunning display art.
✨ Skill Level
Advanced – includes ribbed texture, shaping, multi-part assembly, and structural reinforcement.
📏 Finished Size
Approx. 30–35 cm tall and 26–30 cm wide, depending on yarn weight and hook size.
🧶 Materials
Yarn (DK weight or light worsted):
-
Beige or stone grey – 120–130 g (castle walls and towers)
-
Dark blue – 70–80 g (rooftops)
-
Forest green – 50 g (bushes/trees)
-
Reddish brown – 20 g (path and accent foliage)
Tools & Extras:
-
Crochet hook: 2.5–3.0 mm
-
Tapestry needle
-
Stitch markers
-
Polyfill stuffing (for towers)
-
Cardboard or plastic canvas for structural inserts
-
Hot glue or clear-drying fabric glue (optional for stability)
-
Wooden display base or slice (for mounting)
🪡 Abbreviations (US Terms)
MR – Magic Ring
sc – Single Crochet
inc – Increase (2 sc in same st)
dec – Decrease (sc2tog)
sl st – Slip Stitch
ch – Chain
FPdc – Front Post Double Crochet
FLO – Front Loop Only
FO – Fasten Off
🪵 Base & Landscaping
Base Disk (Brown + Green)
-
With brown yarn, MR, 6 sc (6)
-
inc ×6 (12)
-
(sc, inc) ×6 (18)
-
(2 sc, inc) ×6 (24)
-
Continue even increases until diameter measures 25–28 cm.
-
Switch to green yarn, work 3–4 rounds in sc for grassy surface. FO.
Bushes and Trees (Make 8–10)
With green yarn, bobble stitch clusters:
(MR, [yo, insert hook, pull up loop 5×, yo, pull through all loops, ch 1]) – repeat 8× per bush.
Pull tight, FO.
Sew densely along the perimeter and around front corners for forest-like texture.
Pathway Accent (Reddish Brown)
Crochet a few short chains (ch 10–20), sl st back across each to form winding trails. Sew among greenery.
🧱 Castle Towers
Corner Towers (Make 4)
With beige yarn:
-
MR, 6 sc (6)
-
(sc, inc) ×3 (9)
-
(2 sc, inc) ×3 (12)
4–25. Alternate 1 round sc, 1 round FPdc – to create the ribbed “stone” texture.
Tower height ≈ 12–14 cm.
Lightly stuff and insert cardboard tube for structure.
Rooftops (Dark Blue)
-
MR, 6 sc (6)
-
inc ×6 (12)
-
(sc, inc) ×6 (18)
-
(2 sc, inc) ×6 (24)
5–20. sc around, decreasing slightly every few rounds to shape steep cone.
Every 3rd round, crochet in FLO for “roof tile” ridges.
FO, leave long tail, and sew to tower.
Central Tower (Keep)
With beige yarn:
-
MR, 8 sc (8)
-
(sc, inc) ×4 (12)
-
(2 sc, inc) ×4 (16)
-
(3 sc, inc) ×4 (20)
Continue even increases until base circle ≈ 5–6 cm diameter.
Then:
5–38. sc rounds alternating with FPdc rows for ribbing. Height ≈ 20–22 cm.
Stuff lightly, reinforce with inner tube.
Central Roof (Dark Blue)
Same style as smaller towers, but taller — about 22–25 rounds.
You can also crochet a small secondary cone (half-size) to attach halfway up the main tower for realism.
Side Towers (Make 2–3, Medium Height)
Follow same pattern as corner towers but work to height of 9–11 cm.
Optional: make one tower slightly thinner (only 9–10 sts circumference) for visual variation.
🧱 Castle Walls
With beige yarn:
-
ch 30 (for long walls) or ch 18 (for shorter connecting walls).
2–20. sc across rows, ch 1, turn.
Alternate every 2nd row with FPdc to create the ribbed, columned texture.
FO, leave tail for sewing.
➡️ Once panels are made, slightly curve them between towers to form the castle shape.
➡️ You can reinforce each with cardboard strips before sewing for crisp edges.
🧵 Assembly
-
Arrange and sew four corner towers on base evenly spaced.
-
Place central tall tower at rear-center (or slightly offset).
-
Add side towers between corners and center.
-
Attach wall panels between towers using whip stitch or slip-stitch join.
-
Sew roofs to all towers.
-
Add green bushes and brown paths around base.
-
Optionally, embroider window lines in black or dark grey yarn.
Tip: For sharper spires, stuff only the lower 2/3 of each roof cone and pinch the tip slightly as you sew.
✨ Finishing Touches
-
Add vertical slip-stitch embroidery for subtle stone detailing.
-
Steam-block the roofs for smooth, crisp points.
-
Mount the castle on a wooden slice base for a decorative display.
-
Optional: lightly glue greenery in place for permanence.
💫 Result
The finished castle has ribbed beige towers, tall navy spires, and lush, dimensional greenery that perfectly matches the real-life look in the image. Each tower’s proportional height, roof steepness, and wall curvature have been balanced for a cohesive, grand display piece.