Amigurumi Bull Terrier – FREE Crochet Pattern

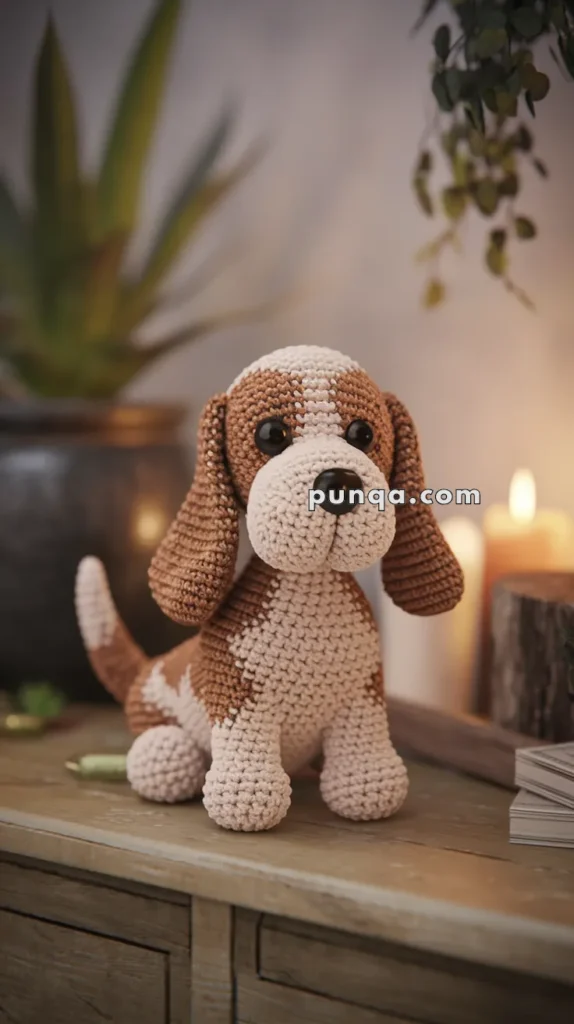
A crocheted dog toy with a black patch over one eye and a black nose, situated on a table with yarn and knitting needles nearby, in a cozy room setting.
Spread the love

Say hello to the Amigurumi Bull Terrier, a playful pup with a big heart and even bigger personality! 🐾🧶 With its signature egg-shaped head, perky ears, and stout little body, this crochet cutie captures all the charm of the beloved bull terrier breed. Whether you’re a dog lover, a fan of quirky designs, or just looking to add a loyal companion to your handmade menagerie, this pup is sure to win you over with every stitch.

Perfect for crocheters who enjoy bold shapes and expressive features, this pattern brings the bull terrier’s unique look to life in the most adorable way. Add a tiny collar, stitch on a spot or two, or personalize it to match your own furry friend. The Amigurumi Bull Terrier is a joyful way to stitch up loyalty, character, and a sprinkle of handmade magic—one loop at a time! 🧵✨🐶
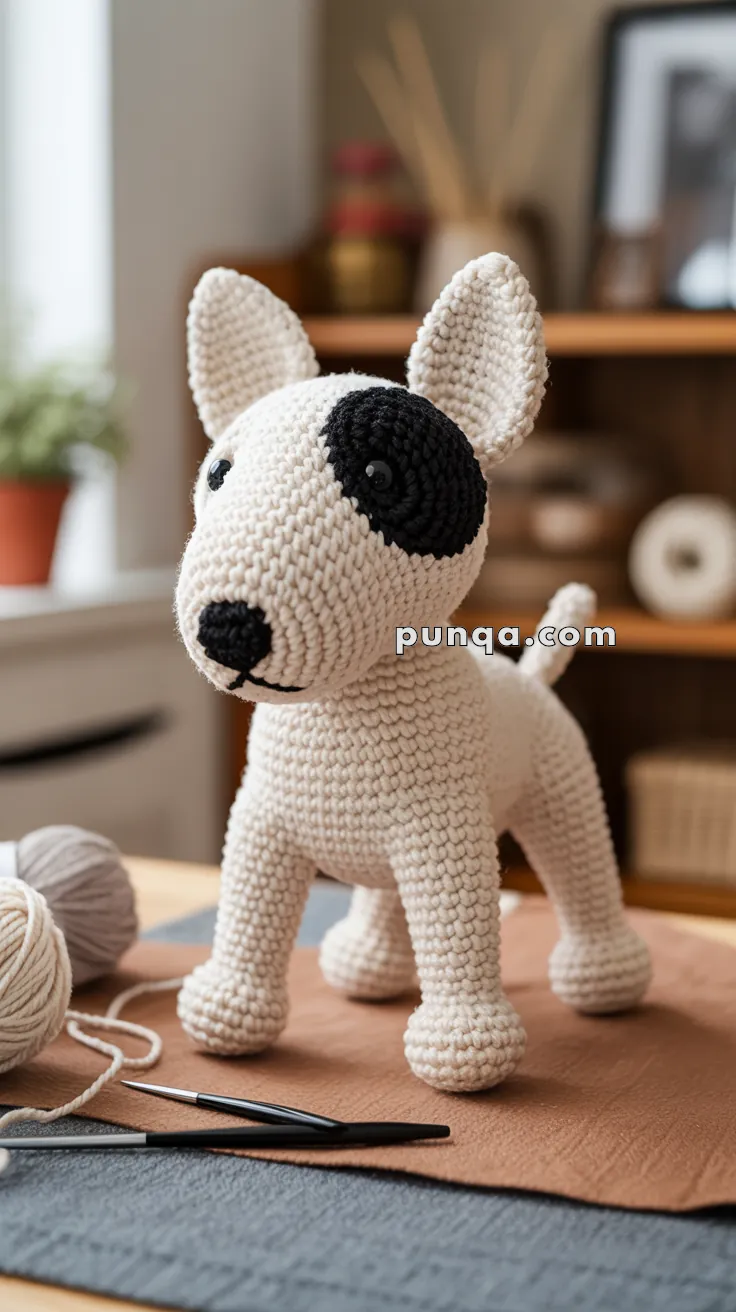
A crocheted dog toy with a black patch over one eye and a black nose, situated on a table with yarn and knitting needles nearby, in a cozy room setting.
Copyright & Pattern Usage Policy

🐶 Amigurumi Bull Terrier Crochet Pattern

Create a proud little bull terrier with a long egg-shaped head, tapered muzzle, upright pointed ears, bold black eye patch, muscular chest, sturdy legs, rounded paws, and a short upturned tail. 🐾

This pattern uses a separate black facial appliqué rather than complicated in-round color changes. The head is shaped from the nose toward the back of the skull, producing the breed’s distinctive downward-curving profile and smooth, wedge-shaped face.


✨ Skill Level

Intermediate to Advanced

This project includes:

  • Elongated head and muzzle shaping
  • Oval construction around a foundation chain
  • Separate eye-patch appliqué
  • Double-layered pointed ears
  • Broad chest and tapered waist
  • Four weight-bearing legs
  • Rounded paw construction
  • Standing-pose assembly
  • Facial embroidery and light sculpting

📏 Finished Size

Using DK-weight cotton or cotton-blend yarn with a 3 mm crochet hook, the finished dog measures approximately:

  • 26–29 cm (10¼–11½ in) tall to the ear tips
  • 24–27 cm (9½–10½ in) from chest to rump
  • 11–13 cm (4¼–5 in) wide across the chest

Finished measurements may vary depending on yarn, hook size, tension, stuffing, and assembly.


🧶 Yarn Requirements

Use smooth DK-weight yarn for firm shaping and clear stitch definition.

  • 🤍 Warm cream or off-white — 190–220 g
  • 🖤 Black — 25–30 g
  • 🩶 Dark gray, optional for nose shading — 3–5 g

Polyester fiberfill — approximately 220–280 g


🧵 Materials

  • 3 mm crochet hook
  • Two 10–12 mm dark-brown or black safety eyes
  • Polyester fiberfill
  • Tapestry needle
  • Long doll-making needle
  • Stitch markers
  • Pins
  • Scissors
  • Black embroidery thread
  • Optional plastic pellets for body stability
  • Optional plastic canvas for the paws
  • Optional 1–1.5 mm craft wire for the tail

Safety eyes and internal wire are unsuitable for children under three. Use embroidered eyes and omit wire when making the dog as a young child’s toy.


🔤 Abbreviations — US Terms

  • MR — Magic Ring
  • sc — Single Crochet
  • inc — Increase: 2 sc in one stitch
  • dec — Invisible Decrease
  • sl st — Slip Stitch
  • ch — Chain
  • hdc — Half Double Crochet
  • BLO — Back Loop Only
  • FLO — Front Loop Only
  • FO — Fasten Off
  • st — Stitch

Work in continuous rounds unless instructed otherwise.


🐾 Construction Notes

The head is worked from the nose end toward the back of the skull. This creates the long, convex bull-terrier profile more accurately than beginning with a round ball.

The body is worked separately and shaped into a broad chest with a narrower rear section. All four legs are attached in a standing pose.

Use tight tension throughout so the stuffing does not show.


🐽 Egg-Shaped Head and Muzzle

The head begins with a long oval foundation. One end becomes the muzzle, while the increases and even rounds build the broad skull behind it.

Using cream yarn:

R1

Ch 10.

Starting in the second chain:

8 sc, 3 sc in the final chain.

Continue along the opposite side:

7 sc, inc.
(20)

R2

inc, 7 sc, 3 inc, 7 sc, 2 inc.
(26)

R3

2 sc, inc, 7 sc, (2 sc, inc) ×3, 7 sc, (2 sc, inc) ×2.
(32)

R4

sc around.
(32)

R5

(3 sc, inc) ×8.
(40)

R6–9

sc around.
(40)

These rounds form the long muzzle and begin widening the face.

R10

(4 sc, inc) ×8.
(48)

R11–17

sc around.
(48)

The head should now be considerably wider behind the muzzle.

R18

(6 sc, dec) ×6.
(42)

R19–21

sc around.
(42)

R22

(5 sc, dec) ×6.
(36)

R23–24

sc around.
(36)

Begin stuffing firmly through the open back.

Keep the muzzle dense and smooth. Add more stuffing to the crown and upper back of the head than beneath the chin.

R25

(4 sc, dec) ×6.
(30)

R26

(3 sc, dec) ×6.
(24)

R27

(2 sc, dec) ×6.
(18)

Continue stuffing and shape the head into a long wedge.

R28

(1 sc, dec) ×6.
(12)

R29

dec ×6.
(6)

FO and close.


✨ Shaping the Head

The finished head should have:

  • A long, gently downward-sloping forehead
  • A narrow nose end
  • A broad skull behind the eyes
  • A smooth transition between forehead and muzzle
  • A rounded but not spherical back

Roll the stuffed piece gently between your palms.

Press the underside of the muzzle slightly flatter while keeping the upper profile convex.


🖤 Black Eye Patch

The eye patch is a large irregular oval with a slightly pointed upper edge.

Using black yarn:

R1

Ch 8.

Starting in the second chain:

6 sc, 3 sc in the final chain.

Continue along the opposite side:

5 sc, inc.
(16)

R2

inc, 5 sc, 3 inc, 5 sc, 2 inc.
(22)

R3

2 sc, inc, 6 sc, inc ×3, 6 sc, inc ×2.
(28)

R4–5

sc around.
(28)

FO, leaving a long sewing tail.

Flatten the piece.

Pinch its upper inner edge slightly to form a soft point.


👀 Eye Placement

Insert one safety eye through the center-lower portion of the black patch.

Position the patch on one side of the head so that:

  • The eye sits just behind the widest part of the muzzle
  • The patch extends above and below the eye
  • Its upper point angles toward the nearest ear
  • Its lower edge follows the cheek

Secure the safety-eye washer inside the head before closing it completely, or use an embroidered eye if the head is already closed.

Place the second eye on the opposite side at the same height.

The eyes should sit approximately between Head Rounds 12 and 15.

Sew the black patch flat around its entire edge.


👁️ Optional Eye Highlights

Using white embroidery floss, add one tiny highlight stitch to each eye.

Keep the highlights in matching positions.


👃 Black Nose

The nose is a broad rounded oval attached to the very end of the muzzle.

Using black yarn:

R1

Ch 5.

Starting in the second chain:

3 sc, 3 sc in the final chain.

Continue along the opposite side:

2 sc, inc.
(10)

R2

inc, 2 sc, 3 inc, 2 sc, 2 inc.
(16)

R3–4

sc around.
(16)

R5

(2 sc, dec) ×4.
(12)

Stuff lightly.

FO, leaving a long sewing tail.

Flatten the back opening and sew the nose to the muzzle tip.

The nose should cover most of the narrow front end without extending too far down the chin.


👄 Mouth

Using black embroidery thread:

  1. Stitch a short vertical line beneath the nose.
  2. Add one shallow curve toward each side.
  3. Keep the curves short and close to the muzzle tip.

Avoid a wide smile. The expression should remain gentle and alert.


🪡 Optional Muzzle Sculpting

To emphasize the downward profile:

  1. Insert a long cream yarn strand beneath the jaw near the head.
  2. Bring the needle out beneath the nose.
  3. Return it to the starting point.
  4. Pull very gently.

This raises the nose end slightly while creating a subtle chin curve.

Knot securely and hide the ends.


👂 Outer Ears — Make 2

The ears are tall, flat, pointed, and broad at the base. They are worked in rows rather than rounds so they do not become tubular.

Using cream yarn:

Row 1

Ch 15.

Starting in the second chain, sc across.
(14)

Row 2

Ch 1, turn, dec, 10 sc, dec.
(12)

Row 3

Ch 1, turn, sc across.
(12)

Row 4

Ch 1, turn, dec, 8 sc, dec.
(10)

Row 5

Ch 1, turn, sc across.
(10)

Row 6

Ch 1, turn, dec, 6 sc, dec.
(8)

Row 7

Ch 1, turn, sc across.
(8)

Row 8

Ch 1, turn, dec, 4 sc, dec.
(6)

Row 9

Ch 1, turn, dec, 2 sc, dec.
(4)

Row 10

Ch 1, turn, dec twice.
(2)

FO.

Join cream yarn at one lower corner and sc evenly around both sloping sides and the tip.

Work 2 sc in the tip to keep it softly pointed.

FO, leaving a long sewing tail.


👂 Inner Ear Panels — Make 2

Using cream yarn for a subtle monochrome inner ear, or pale pink for additional contrast:

Row 1

Ch 11.

Starting in the second chain, sc across.
(10)

Row 2

Ch 1, turn, dec, 6 sc, dec.
(8)

Row 3

Ch 1, turn, sc across.
(8)

Row 4

Ch 1, turn, dec, 4 sc, dec.
(6)

Row 5

Ch 1, turn, dec, 2 sc, dec.
(4)

Row 6

Ch 1, turn, dec twice.
(2)

FO.

Sew one inner panel to each outer ear, leaving a visible border.


🪡 Attaching the Ears

Pinch the lower edge of each ear inward to create a shallow cup.

Position the ears:

  • High on the crown
  • Slightly behind the eyes
  • Upright
  • Angled a little outward
  • With a clear gap between their bases

Sew through the folded bases several times.

The ears should remain tall and alert rather than leaning sideways.


🐕 Body

The body has a deep chest, rounded ribcage, and slightly narrower rump.

Using cream yarn:

R1

MR 6.
(6)

R2

inc ×6.
(12)

R3

(1 sc, inc) ×6.
(18)

R4

(2 sc, inc) ×6.
(24)

R5

(3 sc, inc) ×6.
(30)

R6

(4 sc, inc) ×6.
(36)

R7

(5 sc, inc) ×6.
(42)

R8

(6 sc, inc) ×6.
(48)

R9–19

sc around.
(48)

Begin stuffing firmly.

R20

(6 sc, dec) ×6.
(42)

R21–24

sc around.
(42)

R25

(5 sc, dec) ×6.
(36)

R26–29

sc around.
(36)

R30

(4 sc, dec) ×6.
(30)

R31–33

sc around.
(30)

R34

(3 sc, dec) ×6.
(24)

Finish stuffing firmly.

Keep the chest broader than the rear section.

FO, leaving a long tail for attaching the head.


🐾 Front Legs — Make 2

The front legs are straight and slightly thicker through the paws.

Using cream yarn:

R1

MR 6.
(6)

R2

inc ×6.
(12)

R3

(1 sc, inc) ×6.
(18)

R4

(2 sc, inc) ×6.
(24)

R5–7

sc around.
(24)

R8

BLO (2 sc, dec) ×6.
(18)

The back-loop round creates a subtle paw ridge.

R9–21

sc around.
(18)

R22

(4 sc, dec) ×3.
(15)

R23–24

sc around.
(15)

Stuff the paws firmly and the upper legs moderately.

Flatten the upper opening.

FO, leaving a long sewing tail.


🐾 Rear Legs — Make 2

The rear legs are slightly longer and angle backward beneath the rump.

Using cream yarn:

R1

MR 6.
(6)

R2

inc ×6.
(12)

R3

(1 sc, inc) ×6.
(18)

R4

(2 sc, inc) ×6.
(24)

R5–7

sc around.
(24)

R8

BLO (2 sc, dec) ×6.
(18)

R9–23

sc around.
(18)

R24

(4 sc, dec) ×3.
(15)

R25–26

sc around.
(15)

Stuff firmly.

Flatten the upper opening at a slight diagonal.

FO, leaving a long sewing tail.


🐾 Paw Shaping

Using cream yarn and a long needle, create two shallow toe divisions on each paw.

For each division:

  1. Insert the needle beneath the paw.
  2. Bring it out near the front top edge.
  3. Return through the underside.
  4. Pull gently.
  5. Knot securely.

The toes should remain subtle.


🐕 Tail

The tail is short, narrow, and curves upward.

Using cream yarn:

R1

MR 5.
(5)

R2

inc ×5.
(10)

R3–6

sc around.
(10)

R7

(3 sc, dec) ×2.
(8)

R8–13

sc around.
(8)

R14

(2 sc, dec) ×2.
(6)

R15–17

sc around.
(6)

Stuff very lightly.

FO, leaving a long sewing tail.

Curve the tail upward while sewing, or insert a safely wrapped wire for a poseable display piece.


🪡 Head-to-Body Assembly

Center the head over the front-top of the body.

The head should:

  • Sit higher than the shoulder line
  • Angle slightly downward
  • Keep the muzzle pointing forward
  • Show a smooth transition into the neck
  • Remain balanced between the ears

Add extra stuffing between the pieces if needed.

Sew around the body opening several times.

Reinforce the underside of the neck because the long head adds forward weight.


🪡 Attaching the Front Legs

Position the front legs beneath the chest.

They should:

  • Stand nearly vertical
  • Remain parallel
  • Sit slightly wider than the muzzle
  • Support the broad chest
  • Rest fully on their paw bases

Pin both legs while the body stands on a flat surface.

Sew firmly around the flattened upper openings.


🪡 Attaching the Rear Legs

Position the rear legs beneath the rump.

Angle them slightly backward.

The paws should rest flat and remain approximately level with the front paws.

Check the dog from both sides before sewing permanently.


🪡 Attaching the Tail

Place the tail high on the rear body.

Angle it upward and slightly backward.

Sew securely around the broad base.

Add one hidden tacking stitch near the middle if the curve needs support.


⚖️ Standing Balance

Before closing every seam permanently:

  1. Place the dog on a flat surface.
  2. Check all four paws.
  3. Adjust the front legs until the chest sits centrally.
  4. Adjust the rear legs until the rump is supported.
  5. Confirm that the head does not pull the body forward.
  6. Re-pin any uneven leg before sewing.

A sealed pouch of plastic pellets may be placed inside the lower body for extra stability.


🪨 Optional Paw Reinforcement

Cut four small plastic-canvas ovals slightly smaller than the paw bases.

Insert one into each paw before final stuffing.

Cover the canvas completely with fiberfill.

This creates flatter soles and improves standing balance.


✨ Final Shaping

  • Keep the head elongated and egg-shaped.
  • Maintain the smooth downward forehead profile.
  • Keep the nose low on the muzzle tip.
  • Position the black patch around only one eye.
  • Stand both ears tall and slightly outward.
  • Shape the chest broad and full.
  • Keep the waist narrower than the shoulders.
  • Position the front legs straight.
  • Angle the rear legs slightly backward.
  • Flatten all four paw bases.
  • Curve the tail upward.
  • Check symmetry from the front, sides, and back.

💡 Helpful Tips

  • Pin the eye patch before inserting the eye.
  • Check the muzzle profile from the side frequently.
  • Add stuffing to the head gradually to avoid lumps.
  • Keep the ears completely unstuffed.
  • Reinforce the ear bases with several sewing passes.
  • Stuff the legs firmly enough to bear the body’s weight.
  • Use invisible decreases to keep shaping smooth.
  • Place all four legs before sewing any one leg completely.
  • Use smooth embroidery thread for the mouth.
  • Reinforce the neck seam because the head is front-heavy.

🧼 Care Instructions

Spot clean gently with a damp cloth.

Allow the dog to air dry completely.

Avoid machine washing when safety eyes, wire, plastic canvas, or weighted pellets are used.

Store upright without placing pressure on the ears, muzzle, or tail.


🌟 Final Thoughts

Your handmade bull terrier is ready to stand proudly beside your favorite dog-themed décor. 🐶🐾

With its long egg-shaped head, gently sloping profile, upright pointed ears, expressive black eye patch, broad chest, straight sturdy legs, rounded paws, and short raised tail, this amigurumi captures the unmistakable strength and sweetness of the breed.

Happy Crocheting! 🧶💗


Spread the love

Comments

No comments yet. Why don’t you start the discussion?

Leave a Reply

Your email address will not be published. Required fields are marked *