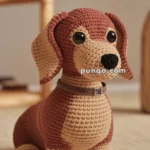
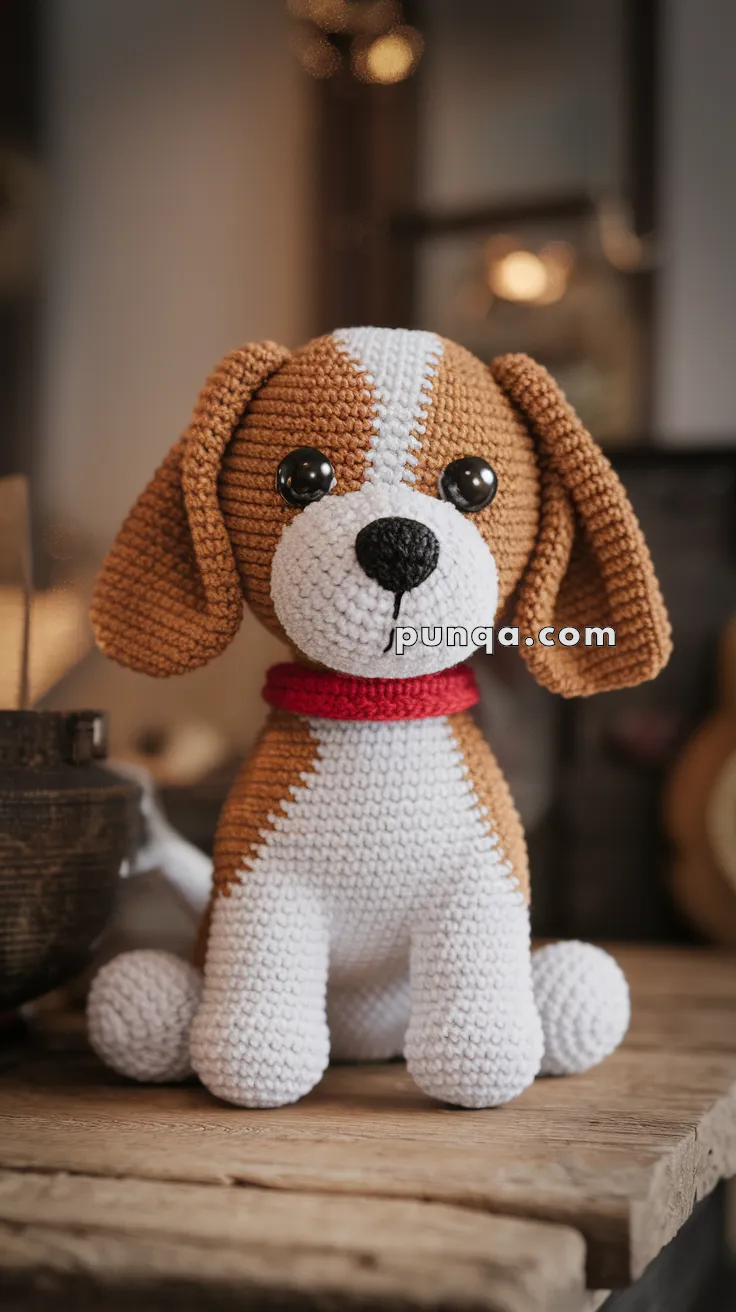
Say hello to the Amigurumi Beagle, a lovable crochet companion that’s full of charm and tail-wagging personality! 🐶🧶 With its floppy ears, soulful eyes, and classic tricolor coat, this pup looks just like a plush toy come to life—ready to sit loyally by your side or snuggle into a handmade gift box. Whether you’re crafting for a dog lover, decorating a nursery, or adding to your amigurumi menagerie, this beagle is sure to steal hearts.
Perfect for crocheters who enjoy expressive shaping and cozy details, this pattern invites you to explore soft textures, realistic features, and a touch of canine cuteness. Add a tiny collar, stitch on a name tag, or customize the colors to match your favorite furry friend. The Amigurumi Beagle is a joyful way to stitch up loyalty, warmth, and a whole lot of handmade love—one loop at a time! 🧵🐾
🐶 Amigurumi Beagle Crochet Pattern
If you’ve ever wanted to capture the loyal and soulful look of a beagle in crochet form, this project is for you! This little pup features floppy ears, a red collar, a name tag, and his signature white blaze, chest, and paws.
✨ Skill Level
Intermediate – Includes color changes, intarsia-style techniques, shaping, and assembly.
📏 Finished Size
Approximately 24–26 cm (9.5–10 inches) tall when made with DK or light-worsted yarn and a 3.0 mm hook.
🧶 Materials
- White – 100 g (blaze, snout, chest, body sides, all four legs, tail tip)
- Tan/Light Brown – 80 g (head, ears, back, tail base)
- Black – 10 g (nose, mouth details)
- Red – 5 g (collar)
- Yellow – small amount (collar tag)
Other supplies:
3.0 mm crochet hook · 12 mm safety eyes · Polyester fiberfill · Black embroidery thread · Tapestry needle · Stitch markers · Scissors
🔤 Abbreviations (US Terms)
MR – Magic Ring sc – single crochet inc – increase (2 sc in same st) dec – decrease (sc2tog) sl st – slip stitch ch – chain FO – fasten off
(Work in continuous spiral unless otherwise stated.)
🧠 Head (White Blaze with Tan Sides)
Start with white yarn for the blaze.
R1 6 sc in MR (6)
R2 inc ×6 (12)
R3 (sc, inc) ×6 (18)
R4 (2 sc, inc) ×6 (24)
R5 (3 sc, inc) ×6 (30)
R6 (4 sc, inc) ×6 (36)
Switch to tan, carrying white for the blaze.
R7–8 Work in tan while keeping 6–8 white sts center front.
R9–10 Continue with 6 white sts center front.
R11 Reduce blaze to 4 white sts.
👉 Insert eyes between R10–11, 8–9 sts apart, centered on blaze.
R12–16 sc around (keep 4 white sts).
R17 (4 sc, dec) ×6 (30)
R18 (3 sc, dec) ×6 (24)
R19 (2 sc, dec) ×6 (18) – stuff firmly.
R20 (sc, dec) ×6 (12)
R21 dec ×6 (6) → FO and close.
Tip: The white blaze should run symmetrically from crown to snout center.
🐽 Snout (White, Large & Rounded)
R1 6 sc in MR (6)
R2 inc ×6 (12)
R3 (sc, inc) ×6 (18)
R4 (2 sc, inc) ×6 (24)
R5–8 sc around (24)
R9 (2 sc, dec) ×6 (18)
Stuff firmly for a prominent rounded muzzle. FO.
Sew centered below the blaze between eyes.
🐾 Nose (Black)
R1 6 sc in MR (6)
R2 inc ×6 (12)
R3 sc around (12) → lightly stuff.
Sew on snout tip. Embroider a vertical line and a small smile.
👂 Ears (Make 2 – Tan, Long & Floppy)
R1 6 sc in MR (6)
R2 inc ×6 (12)
R3 (sc, inc) ×6 (18)
R4 (2 sc, inc) ×6 (24)
R5–18 sc around (24)
Flatten and do not stuff. FO.
Attach level with eyes, slightly toward the back so they fall forward to chin level.
🐕 Body (White Sides & Belly with Tan Back)
Start with white.
R1 6 sc in MR (6)
R2 inc ×6 (12)
R3 (sc, inc) ×6 (18)
R4 (2 sc, inc) ×6 (24)
R5 (3 sc, inc) ×6 (30)
R6 (4 sc, inc) ×6 (36)
R7–9 sc around (36) → entirely white.
Color transition for back panel:
R10–18 Work intarsia-style — front and sides remain white (20–24 sts); back top is tan (12–16 sts). This forms the saddle-like tan patch.
R19 (4 sc, dec) ×6 (30)
R20 (3 sc, dec) ×6 (24)
R21 (2 sc, dec) ×6 (18)
FO and stuff firmly.
Sew head to body with chest facing forward.
🦵 Front Legs (2 × White)
R1 6 sc in MR (6)
R2 inc ×6 (12)
R3 (sc, inc) ×6 (18)
R4–6 sc around (18)
R7 (sc, dec) ×6 (12)
R8–18 sc around (12) → 11 rounds.
Stuff moderately. Attach beneath chest angled slightly forward.
🦵 Back Legs (2 × White)
R1 6 sc in MR (6)
R2 inc ×6 (12)
R3 (sc, inc) ×6 (18)
R4–6 sc around (18)
R7 (sc, dec) ×6 (12)
R8–14 sc around (12)
R15 (2 sc, dec) ×3 (9)
R16–17 sc around (9)
FO. Stuff and sew at lower back so dog sits upright.
🐾 Tail (Tan)
R1 6 sc in MR (6)
R2 (sc, inc) ×3 (9)
R3–12 sc around (9)
Lightly stuff and sew to rear center. Keep upright with a slight curve.
(Optional: last 2–3 rounds in white for a classic white-tipped tail.)
🔴 Collar (Red)
Ch 36 (adjust to fit neck), join into ring.
R1–3 sc around (36) → 3 rounds for width.
Slip collar over neck once assembled.
🏷️ Tag (Yellow)
R1 6 sc in MR (6)
R2 inc ×6 (12)
Flatten and FO.
Sew front center of collar and optionally embroider name.
🧵 Face & Finishing Details
- Eyes: 12 mm black safety eyes between R10–R11, 8–9 sts apart.
- Eyebrows: Tiny curved stitches above eyes for expression.
- Mouth: Embroider vertical line from nose plus small smile.
- Ears: Ensure they hang evenly and naturally.
- Stuffing: Head firmly, body well packed but soft at bottom for stability.
🪡 Assembly Checklist
✅ Head centered on body
✅ White blaze perfectly straight
✅ Snout large and rounded
✅ Nose securely sewn
✅ Floppy tan ears even on both sides
✅ Body stuffed and color split accurate
✅ Four white legs aligned for balanced sit
✅ Tail upright and tan
✅ Collar and yellow tag attached
💡 Finishing Tips
- Color Work: Use intarsia or yarn bobbin to keep tan back edges clean.
- Symmetry: Align the blaze and ears before sewing.
- Pose: Slightly angle legs forward for a natural sitting position.
- Expression: Center the muzzle and add a gentle smile for personality.
🐾 Your Beagle Is Complete!
You’ve created a photo-accurate amigurumi Beagle — with its white blaze, tan head and floppy ears, fully white legs, and signature red collar. It sits independently, balances perfectly, and radiates that unmistakable Beagle charm.
Working Time: 10–14 hours · Difficulty: Intermediate · Key Feature: Authentic Beagle color pattern with symmetrical white side panels.
Happy Crocheting! 🧶✨