Creating amigurumi is such a delightful adventure, and crafting a police officer doll pattern just adds that extra dash of excitement! 😊 There’s something incredibly satisfying about turning simple yarn into a charming, lovable figure that can tell a story of its own. Amigurumi, the art of crocheting small, stuffed yarn creatures, has always intrigued me with its whimsical touch and endless possibilities. When you decide to create a police officer doll, you’re not just making an adorable keepsake; you’re celebrating the heroes in our communities. Whether it’s for a child’s toy collection or as a heartfelt gift for someone in law enforcement, the joy it brings is unmatched.
Now, let’s chat about the process, which is as engaging as the end product! 🧶 First, I gather my favorite yarns, hooks, and a hot cup of tea. The initial step is designing the pattern, which involves a bit of imagination and a lot of creativity. I start with the basics, like the head, body, and limbs, making sure each stitch is crafted with care. Then comes the fun part: adding the distinctive police details, like the badge, hat, and uniform. Customizing these elements allows me to infuse a bit of personality into each doll. So, as I weave each stitch with love and detail, I can’t help but smile at the thought of the finished piece bringing joy to someone’s day. 💙
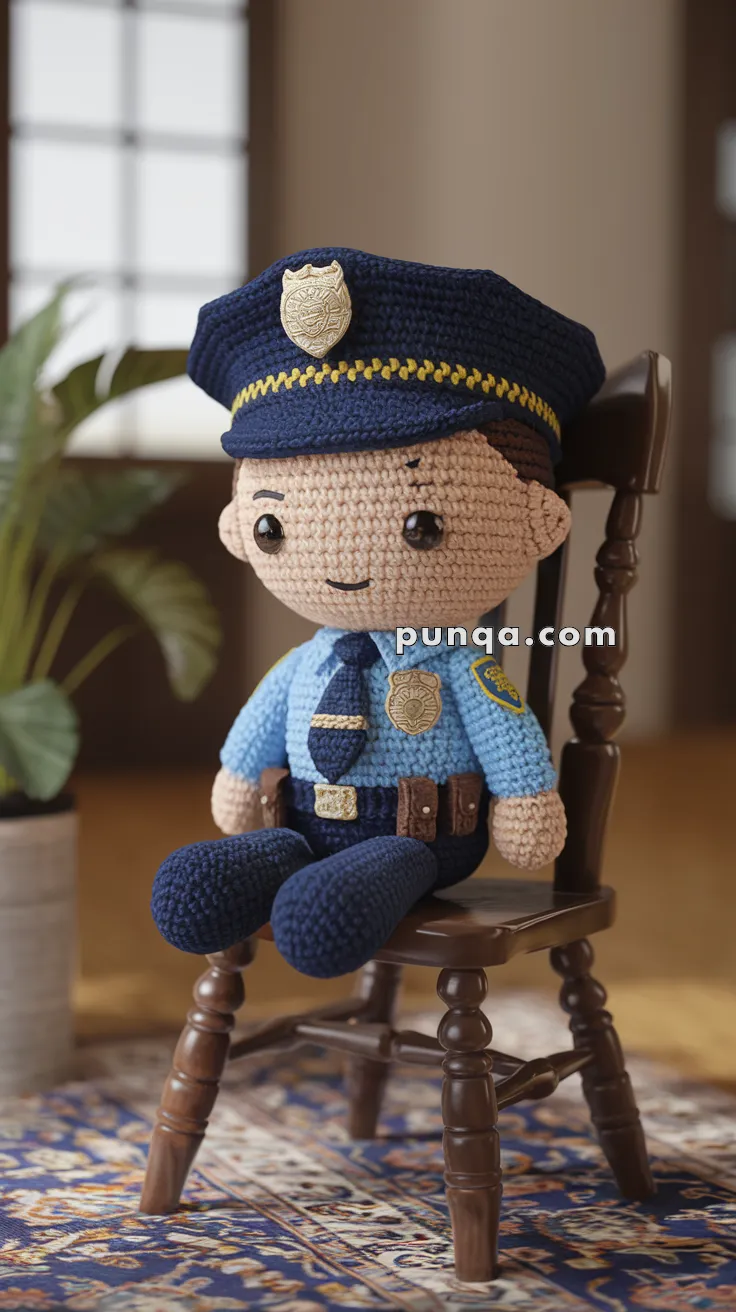
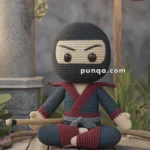
👮♂️ Amigurumi Police Officer Doll Crochet Pattern
Bring a touch of bravery to your handmade collection with this adorable Amigurumi Police Officer Doll! With a detailed uniform, belt accessories, and a proud hat, this crochet project makes a great gift for kids or to honor real-life heroes. 💙
✨ Skill Level
Intermediate
Includes shaping, color changes, and small accessory construction.
📏 Finished Size
Approx. 25–28 cm (10–11 inches) tall (seated posture)
🧶 Materials (Approximate Yarn Amounts)
DK / light worsted yarn:
- Light Beige (skin): 35–45 g
- Navy Blue (pants, shoes, hat): 75–85 g
- Light Blue (shirt): 40–50 g
- Brown (hair): 10–15 g
- Dark Brown (belt & pouches): 20–25 g
- Yellow/Gold (badge & hat trim): 10–15 g
- Black (tie, eyebrows): small amount
- White (minor accents): small amount
Supplies:
- 2.5–3.0 mm crochet hook
- 8–10 mm safety eyes
- Polyester stuffing
- Tapestry needle
- Stitch markers
Optional non-crochet materials:
- Small piece of felt or embroidery thread for badge detailing
- Thin cardstock or interfacing for shaping the hat brim
🧵 Abbreviations (US Terms)
MR – Magic Ring
sc – single crochet
inc – increase
dec – invisible decrease
ch – chain
sl st – slip stitch
BLO – back loop only
FO – fasten off
👨 Head
With light beige:
Rnd 1: MR 6 (6)
Rnd 2: inc ×6 (12)
Rnd 3: (sc, inc) ×6 (18)
Rnd 4: (2 sc, inc) ×6 (24)
Rnd 5: (3 sc, inc) ×6 (30)
Rnd 6: (4 sc, inc) ×6 (36)
Rnd 7–14: sc 36
Insert safety eyes between Rnds 9–10, spaced about 6–7 stitches apart.
Rnd 15: (4 sc, dec) ×6 (30)
Rnd 16: (3 sc, dec) ×6 (24)
Rnd 17: (2 sc, dec) ×6 (18)
Stuff firmly.
Rnd 18: (sc, dec) ×6 (12)
Rnd 19: dec ×6 (6)
FO
Embroider soft eyebrows and a small curved smile.
💇 Hair (Subtle side/back coverage)
With brown:
Rnd 1: MR 6
Rnd 2: inc ×6 (12)
Rnd 3: (sc, inc) ×6 (18)
Rnd 4: (2 sc, inc) ×6 (24)
Rnd 5–6: sc 24
FO and sew onto back/top of head, leaving front edge clean.
👂 Ears (Make 2)
Rnd 1: MR 5
Rnd 2: sc 5
Flatten and sew slightly below eye line on each side.
👕 Torso (Uniform Shirt + Pants)
Start with light blue:
Rnd 1: MR 6
Rnd 2: inc ×6 (12)
Rnd 3: (sc, inc) ×6 (18)
Rnd 4: (2 sc, inc) ×6 (24)
Rnd 5–10: sc 24
➡️ Creates structured shirt section
Switch to navy:
Rnd 11–16: sc 24
➡️ Forms pants with consistent width
Stuff lightly and fasten off.
🦵 Legs (Short, forward-positioned – Make 2)
With navy:
Rnd 1: MR 6
Rnd 2: inc ×6 (12)
Rnd 3–10: sc 12
Lightly stuff and flatten top edge for sewing.
👞 Shoes (Rounded, compact – Make 2)
With navy:
Rnd 1: MR 6
Rnd 2: inc ×6 (12)
Rnd 3: (sc, inc) ×6 (18)
Rnd 4–5: sc 18
Rnd 6: (4 sc, dec) ×3 (15)
Lightly stuff and shape base flat.
🧤 Arms (Make 2)
With light beige:
Rnd 1: MR 6
Rnd 2–5: sc 6
Switch to light blue:
Rnd 6–11: sc 6
Lightly stuff upper section.
👔 Tie
With navy or black:
Ch 14
Sl st back along chain
Sew centered on chest.
🛡️ Chest Badge
With yellow:
Rnd 1: MR 6
Rnd 2: inc ×6 (12)
Flatten slightly and sew onto chest.
Optional: embroider fine details.
🧢 Police Hat (Peaked Cap with Brim)
Crown
With navy:
Rnd 1: MR 6
Rnd 2: inc ×6 (12)
Rnd 3: (sc, inc) ×6 (18)
Rnd 4: (2 sc, inc) ×6 (24)
Rnd 5: (3 sc, inc) ×6 (30)
Rnd 6–9: sc 30
Decorative Band
With yellow:
Surface stitch a band across the front of the hat.
Brim
Ch 16
Rows 1–4: sc across
Sew along front edge and shape slightly downward.
Insert thin cardstock if a firmer brim is desired.
Hat Badge
Create a small oval or shield using yellow yarn or felt and attach centered above the brim.
🧷 Belt & Pouches
Belt
With dark brown:
Ch 32–36
Rows 1–2: sc across
Wrap around waist and sew securely.
Pouches (Make 2–3)
Ch 6
Rows 1–4: sc across
Fold and sew edges to form small pockets.
Attach evenly along belt.
🧩 Assembly
Attach head securely to torso.
Sew ears before placing hat.
Attach arms at shoulder level.
Position legs forward for seated look.
Sew shoes to legs.
Wrap belt around waist and attach pouches.
Place hat snugly on head and secure.
✨ Finishing Touches
Shape the hat brim gently downward 🧢
Keep facial features soft and friendly
Ensure legs sit evenly for balance
Adjust belt and accessories neatly
💛 Final Thoughts
This amigurumi police officer blends clean shaping with thoughtful uniform details, from the structured cap to the functional belt and badge. The seated pose and soft expression give it a warm, approachable character while maintaining a classic uniformed look.
A meaningful and enjoyable project—perfect for gifting or display. 🧶👮♂️💙