There’s something truly magical about crafting amigurumi, especially when it involves creating an adorable little chick. 🐥 The joy of bringing yarn to life is simply unparalleled! With their tiny beaks and fluffy bodies, these amigurumi chicks have a way of melting hearts and adding a touch of whimsy to any space. The process is not just about crocheting; it’s about capturing the essence of cuteness and joy in every stitch. Whether you’re new to the world of crochet or a seasoned pro, creating an amigurumi chick is an exciting and rewarding adventure that promises endless smiles.
The process of making an amigurumi chick is both straightforward and delightfully engaging. It starts with selecting the perfect yarn – something soft and vibrant that captures the chick’s playful spirit. 🧶 Then, you embark on your crochet journey, usually beginning with a magic ring to form the chick’s round body. Stitch by stitch, the chick takes shape, and you can’t help but feel a surge of excitement with each round completed. Adding the finishing touches, like tiny eyes and a cheerful little beak, truly brings your creation to life. The joy of holding your finished amigurumi chick in your hands is sheer bliss, knowing that you’ve crafted something uniquely charming.
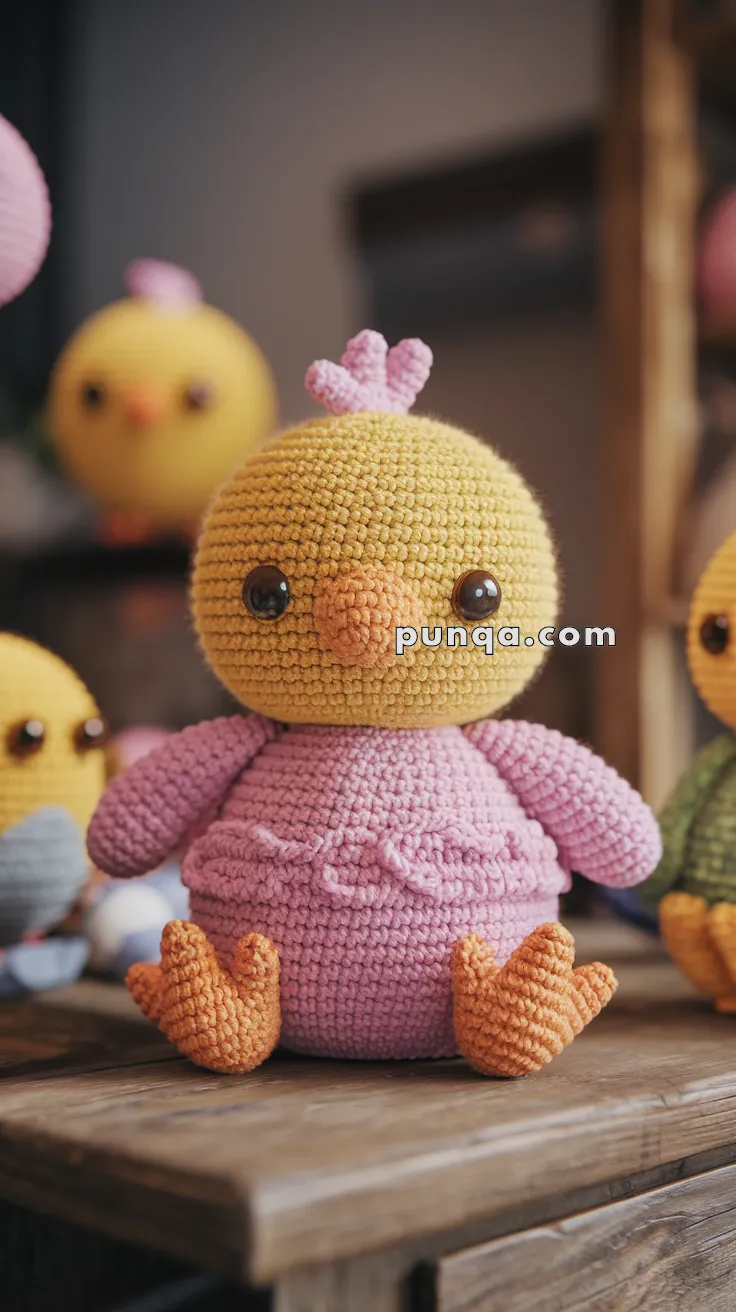
🐥 Amigurumi Dressed Chick – FREE Crochet Pattern
This sweet little chick in a ruffled pink dress is full of personality and charm! With its big eyes, heart-shaped crest, and tiny ruffled details, it’s perfect for springtime displays, Easter baskets, or gifting to someone who loves handmade cuteness.
🧶 Materials:
-
DK weight yarn in yellow, pink, orange, and a tiny amount of black
-
2.5 mm or 3.0 mm crochet hook
-
10 mm safety eyes
-
Fiberfill stuffing
-
Yarn needle
-
Stitch marker
-
Optional: blush for cheeks
✨ Abbreviations (US Terms):
-
MR – Magic Ring
-
sc – Single Crochet
-
inc – Increase
-
dec – Decrease
-
ch – Chain
-
sl st – Slip Stitch
-
FO – Fasten Off
📏 Finished Size:
Approx. 18 cm (7 inches) tall using DK yarn and 2.5 mm hook.
🧠 Skill Level:
Beginner to Intermediate – Basic shaping and assembly with simple ruffle detailing.
✂️ Pattern Instructions
🟡 Head
With yellow yarn:
-
MR, sc 6
-
Inc in each st (12)
-
(sc, inc) x6 (18)
-
(2 sc, inc) x6 (24)
-
(3 sc, inc) x6 (30)
-
(4 sc, inc) x6 (36)
-
(5 sc, inc) x6 (42)
8–14. sc in each st (42) -
(5 sc, dec) x6 (36)
-
(4 sc, dec) x6 (30)
-
(3 sc, dec) x6 (24)
-
(2 sc, dec) x6 (18)
👉 Stuff firmly -
(sc, dec) x6 (12)
-
dec x6 (6)
FO, close with yarn needle.
👀 Eyes & Beak
-
Insert 10 mm safety eyes between rounds 10–11, about 6 stitches apart.
-
Beak (orange):
MR, sc 4
sc around for 3–4 rounds
FO and sew between eyes.
🎀 Crest (Make 3 bumps)
With pink yarn:
-
MR, sc 6
-
sc around (6)
-
FO each bump and sew in a heart shape on top of the head.
🟡 Body
With pink yarn:
-
MR, sc 6
-
Inc in each st (12)
-
(sc, inc) x6 (18)
-
(2 sc, inc) x6 (24)
-
(3 sc, inc) x6 (30)
-
(4 sc, inc) x6 (36)
7–12. sc around (36) -
Switch to yellow yarn
14–18. sc around (36) -
(4 sc, dec) x6 (30)
-
(3 sc, dec) x6 (24)
👉 Stuff firmly -
(2 sc, dec) x6 (18)
-
(sc, dec) x6 (12)
-
dec x6 (6)
FO and close.
🧤 Arms (Make 2)
With pink yarn:
-
MR, sc 6
-
(sc, inc) x3 (9)
3–10. sc around
👉 Lightly stuff
FO and sew to sides of body.
🐣 Feet (Make 2)
With orange yarn:
-
MR, sc 6
-
sc around for 4 rounds
-
Make 3 toes by chaining 4, turning, and sl st back
-
FO and attach to bottom of body
🎀 Dress Ruffles (Optional for Extra Cuteness!)
With pink yarn:
Attach yarn around middle of body (waistline).
-
Ch 2, (hdc, ch 1) in each stitch around
-
Repeat 1 or 2 rows for extra fluff
Do the same around sleeves and bottom of dress.
🧵 Assembly:
-
Sew the head to the body securely.
-
Attach arms slightly below neckline.
-
Attach feet at the bottom.
-
Sew the crest bumps to the top of the head in a heart shape.
-
Optionally, use blush on the cheeks for a sweet look.
🌸 Display Tip:
This little chick looks perfect sitting on a rustic shelf, tucked into an Easter basket, or gifted with a handwritten tag. Add accessories like a mini flower, bow, or egg for more flair!