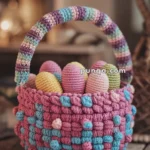
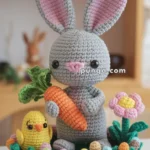
Meet the Amigurumi Moon Fridge Magnet, a dreamy little bunny with a celestial twist that’s sure to brighten any space! 🌙🐰🧶 With her soft lavender fur, cream-colored tummy, big floppy ears, and a delicate floral crown, she brings a gentle, springtime charm to your fridge, desk, or Easter basket. This sweet magnet blends cozy textures with whimsical details, making her a perfect pick for seasonal décor or thoughtful handmade gifts.
Ideal for crocheters who love pastel palettes and playful designs, this pattern invites you to stitch up a tiny treasure full of personality and warmth. Add a few stars, pair her with other spring critters, or create a whole galaxy of soft, floral-accented magnets. The Amigurumi Moon Fridge Magnet is a joyful way to stitch up serenity, sweetness, and a sprinkle of handmade magic—one loop at a time! 🧵✨🌸
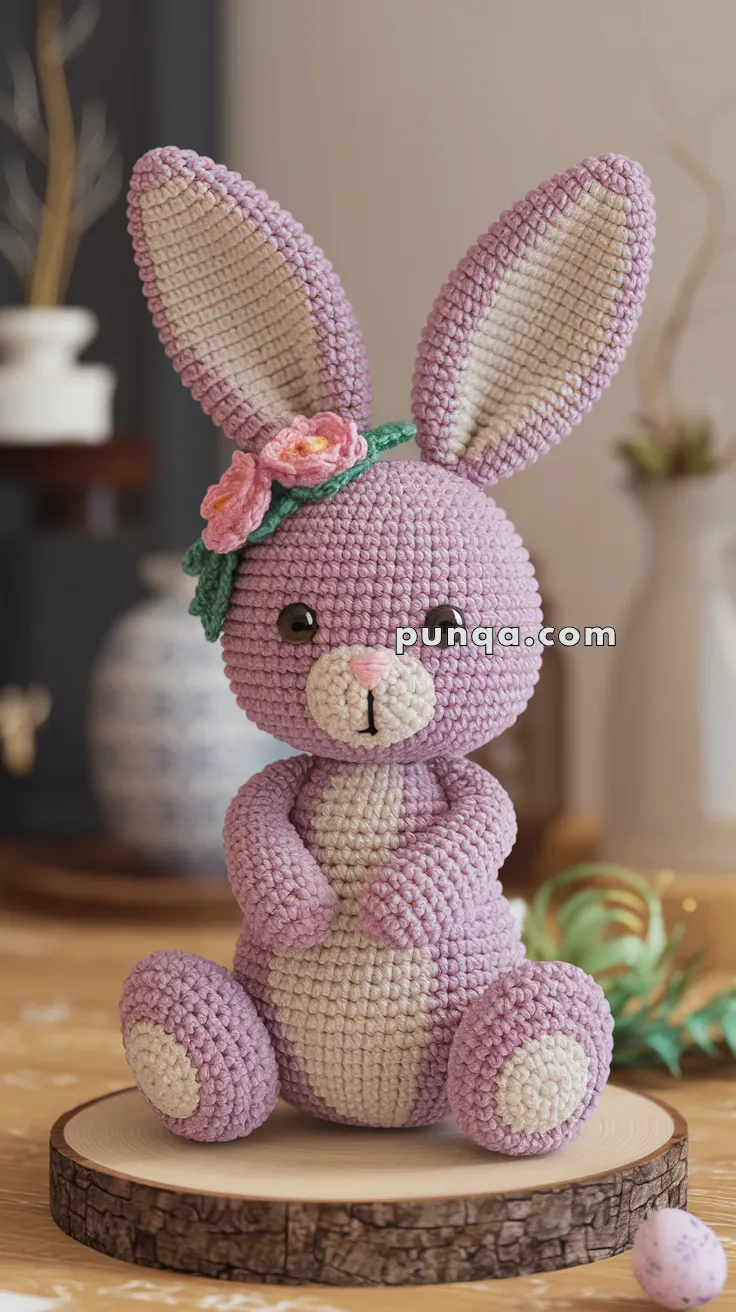
🐰 Crochet Easter Bunny with Floral Crown
Celebrate spring with this sweet handmade Easter Bunny!
Her lavender fur, soft cream belly, tall upright ears, and delicate floral crown make her the perfect Easter decoration or heartfelt gift for loved ones. 🌸🐇💜
🧶 Materials You’ll Need
Gather your supplies before you begin.
-
Velvet or chenille yarn:
-
Lavender – about 70 g (body, head, ears, arms, legs)
-
Cream – about 25 g (belly, muzzle, paw pads, inner ears, tail)
-
Pink – small amount (flower, nose)
-
Peach – small amount (second flower)
-
Green – small amount (leaves and crown base)
-
-
Crochet hook: 4.5 mm
-
Safety eyes: 10–12 mm black or dark brown
-
Polyester stuffing
-
Yarn needle, stitch marker, scissors
-
Optional: thin floral wire for ear support
📏 Finished Size
Approx. 24–25 cm (9–10 in) tall when made with velvet yarn and a 4.5 mm hook.
💡 Skill Level
Intermediate.
You’ll use shaping, color changes, and basic embroidery.
🧵 Abbreviations (US Terms)
MR – Magic Ring
sc – single crochet
inc – increase (2 sc in same stitch)
dec – decrease (sc2tog)
sl st – slip stitch
ch – chain
FO – fasten off
🐇 Head (Lavender)
R1: MR, 6 sc (6)
R2: inc × 6 (12)
R3: (1 sc, inc) × 6 (18)
R4: (2 sc, inc) × 6 (24)
R5: (3 sc, inc) × 6 (30)
R6: (4 sc, inc) × 6 (36)
R7–R12: sc around (36)
👉 Insert safety eyes between rounds 6 and 7, about 7–8 stitches apart.
R13: (4 sc, dec) × 6 (30)
R14: (3 sc, dec) × 6 (24)
R15: (2 sc, dec) × 6 (18)
R16: (1 sc, dec) × 6 (12)
R17: dec × 6 (6)
Stuff firmly and close.
🐽 Muzzle (Cream)
R1: MR, 6 sc (6)
R2: inc × 6 (12)
R3–R4: sc around (12)
FO with long tail.
Sew just below the eyes.
Embroider a small pink triangle nose at the top and a thin black vertical line for the mouth.
👂 Ears (Make 2 – Lavender outer, Cream inner)
Outer Ear (Lavender)
R1: MR, 6 sc (6)
R2: (1 sc, inc) × 3 (9)
R3–R22: sc around (9)
R23: dec × 3 (6) → FO.
Inner Ear (Cream)
Work same pattern but stop at R18 so it’s slightly shorter.
Sew cream inner ear onto lavender outer ear.
Fold base slightly and attach ears on top of head, facing upward.
👉 Insert a thin floral wire or stuffing at the base for firmness.
🧍 Body (Lavender + Cream Belly)
R1: MR, 6 sc (6)
R2: inc × 6 (12)
R3: (1 sc, inc) × 6 (18)
R4: (2 sc, inc) × 6 (24)
R5: (3 sc, inc) × 6 (30)
R6–R10: sc around (30)
R11: (3 sc, dec) × 6 (24)
R12: (2 sc, dec) × 6 (18)
R13–R15: sc around (18) → FO.
Stuff firmly.
Belly Patch (Cream)
R1: MR, 6 sc (6)
R2: inc × 6 (12)
R3: (1 sc, inc) × 6 (18)
R4: (2 sc, inc) × 6 (24)
Flatten to an oval and sew to the front of body from chin to lower belly.
💪 Arms (Make 2 – Lavender)
R1: MR, 6 sc (6)
R2: inc × 6 (12)
R3–R12: sc around (12)
R13: (1 sc, dec) × 4 (8)
Stuff lightly and close.
Sew both arms angled forward so they touch near the center in a “folded hands” pose.
🦵 Legs (Make 2 – Lavender with Cream Soles)
Legs
R1: MR, 6 sc (6)
R2: inc × 6 (12)
R3: (1 sc, inc) × 6 (18)
R4–R8: sc around (18)
R9: (1 sc, dec) × 6 (12)
R10–R12: sc around (12) → FO.
Soles (Cream)
R1: MR, 6 sc (6)
R2: (1 sc, inc) × 3 (9) → FO.
Sew soles onto bottoms, stuff firmly, and attach legs so the bunny sits upright with a round belly forward.
🐾 Tail (Cream Pom-Pom)
Wrap cream yarn 50–60 times around two fingers.
Tie in center, cut loops, trim to a soft ball, and sew to lower back.
🌸 Floral Crown (Left-Ear Placement)
Pink Rosette – MR, (ch 2, 2 dc, ch 2, sl st) × 5 → FO and roll.
Peach Flower – MR, (ch 2, 2 hdc, ch 2, sl st) × 6 → FO.
Light Pink Flower – MR, (ch 2, dc, ch 2, sl st) × 5 → FO.
Leaves (Green, 3–4) – ch 6, sc in 2nd ch, hdc, dc, hdc, sc → FO.
Arrange flowers and leaves into a small half-crown and sew slightly tilted over the left ear base (not centered).
🧩 Assembly
-
Sew the head to the body securely.
-
Attach the upright ears with a slight outward tilt.
-
Sew arms at chest height, angled inward.
-
Attach legs evenly at the base.
-
Sew the cream muzzle, belly patch, and tail.
-
Add the floral crown to the left side of the head.
-
Lightly blush cheeks with pink pastel for warmth.
🌼 Finishing Touches
-
Make sure ears stand tall and firm (wire or tightly stuffed base).
-
Shape head slightly forward for a cute posture.
-
Add a white embroidery dot to each eye for sparkle.
-
Fluff tail and adjust flowers.
💜 The Final Look
Your finished bunny will have:
-
A lavender velvet body with soft cream accents
-
Big upright ears with cream inner panels
-
A delicate floral crown sitting over the left ear
-
A pink nose and embroidered mouth
-
Folded hands and a sitting pose
-
A fluffy cream tail
She’s the perfect handmade centerpiece for springtime décor or Easter gifts! 🌸🐇