I absolutely adore getting into the festive spirit by crafting adorable amigurumi creations, and what better way to celebrate than with a cute Christmas pudding amigurumi? 🎄 These little yarn delights bring so much joy and add a whimsical touch to holiday decorations. The appeal of crafting an amigurumi Christmas pudding lies in its charm and the joy it brings when completed. Watching a simple ball of yarn transform into a miniature work of art is incredibly satisfying. Plus, it’s such a fantastic way to personalize holiday gifts or adorn your tree with handmade love.
Creating a Christmas pudding amigurumi pattern is a delightful journey of creativity and skill. First, I gather my materials: a range of colorful yarns, hooks, and essential tools like stuffing and a yarn needle. The process usually begins with crocheting the base using a deliciously rich brown yarn, reminiscent of a traditional Christmas pudding. Then, the fun part starts—adding a splash of cream-colored yarn to resemble the classic icing on top. For that extra festive touch, I love to crochet tiny holly leaves and berries to place on top, adding a pop of color and holiday cheer. It’s such a joyful experience, full of creativity and festive magic! 🎅✨
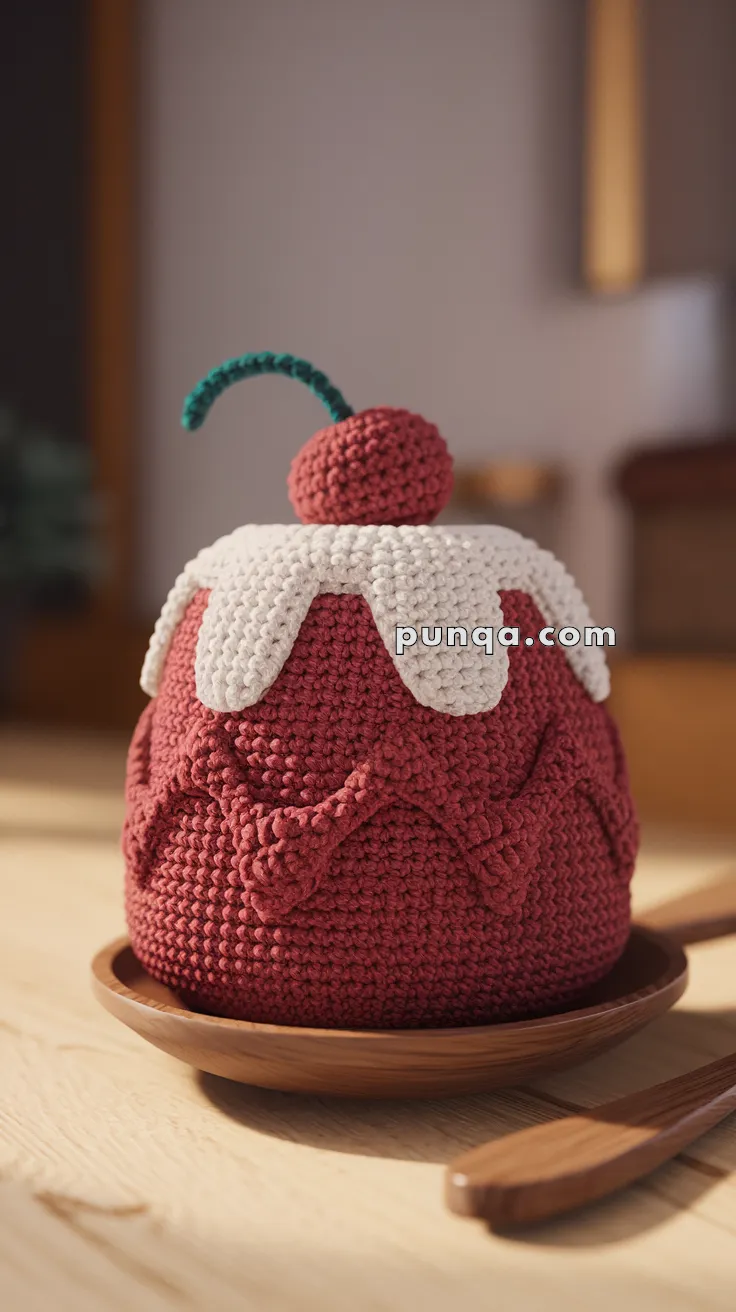
🎄 Amigurumi Christmas Pudding Crochet Pattern
Add a touch of handmade holiday charm to your decor with this cute and squishy Christmas pudding! Topped with snowy icing and a cherry, it’s perfect for festive displays or as a sweet gift.
✨ Skill Level
Beginner to Intermediate – Great for confident beginners who are comfortable with basic shaping and switching colors.
📏 Finished Size
Approx. 5–6 inches (13–15 cm) tall using DK or worsted yarn with a 2.5–3.5 mm hook.
🧶 Materials
-
Yarn (Worsted or DK):
-
Dark red/brown (pudding base)
-
White (icing)
-
Red (cherry)
-
Green (stem)
-
-
Crochet hook: 2.5 mm–3.5 mm
-
Polyfill stuffing
-
Tapestry needle
-
Stitch marker
-
Optional: Wood plate or display dish
🧵 Abbreviations (US Terms)
MR – Magic Ring
sc – Single Crochet
inc – Increase (2 sc in same st)
dec – Decrease (sc 2 together)
ch – Chain
sl st – Slip Stitch
FO – Fasten Off
BLO – Back Loop Only
🍮 Pudding Base (Red/Brown Yarn)
-
MR, 6 sc
-
inc x6 (12)
-
(1 sc, inc) x6 (18)
-
(2 sc, inc) x6 (24)
-
(3 sc, inc) x6 (30)
-
(4 sc, inc) x6 (36)
-
(5 sc, inc) x6 (42)
8–20. sc around (42) -
(5 sc, dec) x6 (36)
-
(4 sc, dec) x6 (30)
-
(3 sc, dec) x6 (24)
-
(2 sc, dec) x6 (18)
– Stuff firmly -
(1 sc, dec) x6 (12)
-
dec x6 (6), FO and close
❄️ Icing Drip (White Yarn)
-
MR, 6 sc
-
inc x6 (12)
-
(1 sc, inc) x6 (18)
-
(2 sc, inc) x6 (24)
-
(3 sc, inc) x6 (30)
-
(4 sc, inc) x6 (36)
-
(5 sc, inc) x6 (42)
-
sc around (42)
-
Create “drips” around edge using ch 3–5, sc into next st, vary for wave-like effect
– FO and place on pudding
🍒 Cherry (Red Yarn)
-
MR, 6 sc
-
inc x6 (12)
-
(1 sc, inc) x6 (18)
4–5. sc (18) -
(1 sc, dec) x6 (12)
-
dec x6 (6), FO
– Stuff lightly and sew to top center of icing
🍃 Cherry Stem (Green Yarn)
-
Ch 15
-
sl st in each ch across
– FO and curl slightly
– Sew one end under cherry
✂️ Assembly Instructions
-
Sew the icing piece to the top of the pudding, letting the drips fall naturally
-
Stitch the cherry on top of the icing
-
Attach the stem securely under the cherry
-
Weave in all ends neatly
This festive pudding makes a perfect holiday companion for your mantel, table centerpiece, or as a stocking stuffer. 🍒❄️ It’s the kind of dessert that stays cute forever!