Say hello to winter’s most charming companion—the Amigurumi Snowman! ☃️ With his cozy scarf, carrot nose, and cheerful smile, this frosty friend is ready to melt hearts all season long. Whether you’re decking the halls or crafting a cuddly gift, this snowman brings a flurry of joy to any space. His soft, rounded shape and playful details make him a delightful addition to your handmade holiday lineup.
Perfect for beginners and seasoned crocheters alike, this pattern invites you to personalize your snowman with colorful accessories, embroidered expressions, or even a sprinkle of glitter for that magical snow-kissed look. From mantelpiece mascots to snuggly bedtime buddies, this amigurumi creation is a heartwarming way to celebrate the season—one stitch at a time. ❄️🧶
⛄ Crochet Snowman Amigurumi Pattern
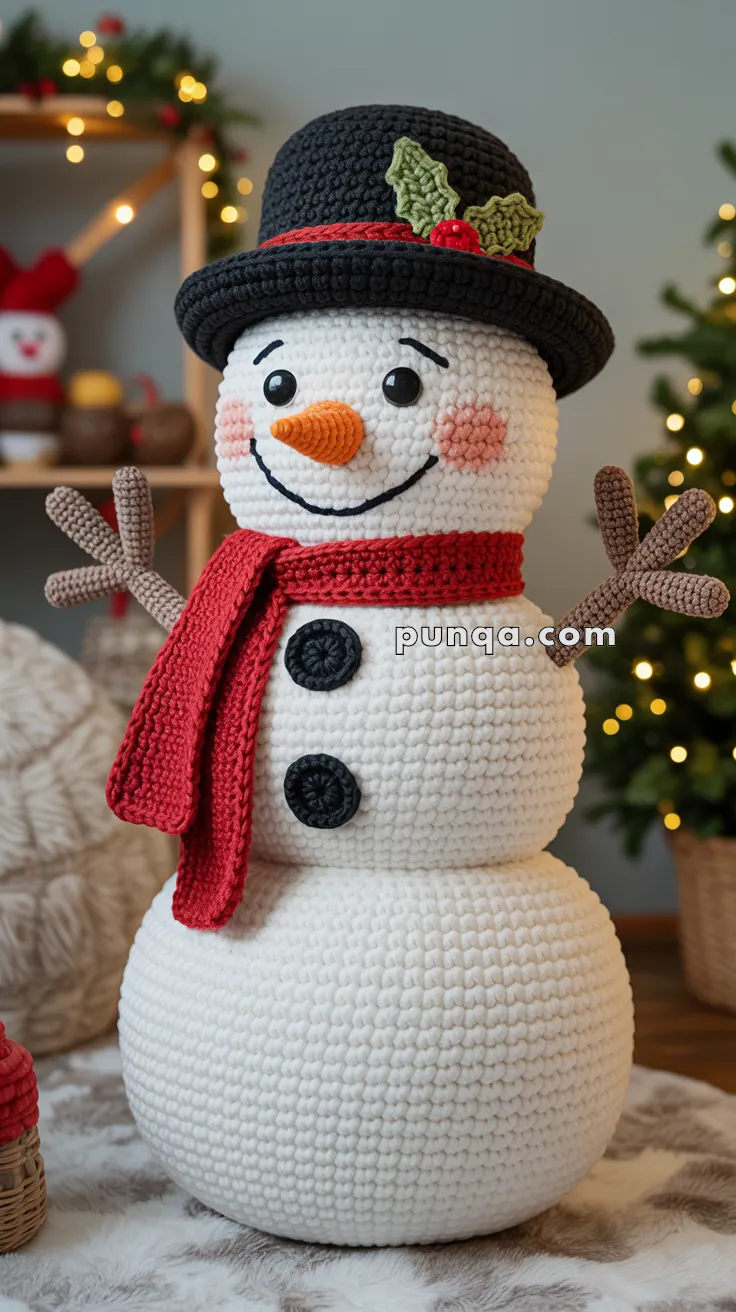
Bring winter magic indoors with this cuddly crochet snowman! With a plump three-tiered body, tall black hat decorated with holly leaves, a bright red scarf, and charming branch arms, this festive snowman is ready to spread holiday cheer. Let’s get started!
✨ Skill Level
Intermediate – shaping, color changes, and assembly involved.
📏 Finished Size
Approx. 18–20 inches tall when using bulky yarn and a 5 mm hook.
🧶 Materials
- Yarn:
- White (body) – bulky chenille yarn
- Black (hat, buttons, eyes) – worsted weight cotton/acrylic
- Orange (nose) – worsted weight
- Red (scarf, hat band, berries) – worsted weight
- Green (holly leaves) – worsted weight
- Brown (arms) – worsted weight
- Light pink (cheeks) – worsted weight
- Hook sizes: 5 mm for body, 3 mm for details
- Stuffing: Polyester fiberfill
- Safety eyes: 12 mm (optional – crochet versions included)
- Yarn needle, stitch markers, scissors
🔤 Abbreviations (US Terms)
- MR = magic ring
- sc = single crochet
- inc = increase (2 sc in 1 st)
- dec = decrease (sc 2 together)
- sl st = slip stitch
- ch = chain
- hdc = half double crochet
- FO = fasten off
🧵 Pattern Instructions
❄️ Body (make 3 spheres)
Bottom sphere (largest):
- MR, 6 sc (6)
- inc x6 (12)
- (sc, inc) x6 (18)
- (2 sc, inc) x6 (24)
- (3 sc, inc) x6 (30)
- (4 sc, inc) x6 (36)
- (5 sc, inc) x6 (42)
- (6 sc, inc) x6 (48)
- (7 sc, inc) x6 (54)
10–24. sc around (54) - (7 sc, dec) x6 (48)
- (6 sc, dec) x6 (42)
- (5 sc, dec) x6 (36)
- (4 sc, dec) x6 (30)
- (3 sc, dec) x6 (24)
- (2 sc, dec) x6 (18)
- (sc, dec) x6 (12)
- dec x6 (6)
FO, stuff firmly.
Middle sphere: Work same as bottom sphere, stop increases at 48 sts.
Head (top sphere): Work same as middle, stop increases at 42 sts.
Sew spheres stacked largest to smallest.
🥕 Carrot Nose
- MR, 5 sc (5)
- sc around (5)
- (2 sc, inc, sc, inc) (7)
4–5. sc around (7)
FO, stuff lightly. Sew centered on head.
👀 Eyes
Option A: Attach 12 mm safety eyes.
Option B: Crochet – MR, 6 sc in black, FO. Sew on.
😊 Cheeks
With pink yarn:
- MR, 6 sc, sl st to join. FO.
Sew under eyes.
😀 Smile
Using black yarn, embroider a curved smile.
🔘 Buttons (make 2)
- MR, 10 sc, sl st to join. FO.
Sew down torso (middle and bottom sections).
🌿 Stick Arms (make 2)
With brown yarn:
- MR, 6 sc (6)
2–18. sc around (6)
At round 10, ch 6, sc back → attach as prong.
Repeat once more on other side.
FO, stuff lightly, sew to middle sphere sides.
🪵 Optional: Wire Armature for Stick Arms
If you’d like the arms to stay lifted and firm (like in the photo), you can insert a simple wire armature:
Materials:
- 2 pieces of floral wire or craft wire (approx. 20–25 cm each)
- Wire cutters
- Masking tape (to blunt the ends so they don’t poke through yarn)
Instructions:
- Prepare wire: Cut two lengths of wire for each arm. Wrap the ends with tape.
- Insert while crocheting: As you work the arm (around Round 4–5), insert the wire inside the tube. Continue crocheting around it.
- Branches (prongs): When making the side prongs, cut smaller wire pieces and tape them to the main arm wire before crocheting over. This will keep the “branch” structure sturdy.
- Finish stuffing: Add a small amount of fiberfill around the wire for shape.
- Attach to body: When sewing arms to the middle sphere, insert the wire slightly into the snowman’s stuffing for extra stability.
This way, your snowman’s arms won’t droop – they’ll stay outstretched exactly as shown in your reference photo.
🎩 Top Hat
Brim:
- MR, 6 sc (6)
- inc x6 (12)
- (sc, inc) x6 (18)
- (2 sc, inc) x6 (24)
- (3 sc, inc) x6 (30)
- (4 sc, inc) x6 (36)
- (5 sc, inc) x6 (42)
- (6 sc, inc) x6 (48)
- (7 sc, inc) x6 (54)
- sc around in back loops only (54)
Crown:
11–38. sc around (54) → this creates tall straight sides.
39. (7 sc, dec) x6 (48)
40. (6 sc, dec) x6 (42)
41. (5 sc, dec) x6 (36)
42. (4 sc, dec) x6 (30)
43. (3 sc, dec) x6 (24)
FO, stuff lightly, sew to head.
Hat band: Red yarn, ch 60, hdc across, sew around base of crown.
Holly leaves (make 2): Ch 8, sc, hdc, dc, dc, hdc, sc, sl st. FO.
Berries (make 3): MR, 6 sc, FO.
Attach to hat.
🧣 Scarf
Ch 80, hdc across for 6 rows. FO. Wrap around neck with ends hanging.
🎉 Assembly
- Sew hat on at an angle, tilt slightly back.
- Attach scarf snugly.
- Sew buttons in place.
- Embroider smile and attach cheeks.
- Position arms so they curve outward.
✨ Final Touch
Your snowman is complete! With his plump body, tall hat, holly details, and cheery scarf, he looks just like the photo – ready to welcome guests into a festive winter wonderland.