Bring the world of Dragon Ball to life with this Amigurumi Goku Crochet Pattern! Perfect for fans of the iconic anime series, this project lets you stitch up your very own miniature version of the beloved Saiyan hero. With his spiky hair, signature outfit, and cheerful personality, Goku makes an exciting crochet companion that’s sure to spark joy for both makers and collectors alike.
Whether you’re crafting for yourself, gifting to a fellow anime enthusiast, or adding a unique handmade piece to your collection, this pattern is a fun and rewarding project. Easy-to-follow instructions guide you through each step, making it suitable for both beginners and experienced crocheters. Grab your yarn and hook—it’s time to channel your inner Super Saiyan and create a crochet Goku that’s as powerful as he is adorable!
🥋 Goku-Inspired Amigurumi Crochet Pattern 🔥
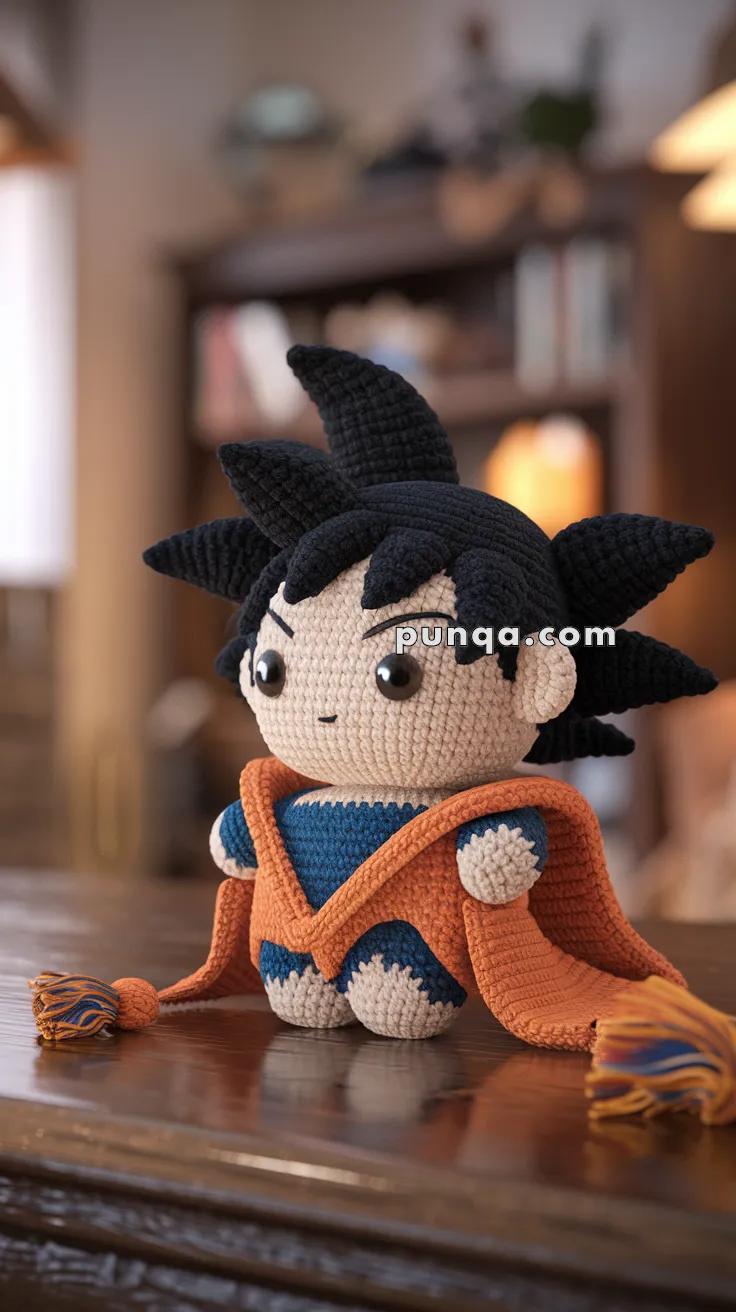
Step into a world of energy, determination, and iconic style with this adorable Goku-inspired amigurumi! 💥 This design captures the spirit of a fearless little warrior in a soft, chibi form—complete with bold spiky hair, expressive eyes, and a flowing orange gi that feels full of movement.
Every detail has been carefully shaped to create a balanced, display-worthy piece—from the rounded head and compact seated body to the layered hair spikes and long belt tassels. Whether you’re making it as a gift for an anime lover or adding it to your own handmade collection, this project brings personality, charm, and a touch of adventure to your crochet lineup. 🧶✨
✨ Skill Level
Intermediate–Advanced
You’ll use:
- shaping and proportion control
- clean color transitions
- layered hair construction
- draped garment assembly
- decorative finishing
📏 Finished Size
Approx. 18–21 cm (7–8.5 inches) tall (seated style)
🧶 Materials & Yarn Amount
- Beige (skin) – 30 g
- Black (hair) – 55 g
- Dark blue (undersuit) – 25 g
- Orange (gi + belt) – 50 g
- Small amount of black thread (face details)
Tools:
- 2.75–3.25 mm hook
- 10–12 mm safety eyes
- Polyester stuffing
- Yarn needle, stitch marker
🧵 Abbreviations (US Terms)
MR – magic ring
sc – single crochet
inc – increase
dec – invisible decrease
ch – chain
sl st – slip stitch
FO – fasten off
🧠 Head (Large, Smooth & Round)
With beige yarn:
R1: MR, 6 sc (6)
R2: inc ×6 (12)
R3: (1 sc, inc) ×6 (18)
R4: (2 sc, inc) ×6 (24)
R5: (3 sc, inc) ×6 (30)
R6: (4 sc, inc) ×6 (36)
R7: (5 sc, inc) ×6 (42)
R8: (6 sc, inc) ×6 (48)
R9–18: sc around (48)
Insert eyes between R12–13 with a slightly wide spacing for a cute look.
R19: (6 sc, dec) ×6 (42)
R20: (5 sc, dec) ×6 (36)
R21: (4 sc, dec) ×6 (30)
R22: (3 sc, dec) ×6 (24)
R23: (2 sc, dec) ×6 (18)
R24: (1 sc, dec) ×6 (12)
R25: dec ×6 (6)
Stuff firmly and FO.
Face Details 😊
- Small centered embroidered mouth
- Short angled eyebrows
- Optional soft blush
👂 Ears (Make 2)
With beige:
R1: MR, 6 sc
R2: (1 sc, inc) ×3 (9)
R3–5: sc around (9)
Flatten lightly and sew slightly low on the sides of the head.
🖤 Hair Base (Full Coverage Cap)
With black yarn:
R1–R7: same as head up to 42 sts
R8–14: sc around (42)
FO.
Sew snugly onto head, covering top and extending slightly over forehead.
🔺 Hair Spikes (Structured & Directional)
Make 10–12 spikes total with varied sizes.
Standard Spike
R1: MR, 4 sc
R2: (1 sc, inc) ×2 (6)
R3: (2 sc, inc) ×2 (8)
R4–7: sc around (8)
Larger Spikes (Back – make 3–4)
Add 2 extra rounds.
Front Fringe (Short – make 3–4)
Work only 3–4 rounds.
Do not overstuff—keep slightly firm.
Placement 🔥
- 3–4 large spikes at back (fan outward)
- 3 side spikes angled horizontally
- 3–4 short spikes framing forehead
Sew tightly and angle for a dynamic, upward flow.
🧍 Body (Compact Seated Shape)
With dark blue yarn:
R1: MR, 6 sc
R2: inc ×6 (12)
R3: (1 sc, inc) ×6 (18)
R4: (2 sc, inc) ×6 (24)
R5–9: sc around (24)
Switch to beige for lower torso:
R10–12: sc around (24)
Lightly stuff into a rounded, slightly flattened shape.
FO.
🦵 Legs (Short, Rounded – Make 2)
With beige:
R1: MR, 6 sc
R2: inc ×6 (12)
R3: (1 sc, inc) ×6 (18)
R4–6: sc around (18)
Flatten slightly and sew directly to front of body in a seated pose.
💪 Arms (Make 2)
With beige:
R1: MR, 6 sc
R2: (1 sc, inc) ×3 (9)
R3–6: sc around (9)
Stuff lightly.
Attach high on body so they rest naturally at the sides.
🥋 Gi (Layered & Draped)
With orange yarn:
Back Panel
Ch 26
Row 1–10: sc across
Front Panels (Make 2)
Ch 12
Row 1–10: sc
Attach at shoulders only, leaving front open in a V shape.
Sleeves
Join yarn into arm openings:
Work 3–4 rounds of sc
FO.
🎀 Belt with Long Tassels
Ch 60
Wrap around waist and tie in front.
Tassels (2 long pieces)
Cut 12–14 strands (~10 cm each)
Fold, tie, trim ends evenly
Attach to belt ends for long flowing effect.
🧵 Assembly
- Attach head securely to body
- Position legs forward for seated posture
- Sew arms slightly outward
- Attach gi panels so they drape naturally
- Carefully place hair spikes before final stitching
✨ Finishing Touches
- Shape hair spikes upward and outward
- Adjust gi folds for soft flow
- Trim tassels evenly
- Slightly tilt head for character expression
🌟 Final Result
Your finished piece is a compact, character-rich amigurumi bursting with personality—from its dramatic hair silhouette to the soft folds of the gi and relaxed seated pose. It’s the perfect blend of cute and powerful, making it a standout addition to any shelf, desk, or themed collection.
Take a moment to shape the details, adjust the pose, and admire your work—because this little warrior is ready to bring energy and smiles wherever it goes. 💫
Happy crocheting! 🧶🔥