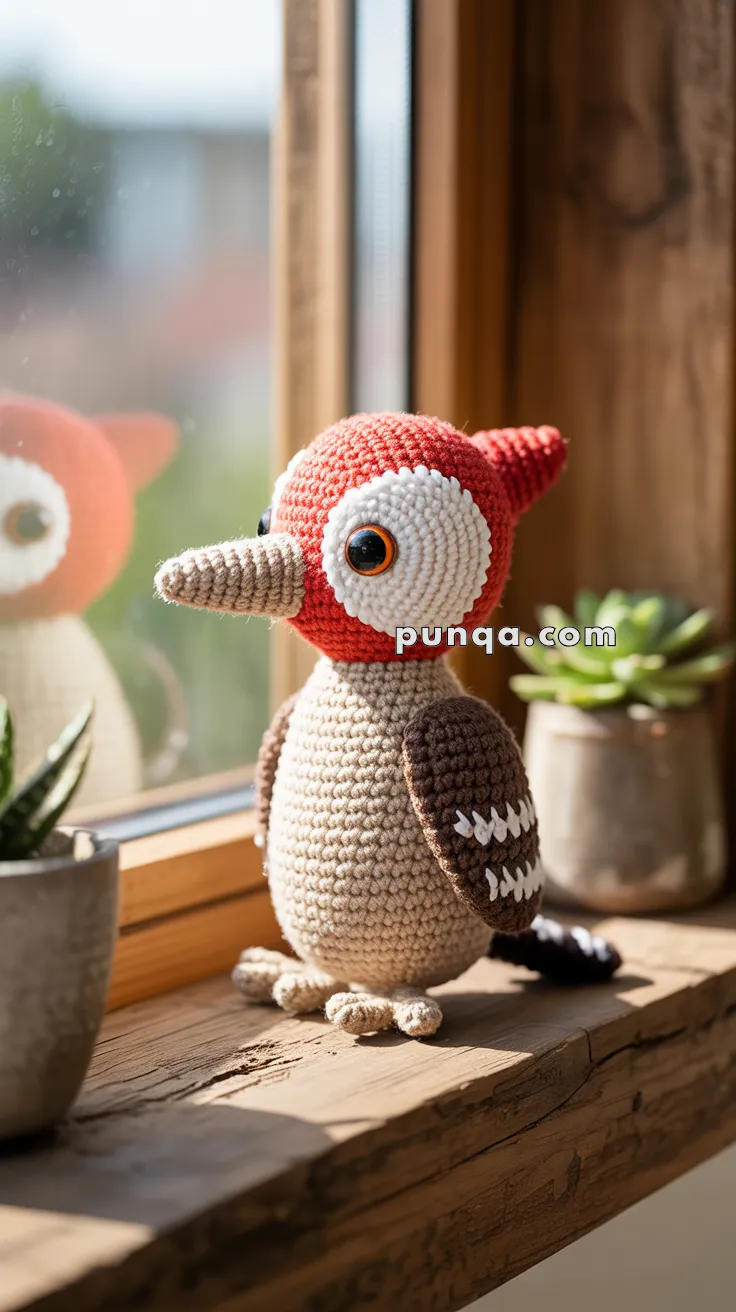
Bring the lively charm of a Woodpecker to life with this Amigurumi Woodpecker crochet pattern! 🐦✨ With its bold colors, striped wings, and distinctive beak, this design captures the essence of this energetic bird in yarn form. Whether you’re crafting for a nature-inspired décor piece, a heartfelt gift, or simply love bird-themed amigurumi, this FREE pattern is a fantastic addition to your collection.
Designed for intermediate crocheters, this pattern allows for customization in feather textures, beak details, and even tiny accessories like embroidered markings or a miniature tree setting to enhance its personality. Choose classic reds, blacks, and whites for a realistic look or experiment with whimsical hues for a unique twist! Whether displayed as part of a woodland setup or gifted to a fellow crochet enthusiast, this amigurumi woodpecker is sure to impress.
Grab your hook, select your favorite yarn, and let’s bring this spirited little bird to life—one stitch at a time! 🧶✨
🐦 Amigurumi Woodpecker Crochet Pattern
Bring a touch of woodland charm to your crochet collection with this adorable amigurumi woodpecker! With its iconic red head, sturdy beak, and spotted wings, it’s a perfect gift for bird lovers or nature-themed nursery decor.
✨ Skill Level
Intermediate – Includes color changes, shaping, and layered piece assembly.
📏 Finished Size
Approx. 8–10 inches (20–25 cm) tall using worsted weight yarn and a 2.5–3.5 mm hook.
🧶 Materials
- Worsted weight yarn in:
- Red (Head)
- White (Eye patch, wing accents, belly)
- Beige/Tan (Body and beak)
- Dark brown (Wings and tail)
- Black (Tail tip)
- 2.75 mm crochet hook
- 12 mm safety eyes
- Polyfill stuffing
- Tapestry needle
- Stitch marker
- Scissors
- Optional: wire for poseable legs or tail support
🧵 Abbreviations (US Terms)
MR – Magic Ring
sc – Single Crochet
inc – Increase (2 sc in same st)
dec – Decrease (sc2tog)
sl st – Slip Stitch
FO – Fasten Off
ch – Chain
st(s) – Stitch(es)
🟤 Body (Beige/Tan)
- MR, 6 sc (6)
- inc x6 (12)
- (1 sc, inc) x6 (18)
- (2 sc, inc) x6 (24)
- (3 sc, inc) x6 (30)
- (4 sc, inc) x6 (36)
7–18. sc around (36) - (4 sc, dec) x6 (30)
- (3 sc, dec) x6 (24)
- (2 sc, dec) x6 (18)
- (1 sc, dec) x6 (12)
Stuff firmly. - dec x6 (6), FO and weave tail through front loops to close.
🔴 Head (Red)
- MR, 6 sc (6)
- inc x6 (12)
- (1 sc, inc) x6 (18)
- (2 sc, inc) x6 (24)
- (3 sc, inc) x6 (30)
6–13. sc around (30)
Insert safety eyes between rounds 6–7, spaced 8 sts apart - (3 sc, dec) x6 (24)
- (2 sc, dec) x6 (18)
- (1 sc, dec) x6 (12)
Stuff and close as for body.
⚪ Eye Patches (Make 2 in White)
- MR, 6 sc, sl st to join, FO leaving long tail for sewing.
Sew around each safety eye, slightly overlapping lower part of head.
🟤 Wings (Make 2 in Brown)
- MR, 6 sc
- inc x6 (12)
- (1 sc, inc) x6 (18)
4–6. sc around (18) - (1 sc, dec) x6 (12)
8–10. sc around (12), FO
Optional: use white yarn to stitch small V or chevron designs to mimic woodpecker wing markings.
🟤 Tail (Brown + Black)
Use brown for base and switch to black halfway.
- ch 13, turn
- sc in 2nd ch from hook and across (12)
3–6. sc across (12)
Switch to black
7–10. sc across (12)
FO, roll and stitch into fan-like shape, attach to back base of body.
🟤 Beak (Beige)
- MR, 4 sc
- (1 sc, inc) x2 (6)
- sc around (6)
- (2 sc, inc) x2 (8)
- sc around (8)
- (3 sc, inc) x2 (10)
- sc around, FO
Stuff lightly and attach beak centered between eyes.
🟤 Feet (Make 2 in Beige)
- MR, 6 sc
- inc x6 (12)
3–4. sc around (12) - (2 sc, dec) x3 (9)
6–7. sc around (9), FO
Create small toes by adding 3 chains and slip stitches at the bottom edge, sew feet flat to the bottom front of body.
🧵 Assembly
- Sew head to body, aligning the neck.
- Attach wings to each side of the body.
- Sew tail to bottom back for support.
- Attach feet so the woodpecker can sit upright.
- Embroider tiny nostrils or cheeks if desired.
💡 Customization Ideas
- Use a brighter red or sparkly yarn for a festive woodpecker.
- Make a hanging loop and turn it into an ornament.
- Add a small embroidered worm in its beak for a fun touch!
This cheerful woodpecker is the perfect project for bird lovers, woodland nursery themes, or your forest animal amigurumi collection! 🪵🪶