Bring the whimsical charm of a Jellyfish to life with this Amigurumi Jellyfish crochet pattern! 🌊✨ With its flowing tentacles, rounded body, and gentle presence, this design captures the essence of this mesmerizing sea creature in yarn form. Whether you’re crafting for an ocean-inspired décor piece, a heartfelt gift, or simply love marine-themed amigurumi, this FREE pattern is a fantastic addition to your collection.
Designed for crocheters of all skill levels, this pattern allows for customization in tentacle textures, color variations, and even tiny accessories like embroidered details or a miniature coral reef setting to enhance its personality. Choose classic blues and purples for a realistic look or experiment with pastel hues for a whimsical twist! Whether displayed as part of an underwater setup or gifted to a fellow crochet enthusiast, this amigurumi jellyfish is sure to impress.
Grab your hook, select your favorite yarn, and let’s bring this enchanting sea creature to life—one stitch at a time! 🧶✨
🪼 Amigurumi Jellyfish Crochet Pattern
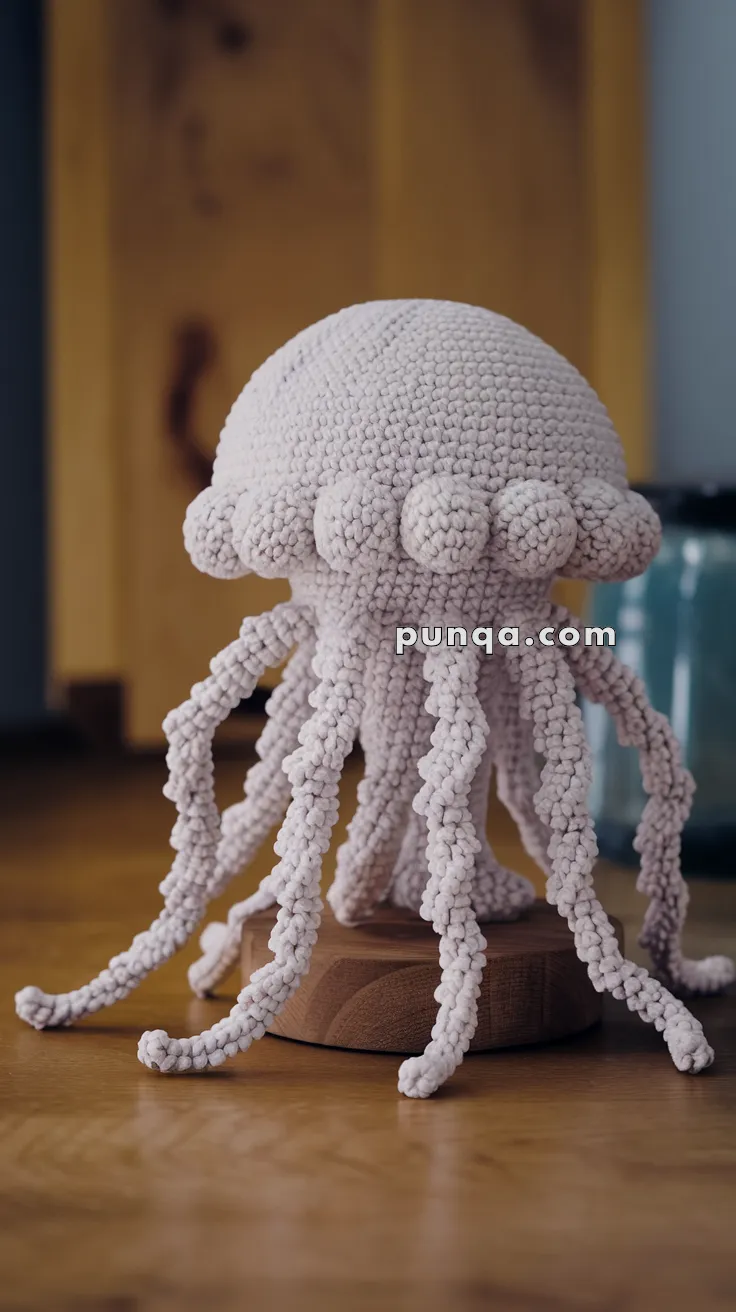
This cozy jellyfish has a perfectly rounded dome with plush bobbles around its edge and long, curly tentacles that drape naturally. Crocheted in soft velvet or chenille yarn, it’s the perfect sea-inspired plush for nursery decor or a calming ocean accent. 🌊✨
✨ Skill Level
Beginner–Intermediate – Uses basic stitches, simple shaping, and optional sewn-on bumps for texture.
📏 Finished Size
Approx. 18–20 cm (7–8 in) tall including tentacles, when made with velvet yarn and a 4.0 mm hook.
🧶 Materials
-
Velvet or Chenille Yarn – Pale blush/pink (approx. 100 g / ~120 m)
-
Crochet hook: 4.0 mm
-
Polyester fiberfill stuffing
-
Yarn needle, stitch markers, scissors
-
Optional: safety eyes (10 mm) or embroidery thread if you want to add a face
🧾 Abbreviations (US Terms)
MR – Magic Ring
sc – Single Crochet
inc – Increase (2 sc in one st)
dec – Decrease (sc 2 together)
ch – Chain
sl st – Slip Stitch
FO – Fasten Off
🍥 JELLYFISH DOME (Top Body)
Use main color yarn:
R1: 6 sc in MR (6)
R2: inc x6 (12)
R3: (sc, inc) x6 (18)
R4: (2 sc, inc) x6 (24)
R5: (3 sc, inc) x6 (30)
R6: (4 sc, inc) x6 (36)
R7: (5 sc, inc) x6 (42)
R8: (6 sc, inc) x6 (48)
R9–R17: sc around (48) – creates the tall dome.
Stuff firmly but not overly, so it keeps a smooth curve.
R18: (6 sc, dec) x6 (42)
R19: (5 sc, dec) x6 (36)
R20: (4 sc, dec) x6 (30)
R21: (3 sc, dec) x6 (24)
R22: (2 sc, dec) x6 (18)
R23: (sc, dec) x6 (12)
R24: dec x6 (6)
FO, weave in end.
✅ Shape Check:
-
Dome should be smooth, round, and slightly wider than tall.
-
Keep the bottom edge open enough to attach bumps neatly around it.
🌸 FRILL BUMPS (12 small spheres)
Make 12 separate bumps using the same yarn:
R1: 6 sc in MR (6)
R2: inc x6 (12)
R3: sc around (12)
R4: dec x6 (6)
FO, lightly stuff, and sew evenly around the lower edge of the dome (around R17–R18).
📍 Photo accuracy note:
Each bump is the same size and sits slightly under the dome’s rim, forming a textured border all around.
🪶 TENTACLES (Make 8 long + 4 short)
These tentacles have soft spirals with slight stretch.
Long Tentacles (Make 8):
ch 55
Starting in 2nd ch from hook, work 2 sc in each ch across (creates the spiral).
FO, leave tail for sewing.
Short Tentacles (Make 4):
ch 35
Starting in 2nd ch from hook, 2 sc in each ch across.
FO, leave tail for sewing.
Attach evenly to the underside of the dome, alternating long and short tentacles for a natural drape.
📍 Photo accuracy note:
-
Tentacles should hang loosely and be spaced evenly in a circular pattern.
-
Each spiral is well-defined (not over-twisted), typical of velvet yarn texture.
🧵 OPTIONAL FACE (Not in photo, but if desired)
Place safety eyes between rounds 9–10, about 7 stitches apart, or embroider small curved eyes for a gentle expression.
🪡 ASSEMBLY
-
Sew bumps evenly around the dome’s lower edge.
-
Attach tentacles to the bottom center, alternating lengths.
-
Weave in all yarn tails securely.
-
Fluff and shape tentacles by hand; they will naturally curl due to the stitch tension.
🌊 FINISHING TOUCHES
-
Adjust tentacle spacing for balance.
-
Steam lightly (optional) to soften the velvet fibers.
-
Keep unstuffed tentacle ends free for natural flow.
Your adorable Amigurumi Jellyfish is ready to float gracefully wherever you place it! 🪼💖 Perfect for ocean nurseries, calming decor, or a soft handmade toy.