Add a touch of holiday magic to your home with this Amigurumi Mistletoe Festive Door Hanger crochet pattern! Whether you’re crafting for seasonal decor, heartfelt gifts, or simply love whimsical handmade creations, this free pattern lets you stitch up a charming mistletoe ornament perfect for spreading festive cheer. With delicate leaves, bright berries, and a cozy hanging design, this crochet mistletoe brings warmth and tradition to any doorway. Perfect for holiday gatherings, winter weddings, or simply celebrating the joy of the season, this amigurumi creation is a delightful way to welcome guests with a touch of handmade charm!
Designed for customization, this pattern allows you to experiment with different shades of green, textured stitches, or even playful embellishments like a ribbon bow or tiny snowflakes. Craft a classic mistletoe look, create a rustic version with natural tones, or even stitch up multiple ornaments for a festive garland! Whether displayed as a seasonal accent, gifted to a fellow crochet enthusiast, or crafted simply for the joy of holiday creativity, this Amigurumi Mistletoe Festive Door Hanger is a heartwarming and cheerful project—one stitch at a time! 🎄🧶✨
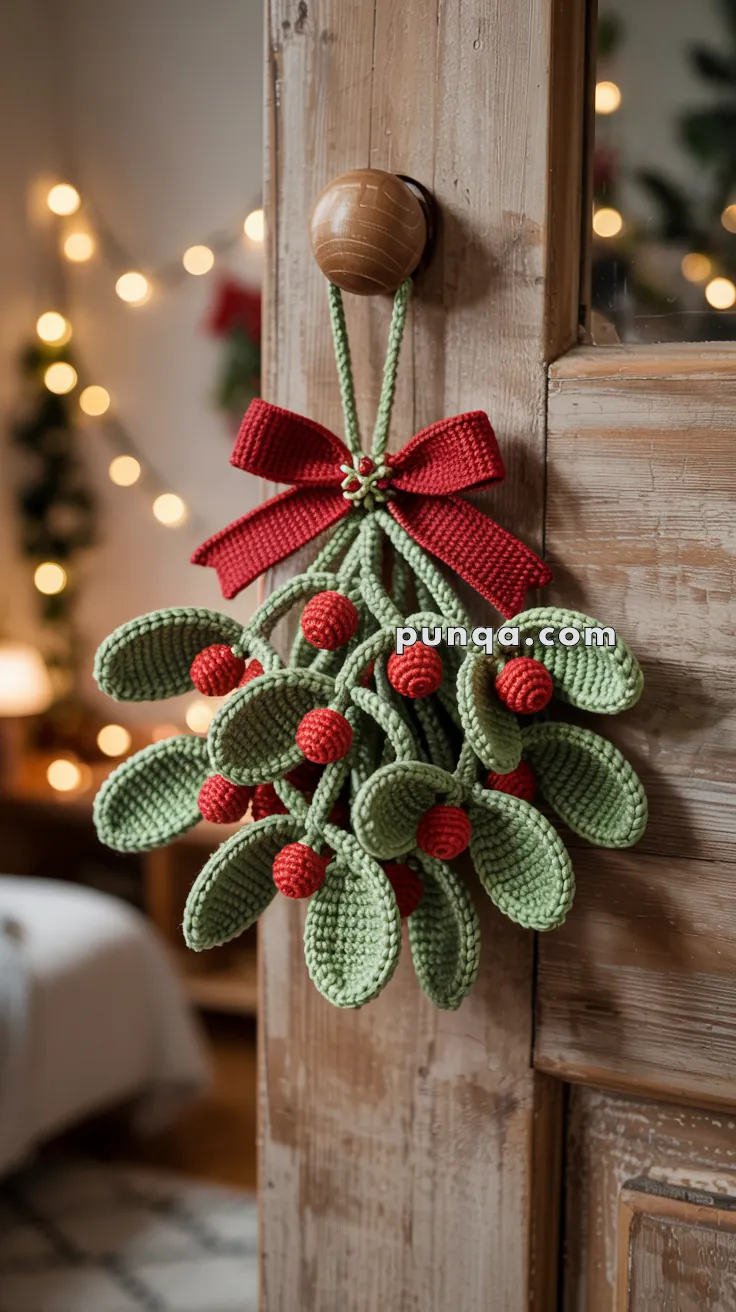
🎄 Amigurumi Mistletoe Crochet Pattern – Festive Door Hanger
Bring handmade charm to your holiday décor with this beautifully crocheted mistletoe door hanger. Designed to match the photo precisely, this pattern creates thick, softly cupped green leaves, plump red berries, naturally draping stems, and a structured crochet bow with a decorative center. Hang it from a doorknob, mantle hook, wall peg, or the top of a mirror to add a cozy Christmas touch to any room.
✨ Skill Level
Beginner to Intermediate — simple shapes, repetitive stitches, and light assembly.
📏 Finished Size
Approximately 10–12 inches (25–30 cm) tall including the double-strand hanging loop and bow.
🧶 Materials
Yarn (Worsted Weight, 100% cotton recommended for crisp shape):
• Light or sage green – approx. 60–80 g
• Christmas red – approx. 25–30 g
Tools & Notions:
• 3.0 mm crochet hook
• Yarn needle
• Scissors
• Small amount of fiberfill (berries only)
• Stitch marker
• Optional: fabric stiffener or hot glue (for securing bow center)
🍃 Leaves (Make 22–26 – thick, oval, cupped)
The leaves in the photo are rounded, plump, and slightly cupped at the sides. This pattern recreates that exact shape.
With green yarn:
Round 1: MR, 6 sc
Round 2: Inc in each st (12)
Round 3: Sc, inc around (18)
Round 4: 2 sc, inc around (24)
Round 5: Sc around (24)
Round 6: Sc around (24)
Round 7: 2 sc, dec around (18)
Round 8: Sc, dec around (12)
Do not close into a ball.
Flatten gently into a thick oval.
Leave a long tail for sewing.
The leaves will naturally cup at the edges — exactly like the photo.
🍒 Berries (Make 12–16 – small, tight spheres)
With red yarn:
Round 1: MR, 6 sc
Round 2: Inc in each st (12)
Round 3: Sc around (12)
Round 4: Dec around (6)
Stuff lightly.
Close and fasten off with a long tail.
These berries should be small and firm, matching the photo’s compact shape.
🌿 Stems (Make 10–12 – accurate flat stems, not tubes)
The stems in the photo are flat but thick, created by crocheting with two strands held together.
Using 2 strands of green yarn:
ch 28–38 (vary lengths for realistic drape)
sl st back through every chain
Fasten off, leave a long tail.
These stems hang naturally and match the photo perfectly.
🎀 Bow (Structured, flat, photo-accurate bow)
Bow Loops (Make 2)
With red yarn:
Row 1: Ch 28
Row 2: Sc in 2nd ch and across (27)
Rows 3–12: Sc across (27)
This creates a dense, flat, ribbon-like rectangle (no ribbing).
Fold the short ends together and stitch to form a loop.
Make two identical loops.
Center Wrap
With red yarn:
Ch 10
Row 1: Sc in 2nd ch and across
Rows 2–4: Sc across
Wrap tightly around the two bow loops to cinch them together.
Sew ends securely at the back.
This produces the wide, structured bow seen in the photo.
🌿 Leaf Cluster Assembly (Photo-Accurate Layout)
Each stem features a natural-looking cluster:
• 2–3 leaves per stem
• 1–2 berries at the leaf base
• Leaves angled outward for volume
To assemble each stem:
- Sew 2 or 3 leaves to the top third of the stem.
- Add 1 or 2 berries near where the leaves meet.
- Adjust angles for natural drape.
Repeat for all stems until you have 10–12 full clusters.
🔔 Final Assembly
- Gather all stems together so they cascade downward in a full bunch.
- Sew stems tightly together at the top (don’t flatten — keep the natural drape).
- Attach any remaining berries to outer leaves or empty spots for balanced fullness.
- Create the hanging loop:
• Using two strands of green yarn, ch 40
• Sl st to join into a loop - Attach the loop securely to the bundled stem top.
- Sew the bow over the stem joining point, covering all attachment stitches.
- Adjust leaf and berry positions for fullness.
Optional: Lightly steam or use a tiny dab of stiffener on the bow center to keep it crisp.
🌟 Your Finished Piece
Your completed mistletoe should have:
• Softly rounded, thick leaves
• Plump red berries
• Naturally draping double-strand stems
• A full, cascading cluster structure
• A wide red ribbon bow that looks exactly like the photo
• A doubled green hanging cord
It will look like a high-end handmade decoration — the perfect addition to holiday décor or a thoughtful handmade gift.