Welcome to the serene and symbolic world of amigurumi! ⛩️✨ Today, I’m excited to share my free crochet pattern for an Amigurumi Torii Gate—a graceful and culturally rich creation perfect for architecture lovers, Japanese aesthetics enthusiasts, or anyone who enjoys crafting structured and meaningful plush designs! 🧶 Whether you love stitching up iconic landmarks, experimenting with bold color contrasts, or simply want to add a miniature Torii gate to your handmade lineup, this pattern will guide you through crafting a beautifully sculpted plush with elegant pillars, curved crossbeams, and a touch of traditional charm! 🌿
This design embraces deep reds, precise shaping, and thoughtful details to bring a peaceful and spiritual presence to your crochet projects! 🧶✨ I’ve carefully outlined each step to ensure your Amigurumi Torii Gate turns out just right—ready to enhance your collection or become a treasured handmade gift! 🎁 So grab your hooks, pick out rich reds, deep blacks, and soft neutrals, and let’s stitch up a stunning Torii gate! ⛩️
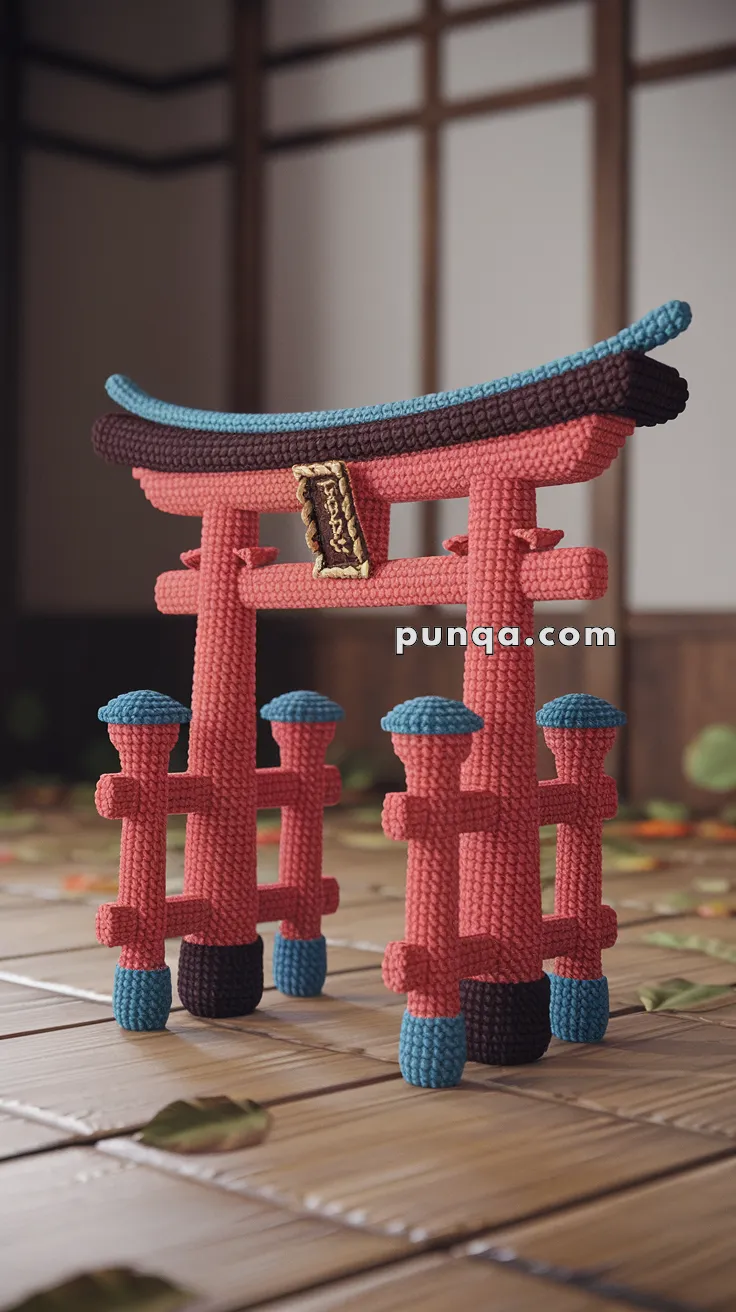
⛩️ Amigurumi Torii Gate Crochet Pattern
Bring a piece of Japanese tradition into your handmade collection with this stunning amigurumi Torii gate. With clean lines, symbolic structure, and a surprisingly sturdy build, this crochet version of a Shinto shrine gate can stand tall on its own—perfect for dioramas, Zen setups, or cultural displays.
✨ Skill Level
Advanced – Includes structural assembly, tight shaping, and integration of support materials for balance.
📏 Finished Size
Approx. 9–11 inches (23–28 cm) tall when using worsted weight yarn and a 3.5 mm hook.
🧶 Materials
-
Worsted weight yarn:
-
Vermilion Red (main gate and pillars)
-
Black or dark brown (top beam)
-
Light blue or teal (accent trims)
-
Gold (sign accent)
-
-
3.5 mm crochet hook
-
Polyester fiberfill stuffing
-
Craft wire, BBQ skewers, or wooden dowels (for internal support)
-
Thin cardboard or plastic canvas (for base platform if needed)
-
Tapestry needle
-
Hot glue (optional for secure assembly)
🧵 Abbreviations (US Terms)
-
MR – Magic Ring
-
sc – Single Crochet
-
inc – Increase
-
dec – Decrease
-
ch – Chain
-
sl st – Slip Stitch
-
FO – Fasten Off
-
BLO – Back Loops Only
🔲 Main Vertical Pillars (Make 2)
Using vermilion red yarn:
-
MR, 6 sc
-
inc x6 (12)
3–35. sc around (12)
Stuff firmly as you go, insert a BBQ skewer or dowel inside for firmness
FO, leave tail for joining to top beam
➖ Top Crossbeam (Kasagi)
With dark brown yarn:
-
Ch 40 (adjust length depending on scale)
-
Row 1–3: sc across (39)
-
FO, fold in half lengthwise and stitch closed to form a beam
-
Optional: Stuff very lightly and insert pipe cleaner or wire for slight arching
➖ Tie Beam (Nuki – Lower horizontal beam)
With vermilion yarn:
-
Ch 32
-
sc across for 2–3 rows
FO, and sew between two vertical pillars approx. halfway down
🔲 Side Stabilizer Pillars (Make 4)
Same method as main pillars, but only 22–25 rows tall
Stuff with skewers or strong pipe cleaners
Add light blue caps by:
-
Switch to blue on final 3 rounds
-
sc around
FO, stitch closed
Tip: You can glue small metal washers into the bottom if you want added weight/stability
🪵 Connecting Crosspieces (Optional Side Rails)
Ch 12, sc 2 rows
FO and stitch between side pillars to mimic wooden side beams
🪧 Decorative Hanging Sign (Make 1)
-
Ch 10
-
sc across for 8–10 rows in dark yarn
-
Border with gold yarn using sl st or surface crochet
-
Embroider or stitch a kanji-like symbol or lines
-
Sew in center of top beam using invisible thread or yarn
🧍 Assembly Instructions
-
Insert skewers through main pillars and attach to base securely
-
Stitch or glue top crossbeam across both vertical pillars
-
Attach tie beam below with sewing or strong glue
-
Position side stabilizer posts symmetrically and attach using wire or hidden glue
-
Reinforce connections using skewers or pipe cleaners inside long horizontal pieces if sagging occurs
🧱 How to Make It Stand Straight
-
Internal Support: Insert wooden skewers or BBQ sticks inside each pillar, cut to exact length. Push the ends into a foam or cardboard base hidden inside the crochet bottom if needed.
-
Flat Surface: Use plastic canvas or firm felt at the very base of each leg section
-
Weight Balance: Sew or glue small metal washers or coins into the pillar bottoms for weighted stability
-
Stiff Blocking: Lightly steam block the crossbeam before attaching to ensure it holds its shape
💡 Customization Ideas
-
Embroider a Shinto symbol or pattern across the beam
-
Add cherry blossoms or lanterns as embellishments
-
Use gradient yarn for a weathered wood look
This amigurumi Torii gate is a meaningful, meditative build that blends tradition with craft. It stands strong, symbolic, and serene—just like the structures that inspired it. ⛩️🧶