Welcome to the tropical and cheerful world of amigurumi! 🌴✨ Today, I’m excited to share my free crochet pattern for an Amigurumi Palm Tree—a fun and breezy creation perfect for beach lovers, summer décor, or anyone who enjoys crafting playful and nature-inspired plush designs! 🧶 Whether you love stitching up miniature landscapes, experimenting with textured leaves, or simply want to add a charming palm tree to your handmade lineup, this pattern will guide you through crafting a beautifully sculpted plush with a sturdy trunk, lush green fronds, and a touch of island magic! 🏝️
This design embraces earthy tones, rounded shaping, and delightful details to bring a relaxed and tropical presence to your crochet projects! 🧶✨ I’ve carefully outlined each step to ensure your Amigurumi Palm Tree turns out just right—ready to brighten up your space or become a treasured handmade gift! 🎁 So grab your hooks, pick out warm browns, vibrant greens, and sandy beiges, and let’s stitch up a breezy palm tree! 🌴
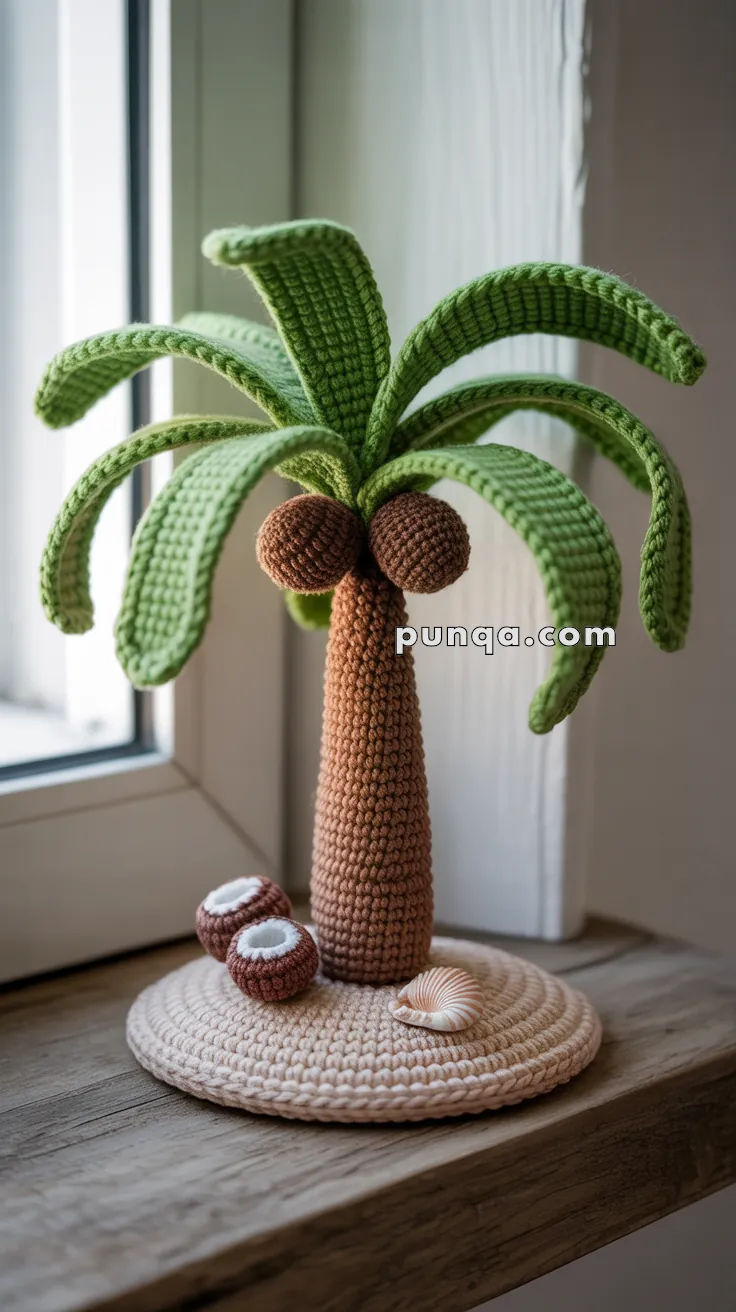
🏝️ Amigurumi Palm Tree Crochet Pattern
Bring the tropics to your windowsill or desk with this adorable amigurumi palm tree! Featuring a textured trunk, curved fronds, fluffy coconuts, and even a beachy base, this soft sculpture is the perfect handmade escape. Great for summer decor, island-themed nurseries, or as part of a seaside crochet scene.
✨ Skill Level
Confident Beginner to Intermediate – Simple shaping, working in the round, optional wire support for leaves.
📏 Finished Size
Approx. 9–10 inches (23–25 cm) tall using DK or worsted weight yarn and a 3.0–3.5 mm hook.
🧶 Materials
- DK or worsted weight yarn:
• Color A: Light beige (sand base)
• Color B: Medium brown (tree trunk)
• Color C: Dark brown (coconuts)
• Color D: Green (palm leaves)
• Color E: White (coconut meat) - Crochet hook: 3.0 mm or 3.5 mm
- Fiberfill stuffing
- Optional: wire or pipe cleaners (for leaf shaping)
- Tapestry needle
- Stitch marker
🧵 Abbreviations (US Terms)
MR – Magic Ring
sc – Single Crochet
inc – Increase (2 sc in one stitch)
dec – Decrease (invisible decrease)
sl st – Slip Stitch
ch – Chain
st – Stitch
FO – Fasten Off
🏖️ Sand Base (Color A)
- MR, 6 sc (6)
- inc × 6 (12)
- (1 sc, inc) × 6 (18)
- (2 sc, inc) × 6 (24)
- (3 sc, inc) × 6 (30)
- (4 sc, inc) × 6 (36)
- (5 sc, inc) × 6 (42)
- (6 sc, inc) × 6 (48)
- (7 sc, inc) × 6 (54)
- (8 sc, inc) × 6 (60)
- (9 sc, inc) × 6 (66)
- (10 sc, inc) × 6 (72)
- (11 sc, inc) × 6 (78)
- sc around (78)
FO. Optional: make a second identical disc and sew together for a thick base.
🌴 Trunk (Color B)
- MR, 6 sc (6)
- inc × 6 (12)
- (1 sc, inc) × 6 (18)
4–30. sc around (18) – continue until trunk reaches ~6 inches tall
Stuff firmly as you go.
FO, leaving long tail for sewing to base.
🌿 Palm Leaves (make 6–8, Color D)
Ch 31
Row 1: sc in 2nd ch from hook, sc across (30)
Row 2: ch 1, turn, sl st in first 5 sts, sc 5, hdc 5, dc 5, hdc 5, sc 5
FO, leave tail.
Optional: Insert floral wire or pipe cleaner along back side as you crochet to help curve the leaf downward naturally.
🥥 Coconuts (make 2–3, Color C + E for halved)
Whole Coconut (Color C)
- MR, 6 sc (6)
- inc × 6 (12)
- (1 sc, inc) × 6 (18)
4–6. sc around (18) - (1 sc, dec) × 6 (12)
- dec × 6 (6)
Stuff lightly, FO, close.
Halved Coconut (Color E + C)
Start with Color E (inside):
- MR, 6 sc (6)
- inc × 6 (12)
- (1 sc, inc) × 6 (18)
Switch to Color C: - (2 sc, inc) × 6 (24)
- sl st around (optional rim)
FO, leave tail. Lightly stuff if desired and sew to base with flat side down.
🧷 Assembly
- Sew the trunk upright at the center of the sand base.
- Attach coconuts near the top of the trunk, just below where the leaves will be added.
- Sew each leaf around the top edge of the trunk, evenly spaced. Angle them downward.
- Add halved coconuts and optional seashell embellishments to the base.
- Weave in all ends and shape the leaves gently.
💡 Custom Ideas
- Embroider a starfish or stitch a small crab for the base.
- Use textured yarn (like boucle) for the sand.
- Add a hammock string between two palm trees for a playful diorama.
Now you’ve got your own handmade tropical retreat—no sunscreen required! 🏝️🌞