I’ve always found something magical about bringing tiny, whimsical creatures to life with my own hands, and creating a dryad amigurumi pattern is no exception! 🌿🧶 There’s something so enchanting about these tree-dwelling spirits from folklore, and translating their ethereal essence into crochet form is a delightful challenge. With just a hook, some yarn, and a sprinkle of imagination, I can craft a charming guardian of the forest, complete with leafy accents and earthy tones. The process of designing an amigurumi pattern, especially one inspired by such mythical beings, is a joyous blend of creativity and technique, allowing me to explore textures and shapes that mimic nature’s wonders.
The joy really kicks in when I dive into the detailed process: choosing the perfect shades of green and brown, deciding on the plumpness of her cheeks, and selecting the right yarn for her cascading hair. 🌿✨ Each stitch is a step closer to seeing her delicate features emerge, which makes the journey all the more rewarding. And let’s not forget those tiny details like her leafy dress or the little acorn she might hold. It’s these personal touches that transform a simple amigurumi into a character with a story and a soul. Whether I’m crocheting for my own enjoyment or sharing my pattern with fellow crochet enthusiasts, creating a dryad amigurumi pattern is a heartwarming adventure that connects me to the ancient, mystical lore of the forests.
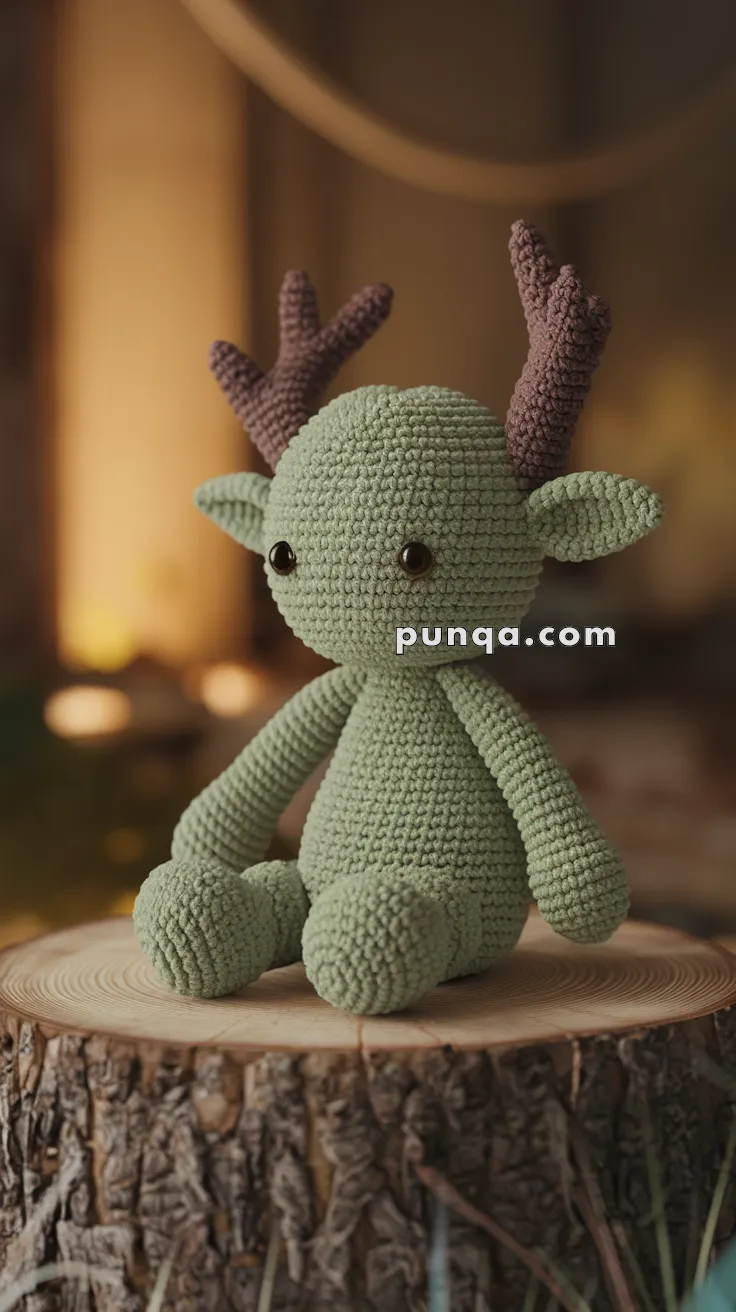
🌿 Amigurumi Dryad Crochet Pattern
Bring an enchanted forest friend to life! This amigurumi dryad is perfect for lovers of fantasy, folklore, and nature.
🧶 Skill Level
Intermediate – Simple shapes but includes antler shaping and firm assembly.
📏 Finished Size
About 22–25 cm (9–10 inches) tall using DK yarn and a 2.75 mm hook.
✂️ Materials
-
Yarn (DK weight)
-
Light green (body)
-
Brown (antlers)
-
-
2.75 mm crochet hook
-
8–10 mm safety eyes
-
Fiberfill stuffing
-
Yarn needle
-
Stitch marker
-
Pipe cleaner or floral wire (optional, for antler shaping)
🧵 Abbreviations (US Terms)
-
MR – Magic ring
-
sc – Single crochet
-
inc – Increase
-
dec – Decrease
-
sl st – Slip stitch
-
FO – Fasten off
🧚 Head
With green:
-
MR, 6 sc
-
inc x6 (12)
-
(sc, inc) x6 (18)
-
(2 sc, inc) x6 (24)
-
(3 sc, inc) x6 (30)
-
(4 sc, inc) x6 (36)
7–12. sc (36) -
(4 sc, dec) x6 (30)
-
(3 sc, dec) x6 (24)
Insert safety eyes between Rounds 9–10, 7 stitches apart -
(2 sc, dec) x6 (18)
-
(sc, dec) x6 (12)
-
dec x6 (6)
FO and close
🌲 Body
With green:
-
MR, 6 sc
-
inc x6 (12)
-
(sc, inc) x6 (18)
-
(2 sc, inc) x6 (24)
5–10. sc (24) -
(2 sc, dec) x6 (18)
-
(sc, dec) x6 (12)
13–15. sc (12)
FO, leave tail for sewing
Stuff firmly
🦵 Legs (Make 2)
With green:
-
MR, 6 sc
-
inc x6 (12)
3–5. sc (12) -
(2 sc, dec) x3 (9)
7–12. sc (9)
Stuff lightly
FO and leave long tail
💪 Arms (Make 2)
With green:
-
MR, 6 sc
-
inc x6 (12)
3–5. sc (12) -
(2 sc, dec) x3 (9)
7–12. sc (9)
Do not stuff
FO and leave long tail
🍃 Ears (Make 2)
With green:
-
Ch 4, sc in 2nd ch from hook, hdc, dc – leave tail
Sew to head, angled outward like elf ears
🦌 Antlers (Make 2)
With brown:
Main Branch:
-
MR, 6 sc
2–7. sc (6)
FO
Small Branch (Make 2 per side):
-
MR, 5 sc
2–4. sc (5)
FO
Sew the smaller branches to the top and side of main branch, forming Y-shaped antlers. Stitch onto head or insert pipe cleaner before sewing for structure.
🧷 Assembly
-
Sew head to body
-
Attach legs low and outward
-
Attach arms at the shoulders
-
Sew ears slightly behind the eyes
-
Attach antlers centered on top of the head
-
Shape and secure limbs if needed for sitting position
🍄 Finishing Touches
-
Embroider a small smile if desired
-
Lightly blush cheeks with soft pastel or yarn
-
Add leaf embroidery or flower accents to the body or head for extra forest flair 🌼🍂
✨ Done!
You’ve just summoned a magical woodland creature! Let your dryad sit peacefully among your plants or roam your fantasy shelves. 🌿🧚