Oh, the joyful world of amigurumi! 🌟 There’s something uniquely delightful about crafting tiny, adorable creations with a simple crochet hook and a few skeins of yarn. Among these creations, the humble potato amigurumi holds a special place in my heart. 🥔❤️ While potatoes might seem plain or even mundane at first glance, there’s something inherently charming about turning them into soft, cuddly companions that bring a smile to anyone’s face. Plus, when it comes to amigurumi, the quirky and unconventional are often the most loved. Who knew that a basic tuber could be transformed into such a heartwarming little friend?
Creating an amigurumi potato is a fun and rewarding process that even beginners can enjoy. 🧶 First, I gather my materials: soft yarn in shades of brown, a trusty crochet hook, and a few essential tools like stuffing and a tapestry needle. I start by crocheting a simple oval shape, gradually adding stitches to give it that perfect potato plumpness. Once the basic shape is complete, I add a touch of personality with embroidered eyes and a cheeky smile. 😊 It’s like magic watching a ball of yarn come to life as a cheerful spud! The whole process is a joyful journey that combines creativity, patience, and the pure satisfaction of handmade crafting.
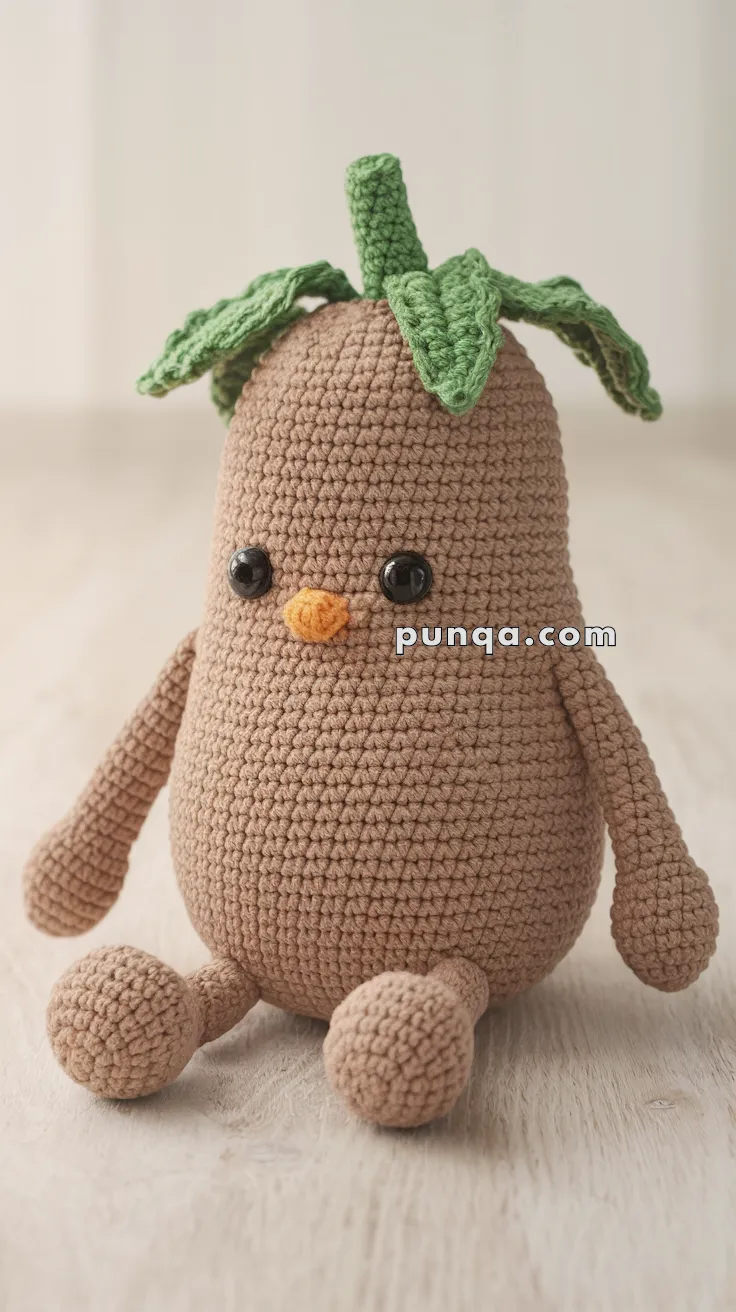
🥔 Amigurumi Potato Crochet Pattern
This adorable little potato pal is the perfect squishy buddy to brighten up your day! With floppy arms, stubby legs, a cute little nose, and leafy greens on top, this veggie friend is a fun and beginner-friendly project for all crochet lovers.
✨ Skill Level
Beginner to Intermediate – Simple shaping, minimal sewing, and basic leaf work.
📏 Finished Size
Approx. 18–20 cm (7–8 inches) tall using worsted weight yarn and a 3.5 mm hook.
🧶 Materials
Yarn (Worsted weight):
-
Light brown (Body, arms, legs)
-
Green (Leaves and stem)
-
Orange (Nose)
Other Supplies:
-
3.5 mm crochet hook
-
10–12 mm safety eyes
-
Polyester stuffing
-
Tapestry needle
-
Stitch marker
-
Scissors
🧵 Abbreviations (US Terms)
-
MR – Magic Ring
-
sc – Single Crochet
-
inc – Increase (2 sc in one stitch)
-
dec – Decrease (sc 2 stitches together)
-
ch – Chain
-
sl st – Slip Stitch
-
FO – Fasten Off
🥔 Body (Light Brown)
-
MR, 6 sc
-
inc x6 (12)
-
(1 sc, inc) x6 (18)
-
(2 sc, inc) x6 (24)
-
(3 sc, inc) x6 (30)
-
(4 sc, inc) x6 (36)
-
(5 sc, inc) x6 (42)
8–26. sc around (42) -
(5 sc, dec) x6 (36)
-
(4 sc, dec) x6 (30)
-
(3 sc, dec) x6 (24)
-
(2 sc, dec) x6 (18)
Stuff firmly -
(1 sc, dec) x6 (12)
-
dec x6 (6), FO and weave closed
👀 Face
-
Place safety eyes between rounds 12 and 13, 6–7 stitches apart
-
Embroider or crochet a small orange nose to place between the eyes
👣 Legs (Make 2 – Light Brown)
-
MR, 6 sc
-
inc x6 (12)
3–6. sc (12) -
dec x6 (6)
8–9. sc (6), FO
Stuff lightly and sew to bottom front sides of the body
🙌 Arms (Make 2 – Light Brown)
-
MR, 6 sc
2–10. sc (6)
FO, stuff lightly and sew to the upper sides of the body
🌱 Leaves (Make 3–5 – Green)
Leaf:
-
Ch 9
-
sc in 2nd ch from hook, hdc, dc x4, hdc, sc
-
Ch 1, turn and repeat on the other side of the chain
-
Sl st into first stitch, FO and leave long tail for sewing
Make multiple leaves and stitch them overlapping on the top of the head.
🌿 Stem (Optional – Green)
-
MR, 6 sc
2–6. sc (6), FO and sew to center of top head before attaching leaves
💡 Customization Ideas
-
Add rosy cheeks with pink felt or yarn
-
Embroider eyebrows or a tiny smile
-
Make a “sprouting potato” by adding more leaf clusters
This little tuber is full of charm and makes a sweet handmade gift or a quirky desk buddy. Happy stitching! 🧶🥔💚