✨ Skill Level
Intermediate
This project includes:
- shaped body construction
- front/back panel joining
- dimensional neck assembly
- decorative embroidery
- structural reinforcement
- detailed finishing work
📏 Finished Size
Approx. 30 cm (12 inches) tall
🧶 Yarn & Required Amounts
Worsted weight cotton yarn:
- Light peach-beige — 130 g (body)
- Dark brown — 60 g (neck, headstock, bridge)
- White — 12 g (strings, tuning pegs, soundhole border)
- Black — 6 g (soundhole center)
Additional supplies:
- 3.0–3.5 mm crochet hook
- Polyester stuffing (150–180 g)
- Yarn needle
- Stitch markers
- Thin cardboard or plastic canvas
- Floral wire or wooden skewer for neck support
🔤 Abbreviations (US Terms)
MR – magic ring
sc – single crochet
inc – increase
dec – invisible decrease
sl st – slip stitch
ch – chain
FO – fasten off
BLO – back loop only
🎵 Guitar Body Front Panel
With light peach-beige yarn.
Upper Body
R1: MR 6 (6)
R2: inc ×6 (12)
R3: (1 sc, inc) ×6 (18)
R4: (2 sc, inc) ×6 (24)
R5: (3 sc, inc) ×6 (30)
R6: (4 sc, inc) ×6 (36)
R7–9: sc around (36)
Shape the Waist
R10: (4 sc, dec) ×6 (30)
R11–12: sc around (30)
Lower Rounded Section
R13: (4 sc, inc) ×6 (36)
R14: (5 sc, inc) ×6 (42)
R15: (6 sc, inc) ×6 (48)
R16–24: sc around (48)
Bottom Curve
R25: (6 sc, dec) ×6 (42)
R26: sc around (42)
R27: (5 sc, dec) ×6 (36)
R28: sc around (36)
FO.
The lower section should look rounded and full while the middle remains slightly narrowed.
🎵 Guitar Body Back Panel
Repeat the front panel exactly.
Do not fasten off second panel.
🪡 Join Body Panels
Place both body panels together with wrong sides inward.
Sc evenly around entire edge to join.
Before closing fully:
- lightly stuff body
- insert thin cardboard/plastic support
- flatten bottom slightly for standing balance
Do not overstuff.
The guitar should remain smooth and softly shaped.
FO and weave in ends.
⚫ Soundhole
Black Inner Circle
With black yarn:
R1: MR 6
R2: inc ×6 (12)
R3: (1 sc, inc) ×6 (18)
FO.
White Outer Ring
With white yarn:
R1: MR 6
R2: inc ×6 (12)
R3: (1 sc, inc) ×6 (18)
R4: sc around (18)
FO.
Sew white ring around black center.
Attach slightly above middle of guitar body.
🟤 Bridge
With dark brown yarn.
Ch 12
Row 1: sc in 2nd ch from hook and across (11)
Row 2–5: sc across (11)
FO.
Curve corners gently while sewing.
Attach centered below soundhole.
Lightly pad underneath bridge center to create slight raised shape.
🪵 Neck
With dark brown yarn.
Ch 10.
Flat Neck Panel (Make 2)
Row 1: sc in 2nd ch from hook and across (9)
Rows 2–48: sc across (9)
Do not fasten off first panel.
Place second panel on top.
Insert floral wire or wooden support between layers.
Sc evenly around outer edge joining both layers together.
The neck should remain narrow, flat, and sturdy.
FO.
🎼 Rounded Headstock
With dark brown yarn.
R1: MR 6
R2: inc ×6 (12)
R3: (1 sc, inc) ×6 (18)
R4: (2 sc, inc) ×6 (24)
R5–8: sc around (24)
R9: (2 sc, dec) ×6 (18)
Lightly stuff.
Flatten gently into rounded oval shape.
FO.
Sew securely to neck top.
Tilt slightly backward for realistic shaping.
⚪ Tuning Pegs (Make 6)
With white yarn:
R1: MR 4
R2: sc around (4)
FO leaving tails.
Sew 3 pegs evenly along each side of headstock.
They should protrude slightly outward.
🎶 Guitar Strings
Cut 6 equal strands of white yarn.
Using yarn needle:
- anchor strings beneath bridge
- pull upward evenly across soundhole
- continue along neck
- secure behind headstock
Keep spacing narrow and parallel.
Allow slight outward fan near headstock.
✨ Assembly
- Sew neck securely to top center of body
- Reinforce underside with extra stitches
- Attach bridge below soundhole
- Add strings last
- Shape body into rounded pear silhouette
- Flatten base slightly so guitar stands upright
🌟 Final Shaping
For the most realistic finish:
- keep neck perfectly straight
- round upper body softly
- make lower body fuller than upper half
- lightly steam body panels if needed
- smooth stuffing evenly
- adjust string tension carefully
The finished guitar should have a tall elegant silhouette with a slim waist and rounded base.
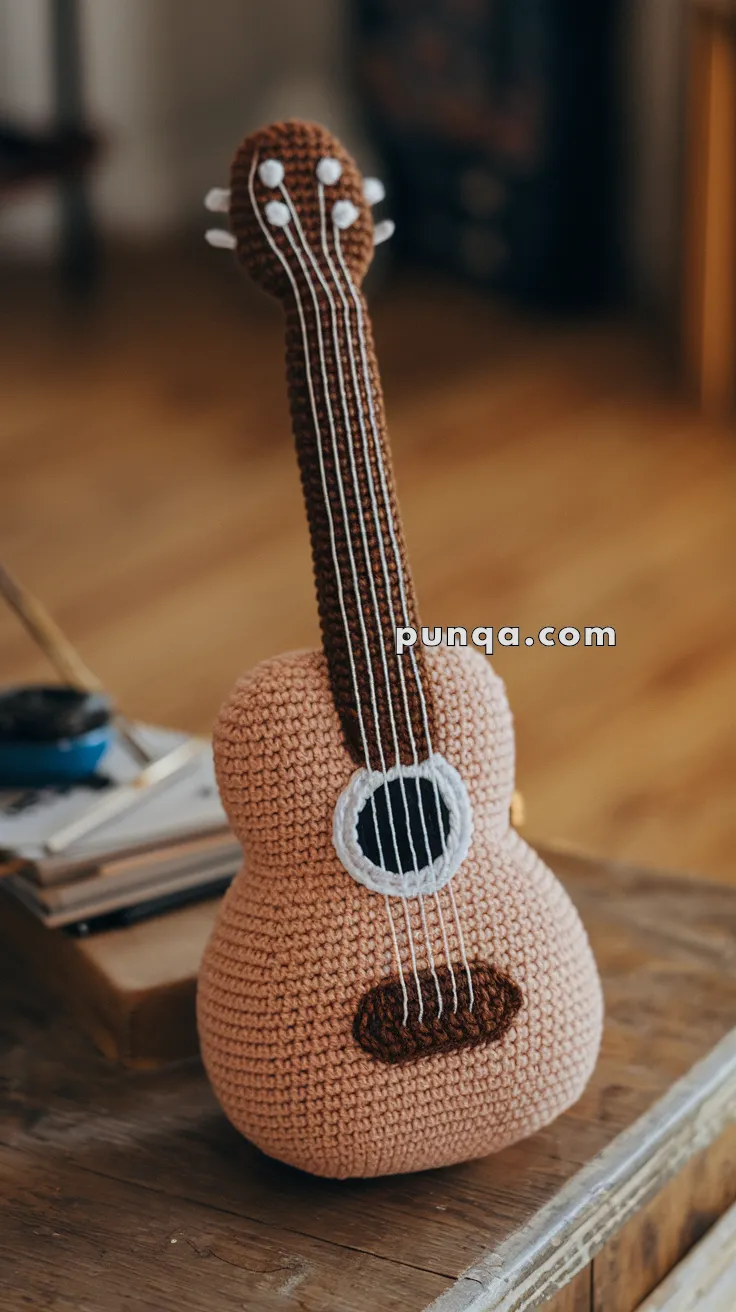
💛 Finished Guitar
This crochet acoustic guitar combines soft texture with realistic shaping for a cozy handmade instrument full of musical charm 🎸✨
With its dimensional body, narrow neck, stitched strings, rounded headstock, and warm natural colors, it makes a beautiful décor piece for music lovers, creative studios, nurseries, or handmade gift collections.
Happy crocheting! 🧶🎶