Hey there! 🌟 Have you ever stumbled upon those adorable little crochet dolls known as amigurumi? They’re like tiny bundles of joy crafted from yarn, and one of my personal favorites to create is the sheriff amigurumi. There’s something irresistibly charming about bringing a miniature law enforcer to life, complete with a little badge and a cowboy hat. Working on a sheriff amigurumi pattern is not only delightful but also an opportunity to spice up your crochet skills with fun details and accessories. Whether you’re a crochet newbie or a seasoned pro, diving into the world of amigurumi is a joyful adventure that adds a touch of whimsy to your crochet repertoire.
Creating a sheriff amigurumi pattern is a delightful process that combines creativity with a dash of patience. It all begins with selecting the perfect yarn colors to capture that classic Western vibe—think earthy tones and a pop of gold for the badge. 🏆 Then, it’s time to work on the head and body, using simple stitches to build the basic shape. Once the structure is set, the real fun begins as you crochet those tiny details like a sheriff’s hat, boots, and maybe even a little lasso. Each stitch adds personality and character, transforming mere yarn into a delightful, huggable character ready to uphold the law in your crochet collection.
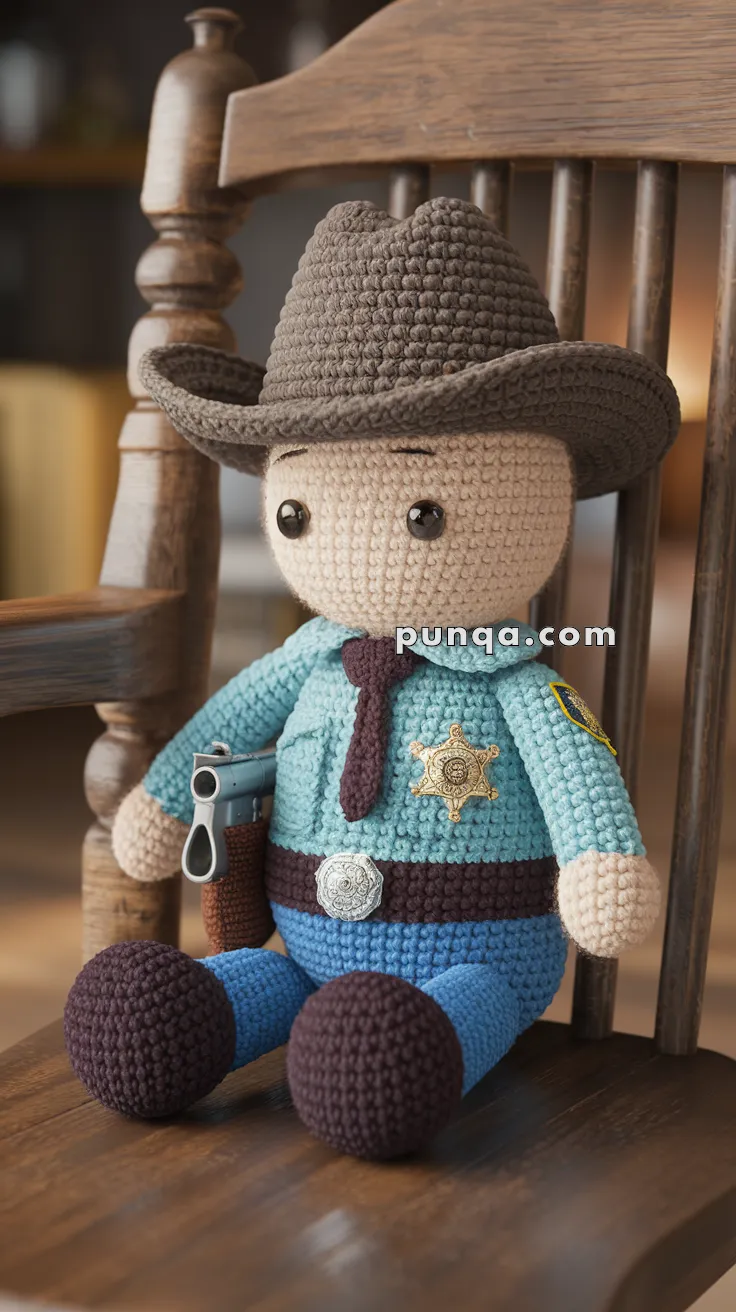
🤠 Amigurumi Sheriff – Free Crochet Pattern
This sheriff is ready to patrol your yarn town! From his classic wide-brim hat to his stitched-on badge and holster, this intermediate project is perfect for Western-themed decor or as a gift for little cowboy fans.
🧶 Skill Level: Intermediate
📏 Finished Size: ~10–12 inches tall
🪡 Materials
-
Worsted weight yarn in:
-
Beige (skin)
-
Brown (hat, shoes, belt, tie)
-
Blue (shirt, pants)
-
Light blue (shirt variant)
-
Gray (badge + belt buckle)
-
Black (eyes + details)
-
-
2.5 mm–3.0 mm crochet hook
-
10 mm safety eyes
-
Yarn needle
-
Stitch marker
-
Polyester fiberfill stuffing
-
Optional: Small toy revolver, fabric badge, or felt for accessories
✨ Abbreviations (US Terms)
-
MR – Magic ring
-
sc – Single crochet
-
inc – Increase (2 sc in 1 st)
-
dec – Decrease (sc 2 together)
-
ch – Chain
-
sl st – Slip stitch
-
BLO/FLO – Back/Front loop only
-
FO – Fasten off
🧑 Head (Beige)
-
MR, 6 sc
-
inc x6 = 12
-
(1 sc, inc) x6 = 18
-
(2 sc, inc) x6 = 24
-
(3 sc, inc) x6 = 30
-
(4 sc, inc) x6 = 36
7–15. sc around
Insert safety eyes between Rnds 10–11, ~6 stitches apart -
(4 sc, dec) x6 = 30
-
(3 sc, dec) x6 = 24
-
(2 sc, dec) x6 = 18
Stuff firmly -
(1 sc, dec) x6 = 12
-
dec x6 = 6 → FO
🎩 Hat (Brown)
-
MR, 6 sc
-
inc x6 = 12
-
(1 sc, inc) x6 = 18
-
(2 sc, inc) x6 = 24
-
(3 sc, inc) x6 = 30
-
(4 sc, inc) x6 = 36
7–10. sc around -
BLO: sc around
-
(5 sc, inc) x6 = 42
-
(6 sc, inc) x6 = 48
-
sc around → FO
Lightly stuff and sew to top of head
👕 Body (Light Blue Shirt & Brown Belt + Blue Pants)
Shirt (light blue):
-
MR, 6 sc
-
inc x6 = 12
-
(1 sc, inc) x6 = 18
-
(2 sc, inc) x6 = 24
-
(3 sc, inc) x6 = 30
6–10. sc around
Belt (brown):
11–12. sc around
Pants (blue):
13–20. sc around
21. (3 sc, dec) x6 = 24
22. (2 sc, dec) x6 = 18
23. (1 sc, dec) x6 = 12
Stuff well and FO
🦵 Legs (Make 2 – Blue Pants + Brown Shoes)
Shoe Sole (brown):
-
MR, 6 sc
-
inc x6 = 12
-
(1 sc, inc) x6 = 18
4–5. sc around
Pants (blue):
6–10. sc around
Stuff lightly
FO and sew to bottom of body
💪 Arms (Make 2 – Beige Hands + Light Blue Shirt)
-
MR with beige, 6 sc
-
inc x6 = 12
-
(1 sc, dec) x4 = 8
-
Switch to light blue
5–10. sc around
Lightly stuff
FO and sew to body sides
👔 Tie (Brown)
-
Ch 9
-
sc across, ch 1, turn
-
dec across
FO, sew as thin vertical tie under head
🔫 Holster + Gun (Brown/Grey Felt or Yarn)
-
Use brown yarn or felt to make a tube shape holster
-
Optional: sew on or glue a small toy revolver or crochet a gray tube
⭐ Badge (Gray or Gold)
-
Sew on star-shaped button or embroider star with yellow/gold thread on chest
-
Optional: use metallic thread for added shine
👖 Belt Buckle (Gray)
-
Embroider or crochet a small gray oval over belt center
-
Can also use a silver button
🧷 Assembly
-
Sew head to body
-
Attach arms and legs securely
-
Position hat slightly tilted for cowboy flair
-
Add embroidered brow and mouth with black thread
💡 Finishing Touches
-
Embroider sheriff details like collar folds, badge, and facial expressions
-
Sew or glue small star patches to sleeves or chest
-
Add belt loops with yarn or surface slip stitches
-
For a realistic holster, shape with felt and secure over belt