Brighten your day with the Amigurumi Rainbow Owl, a joyful crochet project that’s bursting with color and personality! 🦉🌈 With its wide eyes, soft wings, and vibrant stripes, this little owl is a celebration of creativity and charm. Whether perched on a shelf, gifted to a friend, or added to a playful mobile, it’s the kind of handmade companion that brings smiles wherever it lands.
Perfect for crocheters who love bold palettes and whimsical designs, this pattern invites you to mix and match your favorite hues for a truly one-of-a-kind creation. Add tiny tufts for extra fluff, stitch in a sleepy or surprised expression, or make a whole parliament of rainbow owls to suit every mood. Whether you’re crafting for fun or spreading a little handmade happiness, the Rainbow Owl is a delightful way to stitch up joy—one colorful loop at a time! 🧶💖
🦉 Amigurumi Rainbow Owl Crochet Pattern
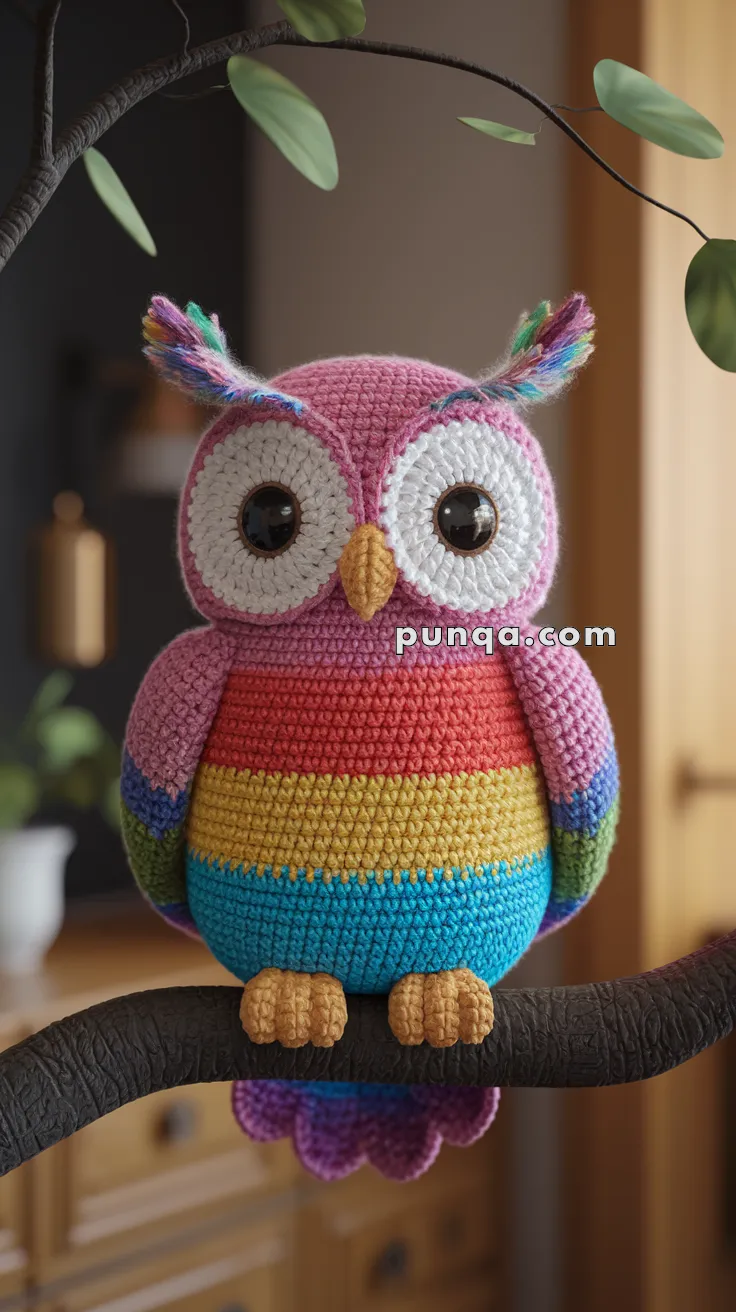
This colorful Rainbow Owl is a joyful and eye-catching project, perfect for nurseries, woodland décor, or as a snuggly handmade gift. With its pink head, rainbow-striped belly, wide eyes, and playful tufts, it’s as charming as it is fun to crochet!
✨ Skill Level
Intermediate – Involves color changes, shaping, and sewing multiple parts together.
📏 Finished Size
Approx. 22–25 cm (9–10 inches) tall when made with worsted weight yarn and a 3.5 mm hook.
🧶 Materials
- Worsted weight yarn in:
- Pink (head & upper body, top of wings)
- Red, Yellow, Blue, Green (belly stripes)
- Purple (tail feathers)
- White (eyes)
- Orange (beak & feet)
- 3.5 mm crochet hook
- 12–14 mm safety eyes (black or dark brown)
- Fiberfill stuffing
- Stitch marker
- Tapestry needle & scissors
🧵 Abbreviations (US Terms)
- MR = Magic Ring
- sc = Single Crochet
- inc = Increase (2 sc in same st)
- dec = Decrease (sc 2 together)
- sl st = Slip Stitch
- ch = Chain
- FO = Fasten Off
🌈 Pattern Instructions
🟣 Head & Body (worked as one piece, top-down)
With pink yarn:
- R1: MR, 6 sc (6)
- R2: inc around (12)
- R3: (1 sc, inc) ×6 (18)
- R4: (2 sc, inc) ×6 (24)
- R5: (3 sc, inc) ×6 (30)
- R6: (4 sc, inc) ×6 (36)
- R7–14: sc around (36)
👉 Insert safety eyes between Rounds 10–11, spaced about 7 sts apart.
Switch to red:
- R15–17: sc around (36)
Switch to yellow:
- R18–20: sc around (36)
Switch to blue:
- R21–24: sc around (36)
Switch to green:
- R25–27: sc around (36)
Begin decreases:
- R28: (4 sc, dec) ×6 (30)
- R29: (3 sc, dec) ×6 (24)
- R30: (2 sc, dec) ×6 (18)
- R31: (1 sc, dec) ×6 (12)
- R32: dec ×6 (6)
FO, close, and weave in.
👉 Stuff firmly as you go for a plump owl shape.
🧡 Beak
With orange:
- R1: MR, 4 sc (4)
- R2: (1 sc, inc) ×2 (6)
- R3: sc around (6)
- R4: dec ×3 (3)
FO, leave tail for sewing. Sew between the eyes.
🐾 Feet (Make 2)
With orange:
- R1: MR, 6 sc (6)
- R2–4: sc around (6)
FO, stuff lightly, flatten. Sew at base, slightly forward under belly.
👀 Eye Whites (Make 2)
With white:
- R1: MR, 6 sc (6)
- R2: inc around (12)
- R3: (1 sc, inc) ×6 (18)
FO, leaving tail.
👉 Place each around a safety eye and sew securely onto the face.
💚 Wings (Make 2)
Worked top to tip in sections:
Start with pink:
- R1: MR, 6 sc (6)
- R2: inc around (12)
- R3: (1 sc, inc) ×6 (18)
- R4–5: sc around (18)
Switch to blue:
- R6–7: sc around (18)
Switch to green:
- R8–9: sc around (18)
FO, flatten, sew to each side of body.
💜 Tail Feathers (Make 3–4)
With purple:
- Ch 5
- Work across chain: sc, hdc, 2 dc, hdc, sc
FO, leave tail for sewing.
Sew side-by-side in a fan shape at back base.
🌟 Ear Tufts
Cut 6–8 strands each of pink, blue, and green yarn, about 5–6 cm long.
Attach with latch-hook method at top corners of head. Trim to tuft shape.
🧷 Assembly
- Sew beak centered between eyes.
- Attach wings symmetrically at sides.
- Sew feet flat at the bottom.
- Add purple tail feathers at back.
- Attach ear tufts.
- Shape with hands and adjust stuffing.
🎀 Finishing Touches
- Lightly brush ear tufts to fluff them.
- Embroider optional feather lines for detail.
- Check symmetry so the owl perches evenly.
🌈 Final Result
Your finished Rainbow Owl will have:
- Pink head & upper body
- Striped belly (red, yellow, blue, green)
- Pink-blue-green striped wings
- Big white eyes with black centers
- Orange beak & feet
- Purple scalloped tail
- Fluffy rainbow tufts
This owl is bursting with personality and color — the perfect handmade companion for woodland nurseries, rainbow lovers, or as a whimsical gift. 🦉💛🌈