Welcome to the dazzling and colorful world of amigurumi! 🦎✨ Today, I’m excited to share my free crochet pattern for a Rainbow Chameleon—a vibrant and playful creation perfect for nature lovers, fantasy-inspired collections, or anyone who enjoys crafting expressive and multicolored plush designs! 🌈 Whether you love stitching up dynamic creatures, creating textured and lifelike figures, or simply want to add a mesmerizing chameleon to your handmade lineup, this pattern will guide you through crafting a beautifully sculpted plush with curled tail, detailed scales, and a touch of rainbow magic! 💖
This design embraces bold hues, intricate shaping, and fun details to bring a joyful and eye-catching presence to your crochet projects! 🧶✨ I’ve carefully outlined each step to ensure your Amigurumi Rainbow Chameleon turns out just right—ready to brighten up your collection or become a treasured handmade gift! 🎁 So grab your hooks, pick out dazzling blues, fiery oranges, or soft pastels, and let’s stitch up a mesmerizing chameleon! 🦎
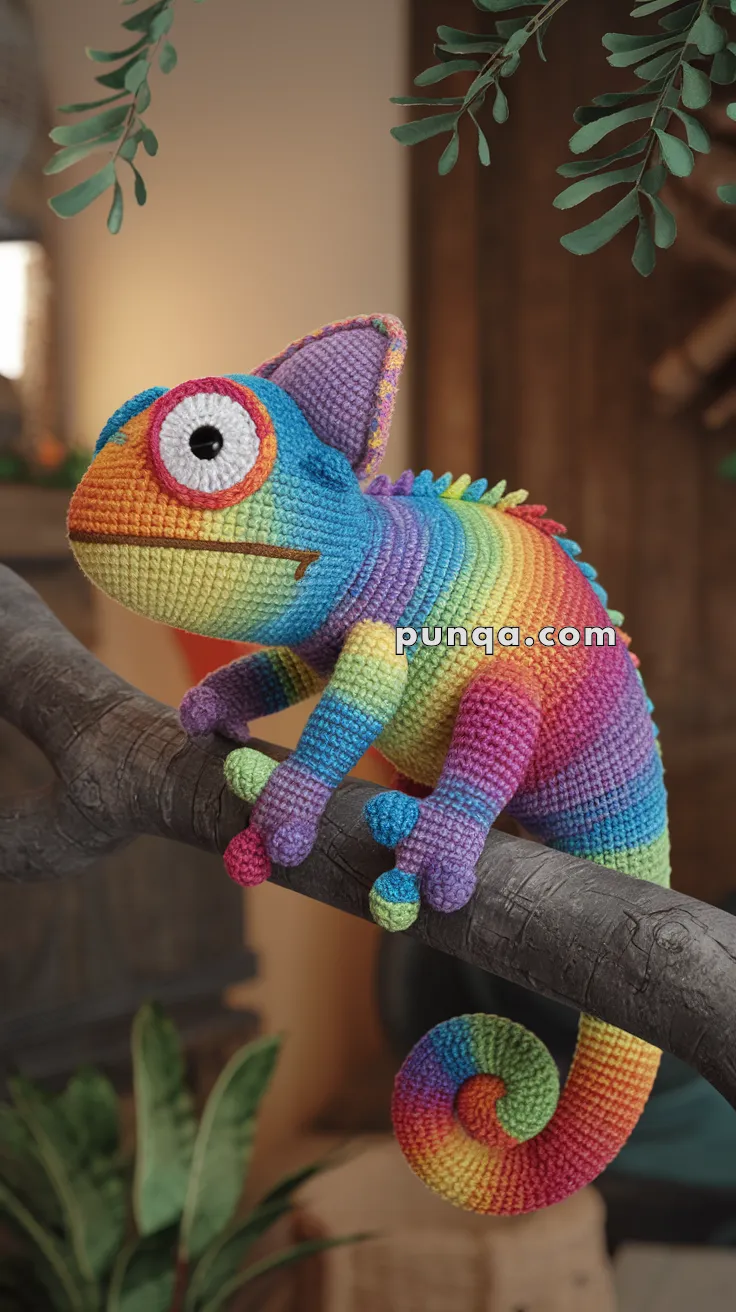
🦎 Amigurumi Rainbow Chameleon – Free Crochet Pattern
This eye-catching rainbow chameleon brings color and charm to your crochet collection! Its spiraled tail, bulging eyes, and textured spine make it a standout showpiece for kids and reptile fans alike.
✨ Skill Level
Intermediate – Includes shaping, frequent color changes, and simple structure sewing.
📏 Finished Size
Approx. 30 cm (12″) from nose to tail using DK or worsted weight yarn and a 2.5–3.5 mm hook.
🧶 Materials
-
Yarn (DK/Worsted):
-
Multiple colors (Red, Orange, Yellow, Green, Blue, Purple, Pink) – for body
-
White – for eyes
-
Black – for eye pupils
-
Brown – for mouth embroidery
-
-
Hook: 2.5–3 mm
-
Safety Eyes: 8–10 mm (or embroider pupils)
-
Tapestry Needle
-
Stuffing
-
Stitch Markers
-
Optional: pipe cleaner or floral wire for bendable tail
🧵 Abbreviations (US Terms)
-
MR – Magic Ring
-
sc – Single Crochet
-
inc – Increase
-
dec – Decrease
-
sl st – Slip Stitch
-
FO – Fasten Off
-
ch – Chain
-
BLO – Back Loop Only
🔹 Body (Start from nose, work in continuous spiral)
Use rainbow yarn or change color every 3–4 rounds in rainbow sequence
-
MR, 6 sc (6)
-
inc x6 (12)
-
(1 sc, inc) x6 (18)
-
(2 sc, inc) x6 (24)
-
(3 sc, inc) x6 (30)
6–12. sc around (30) -
(4 sc, inc) x6 (36)
14–18. sc around (36) -
(4 sc, dec) x6 (30)
20–25. sc around (30) -
(3 sc, dec) x6 (24)
27–35. sc around (24) -
Start tail taper: (2 sc, dec) x6 (18)
-
(1 sc, dec) x6 (12)
-
sc around
Continue sc around, shaping into spiral (approx. 18–24 more rounds), stuff as you go. FO and leave a long tail.
🔹 Tail Tip (Optional Curl for Spiral)
-
MR, 6 sc (6)
-
inc x6 (12)
3–6. sc around (12)
Stuff and sew to end of tail.
🔹 Legs (Make 4 – 2 Front, 2 Back, Use alternating rainbow colors)
-
MR, 6 sc (6)
-
inc x6 (12)
3–4. sc around (12) -
(2 sc, dec) x3 (9)
6–8. sc around (9)
FO, stuff lightly, leave tail for sewing.
🔹 Toes (Make 3 per foot, same color)
-
MR, 4 sc
-
sc around (4)
FO, sew 3 toes per leg.
🔹 Eyes (Make 2 – White)
-
MR, 6 sc
-
inc x6 (12)
-
(1 sc, inc) x6 (18)
-
(2 sc, inc) x6 (24)
-
sc around
Insert black safety eyes or stitch pupils. FO and stuff lightly.
🔹 Spine Bumps (Rainbow ridge)
-
Ch 30
-
Turn, sc in each ch
-
Along the other side of the chain, alternate: (sl st, ch 2, sl st in next) to create small spines
FO and sew along back centerline from head to mid-tail.
🧵 Assembly
-
Stuff body and sew shut if needed.
-
Attach eyes on either side of head slightly angled forward.
-
Embroider mouth using brown yarn.
-
Sew front legs just behind the head base, angled outward.
-
Sew back legs at the lower side of the body, near the beginning of the tail spiral.
-
Attach spine bump strip along the back for extra detail.
-
Bend tail into spiral if using wire or simply curl and sew in place.
🎨 Customization Ideas
-
Use solid green or camouflage yarn for a realistic chameleon.
-
Add a long tongue (ch 20, sl st back) coming from the mouth for a fun twist.
-
Insert a wireframe in the legs for posable limbs.
This rainbow chameleon is not just a fun crochet piece – it’s a colorful companion full of personality! 🦎🌈

