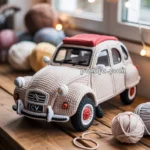
Rev up your crochet skills with this Amigurumi Porsche 911 pattern! Whether you’re crafting for car enthusiasts, adding a sleek touch to your handmade collection, or simply enjoy making unique amigurumi designs, this free pattern lets you stitch up a miniature version of the iconic Porsche 911 bursting with personality. With its streamlined shape, bold details, and unmistakable charm, this crochet Porsche captures the essence of speed and style in every stitch. Perfect for gifting to fellow crochet lovers, decorating a themed space, or simply celebrating the joy of handmade creations, this amigurumi Porsche 911 is sure to bring excitement—one stitch at a time! 🚗✨
Designed for customization, this pattern allows you to experiment with different color schemes, embroidered details, or even tiny accessories like racing stripes or miniature wheels for extra personality. Craft a classic Porsche 911 in its signature sleek design, create a pastel version for a whimsical aesthetic, or even stitch up a full set of car-inspired amigurumi for a stunning display! Whether gifted as a cherished keepsake, displayed as a stylish accent, or made simply for the joy of crafting, this Amigurumi Porsche 911 is a fun and creative project—perfect for bringing the thrill of the open road to every stitch! 🧶🏁
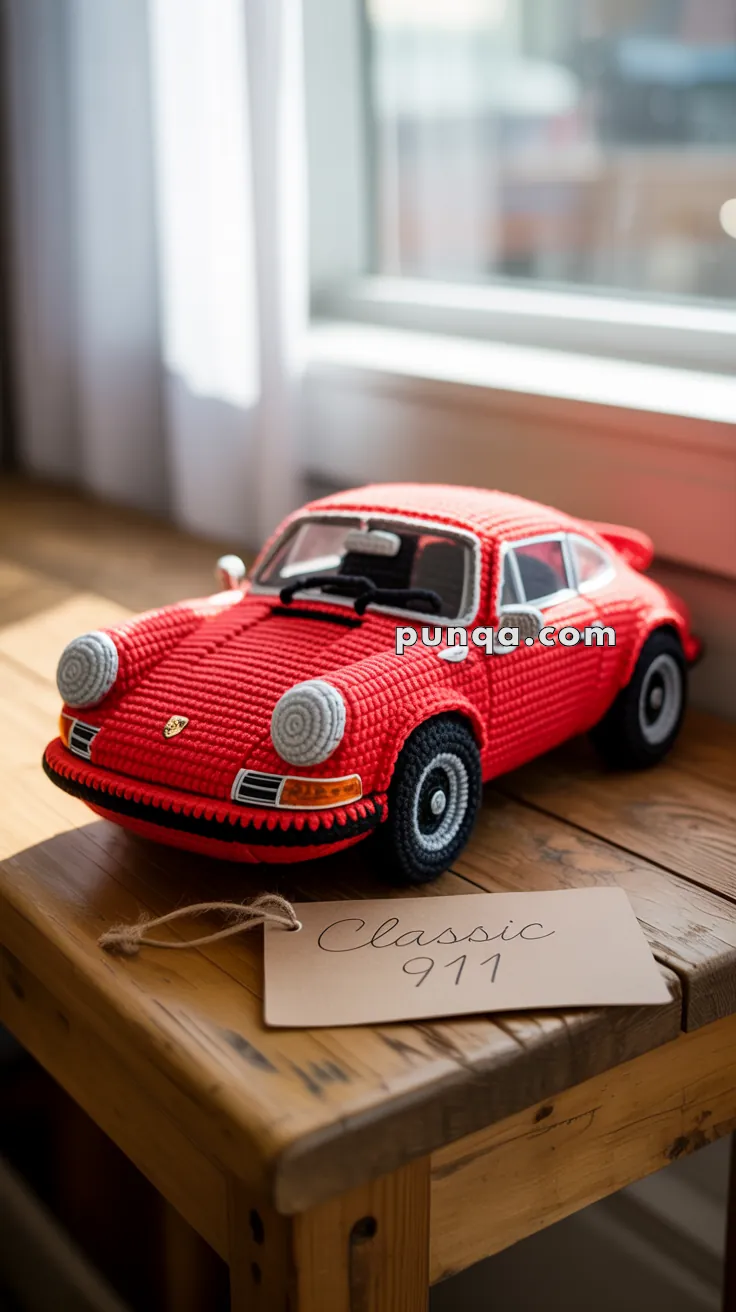
🚗 Amigurumi Classic Porsche 911 Crochet Pattern
Bring a touch of vintage automotive craftsmanship into your handmade world with this crochet Classic Porsche 911, designed to perfectly replicate the real-life curves and details of the iconic car. From the ribbed hood texture to the sculpted headlights, 3D bumpers, recessed windows, and the proud Porsche crest on the bonnet — every feature is faithfully represented in yarn form.
✨ Skill Level
🧶 Advanced Intermediate
This pattern includes shaping, structural reinforcement, layered assembly, and precision detailing.
📏 Finished Size
Approx. 26–28 cm (10–11 inches) long
Low-profile body with gently curved roof and wide stance
🧶 Materials & Yarn Amount
DK or light worsted cotton yarn:
Red (body): 140 g (~420 m)
Black (tires, trim, interior): 45 g (~135 m)
Light grey (headlights, wheel rims): 30 g (~90 m)
White (window panels, headlight centers): 18 g (~55 m)
Orange + yellow (signal lights): small amounts
Gold/yellow (front badge): scrap
Other supplies:
3.0 mm crochet hook
Polyester fiberfill (250–300 g)
Plastic canvas or firm card (for base shaping)
Yarn needle, stitch marker
Optional: thin wire (mirrors, structure), clear plastic (windows)
🧵 Abbreviations (US Terms)
MR – magic ring
sc – single crochet
inc – increase
dec – invisible decrease
ch – chain
sl st – slip stitch
BLO – back loop only
🚗 Lower Body Base (Flat + Structured)
With red yarn:
Oval Base
Ch 28
Rnd 1: sc in 2nd ch, sc across, 3 sc in last st, continue around, 3 sc in end (56)
Rnd 2: inc evenly at both ends (64)
Rnd 3: (7 sc, inc) around (72)
👉 Insert plastic canvas now for a firm flat base
Side Walls
Rnd 4: BLO sc around (72)
Rnd 5–11: sc around (72)
This creates the low, boxy lower body
🚗 Upper Body (Hood + Cabin + Rear)
Attach red yarn at front center.
Hood (sloped front)
Row 1: sc 36 across front half
Row 2–6: sc back and forth
👉 Slightly decrease at edges on Rows 4–6 to create rounded hood taper
Join for full body
Rnd 7: pick up stitches around entire top (60)
Rnd 8–14: sc around (60)
Roof shaping
Rnd 15: (8 sc, dec) ×6 (54)
Rnd 16–18: sc around (54)
Rear taper
Rnd 19: (7 sc, dec) ×6 (48)
Rnd 20–22: sc around (48)
FO.
Stuff lightly — keep body firm but not bulky
🪟 Windows (Inset Panels)
With black yarn:
Windshield
Ch 18
Row 1–6: sc across
Side Windows (make 2)
Ch 10
Row 1–5: sc across
Sew along top and sides only to create recessed effect
Optional: place thin clear plastic underneath
💡 Headlights (Signature Raised Circles)
Make 2 (light grey):
Rnd 1: MR 6
Rnd 2: inc ×6 (12)
Rnd 3: (1 sc, inc) ×6 (18)
Rnd 4: sc around (18)
Inner lens (white):
Rnd 1: MR 6
Rnd 2: inc ×6 (12)
Attach centered.
👉 Sew slightly elevated on hood for iconic raised look
🟠 Front Signal Lights
With orange:
Ch 9
Row 1–2: sc across
Add thin yellow stripe using surface stitch.
Attach below headlights.
🚗 Front Bumper (Rounded Layer)
With black:
Ch 30
Row 1–3: sc across
Lightly stuff and curve.
Attach across lower front edge.
Add grey surface stitch above for trim.
🛞 Wheels (Deep + Recessed) – Make 4
With black:
Rnd 1: MR 6
Rnd 2: inc ×6 (12)
Rnd 3: (1 sc, inc) ×6 (18)
Rnd 4: (2 sc, inc) ×6 (24)
Rnd 5–7: sc around (24)
Rim (grey)
Rnd 8: BLO sc (24)
Inner hub
Rnd 9: (2 sc, dec) ×6 (18)
Center cap (grey):
MR 6 → inc ×6 (12)
Attach to center.
👉 Wheels should be thick and slightly inset into body
🔙 Rear Details
Tail lights
With red:
Ch 10
Row 1–2: sc
Add thin yellow stripe.
Attach horizontally across rear.
Rear bumper
With black:
Ch 26
Row 1–2: sc
Attach slightly curved.
🪞 Side Mirrors (Make 2)
With grey:
MR 5
Rnd 2: sc around
Attach using ch 3 stem.
Position beside windshield.
🪄 Front Badge
With yellow:
MR 5
Rnd 2: sc around
Embroider minimal lines.
Attach centered on hood.
🧵 Assembly & Shaping
✨ Keep stuffing minimal in upper body
✨ Press base flat while shaping
✨ Slightly curve roof downward toward rear
✨ Adjust front slope to create smooth hood line
✨ Attach wheels slightly under side edges
✨ Align headlights symmetrically and slightly forward
🚗 Realistic Shaping Tips
✔ Body must be wide and low
✔ Hood slopes gently downward
✔ Roof is compact and rounded
✔ Headlights sit raised above hood surface
✔ Wheels appear partially tucked into body
✔ Windows sit slightly recessed for depth
🎉 Finished Result
A sleek, compact crochet sports car with clean curves, bold headlights, sculpted body lines, and realistic proportions. The layered construction and careful shaping give it a refined, collector-style appearance that stands out beautifully in any display. 🚗✨
Happy crocheting! 🧶