Add a splash of charm to your crochet collection with this Amigurumi Milk Carton pattern! Whether you’re crafting for playful decor, food-themed amigurumi, or simply love quirky designs, this free pattern lets you stitch up an adorable milk carton bursting with personality. With its classic rectangular shape, cheerful label, and soft texture, this crochet milk carton captures the essence of a nostalgic kitchen staple in every stitch. Perfect for gifting to fellow crochet lovers, decorating a cozy space, or simply celebrating the joy of handmade creations, this amigurumi milk carton is sure to bring smiles—one stitch at a time! 🥛✨
Designed for customization, this pattern allows you to experiment with different colors, embroidered details, or even tiny accessories like a straw or a cute face for extra charm. Craft a classic white-and-blue milk carton, create a pastel version for a soft aesthetic, or even stitch up a full set of food-inspired amigurumi for a delightful display! Whether gifted as a whimsical keepsake, displayed as a fun accent, or made simply for the joy of crafting, this Amigurumi Milk Carton is a bright and creative project—perfect for bringing a touch of handmade sweetness to every stitch! 🧶💖
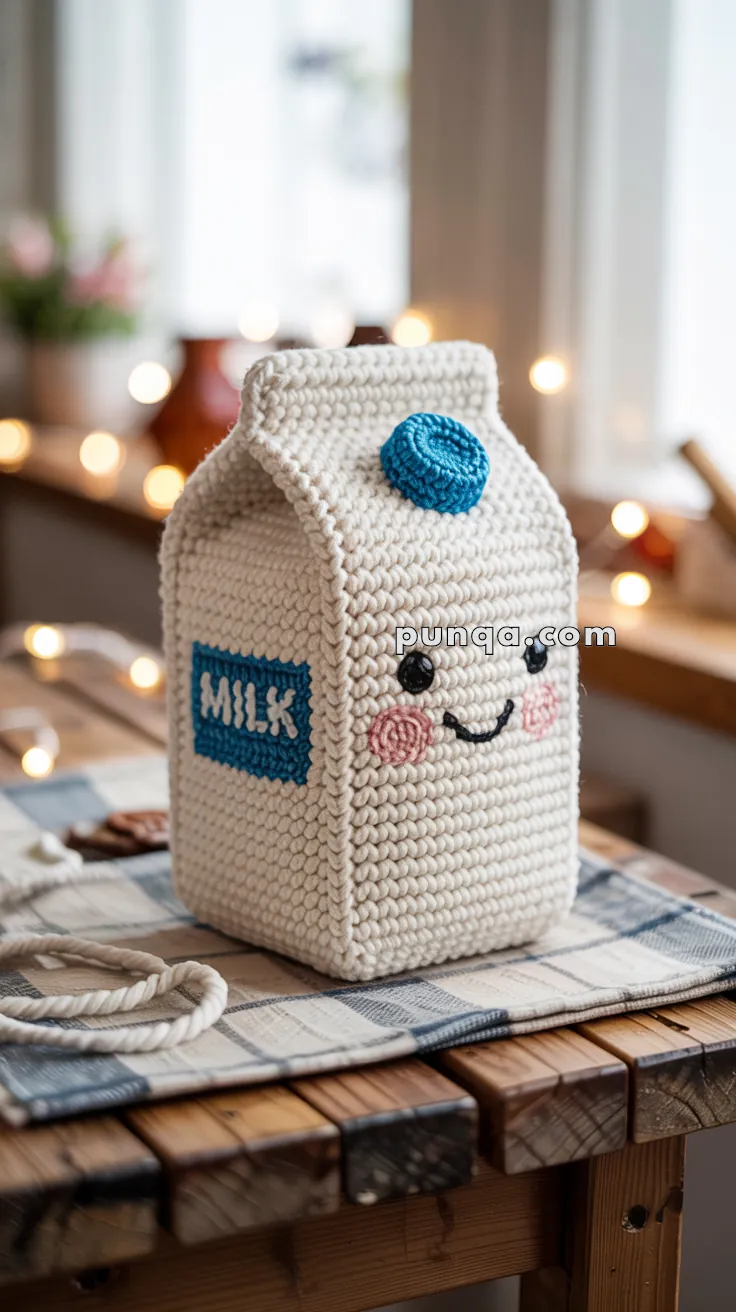
🥛 Amigurumi Milk Carton Crochet Pattern
This adorable Amigurumi Milk Carton is soft, sturdy, and irresistibly sweet! With its neat square shape, cute embroidered face, and a bold blue cap and “MILK” label, it’s the perfect piece to brighten up your breakfast-themed decor or handmade gift collection.
✨ Skill Level
Beginner to Intermediate – single crochet, sewing panels, simple embroidery.
📏 Finished Size
Approx. 6–6.5 in (15–17 cm) tall using worsted weight yarn and a 3.0 mm hook.
🧶 Materials
- Cream (Carton Body) – Worsted or DK weight yarn
- Blue (Cap & Label) – Worsted or DK weight yarn
- Pink (Cheeks) – Worsted or DK weight yarn
- Black (Eyes & Smile) – Worsted or DK weight yarn or embroidery thread
- White (Letters for Label) – Yarn/thread
- Crochet hook 2.5–3.0 mm
- Polyfill stuffing
- Tapestry needle & embroidery needle
- Stitch markers
- Optional: 6 mm black safety eyes (instead of crochet eyes)
🔤 Abbreviations (US Terms)
- MR = Magic Ring
- sc = single crochet
- inc = increase (2 sc in one st)
- dec = decrease (sc2tog)
- ch = chain
- sl st = slip stitch
- FO = fasten off
🧵 Panels (Cream – Carton Body)
We’ll make 4 sides + 1 base + 2 top folds.
Front & Back Panels (Make 2)
Ch 21
Row 1: sc in 2nd ch from hook and across (20)
Rows 2–35: ch 1, turn, sc across (20)
FO
Side Panels (Make 2)
Ch 13
Row 1: sc in 2nd ch from hook and across (12)
Rows 2–35: ch 1, turn, sc across (12)
FO
Base Panel (Make 1)
Ch 13
Row 1: sc in 2nd ch from hook and across (12)
Rows 2–20: ch 1, turn, sc across (12)
FO
👉 Sew all 5 panels together with mattress stitch to form a box. Lightly stuff with polyfill, shaping firmly into a tall carton shape.
🏠 Top Fold Panels (Cream)
Top Slanted Panels (Make 2)
Ch 21
Row 1: sc across (20)
Rows 2–8: dec at beginning and end of each row, sc across (gradually shaping 20 → 12 over 7 rows)
Rows 9–11: sc across (12)
FO
👉 Sew to the top edges of opposite sides. Join top corners together to create the folded spout look.
🧢 Milk Cap (Blue)
Round 1: MR, 6 sc (6)
Round 2: inc ×6 (12)
Round 3: (sc, inc) ×6 (18)
Rounds 4–7: sc around (18)
Round 8: (sc, dec) ×6 (12)
Stuff lightly, FO, and sew onto one top fold.
😊 Face Details
Eyes (Black, or use safety eyes)
MR, 6 sc. FO and sew onto front panel. Place ~⅓ down from top.
Cheeks (Pink)
MR, 8 sc. Round 2: sc in each st (8). FO.
Sew just below eyes.
Mouth (Black)
Embroider a simple curved smile between the cheeks with backstitch or surface chain.
✏️ Label – “MILK” Patch (Blue)
Ch 12
Row 1: sc in 2nd ch from hook and across (11)
Rows 2–6: ch 1, turn, sc across (11)
FO
Using white yarn, embroider MILK in block letters across the rectangle.
Sew to one side panel.
✂️ Finishing Touches
- Block lightly (optional) to sharpen carton edges.
- Shape corners with your fingers while stuffing.
- Weave in all ends securely inside.
- Optional: add a small loop at the top to hang as decor.
💡 Customization Ideas
- Change the label color for flavored milk (pink = strawberry, brown = chocolate).
- Add embroidered “Nutrition Facts” on the back for extra fun.
- Sew little arms and legs to turn it into a character!
🎉 And that’s it! This cute Milk Carton Amigurumi is a satisfying, squishy build that looks great on shelves and makes a sweet handmade gift! 🥛✨